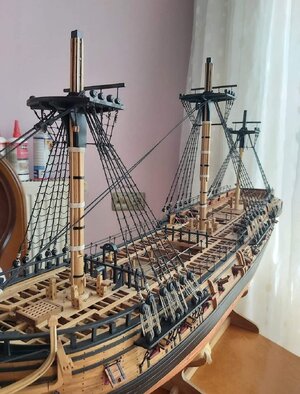
USS Constitution by Model Shipways 1:76 scale.

lines are crisp and deck is clean. Good job!
I now have something to aspire to when I get to that step in my Constitution build
right now I am going through the cannon doors and am noticing a lot of broken pieces. I have contacted Model shipways and they are sending me replacements at no cost to me. I have to say nothing but praises for their customer service.
 
Hi
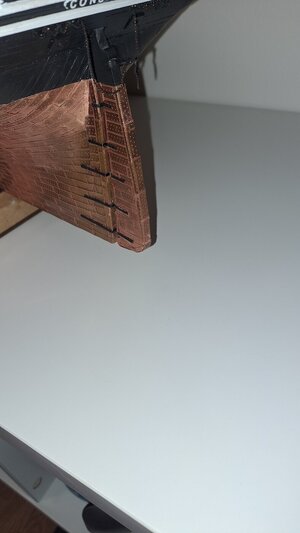
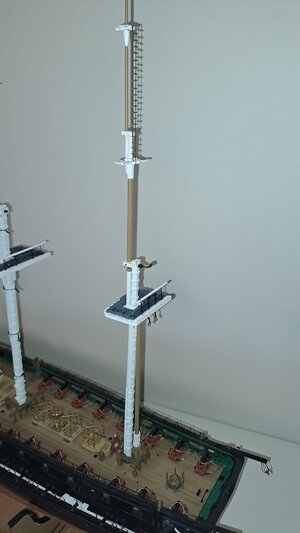
It's been a while since I've updated my slow progress so here's where I'm up to. The decking is finished and the hatches only require stain and varnish.

View attachment 442408
The first planks where placed against a rule to insure it's straight. This is the first time I have planked directly on bulkheads, it's much easier to lay them onto a plywood base.

View attachment 442409
Some of the strips varied in width by as much as 0.5mm this nearly cought me out a few times.

View attachment 442411View attachment 442413
View attachment 442414
View attachment 442415
View attachment 442416
I used a Sharpie on one side of the plank to represent the caulking and pencil for the ends. A 4 plank shift is used and the planks are 150mm long. I wanted to ues shorter length planks but the distance between bulkheads was a problem.

View attachment 442410

Tony.
I don't know how you do it, but it approaches perfection in terms of finish, accuracy.... :) :) :) :) :) :) :) :)

Marc
 
lines are crisp and deck is clean. Good job!
I now have something to aspire to when I get to that step in my Constitution build
right now I am going through the cannon doors and am noticing a lot of broken pieces. I have contacted Model shipways and they are sending me replacements at no cost to me. I have to say nothing but praises for their customer service.
Indeed, perfect service they have! I also received at no costs some replacements...
 
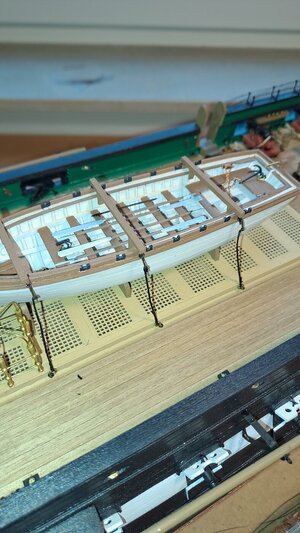
The Strongbacks installed (36' Pinnace)
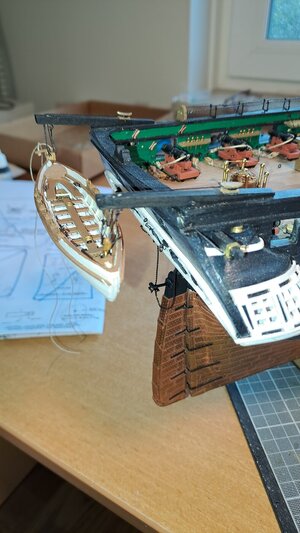
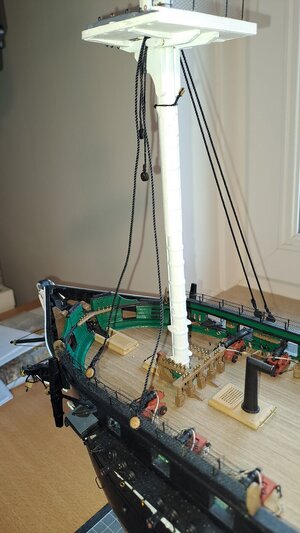
Installed of the quarter Davids (preparation, installation after rigging)
Rigging-stern Davids -
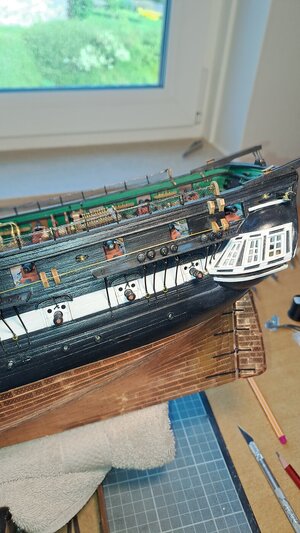
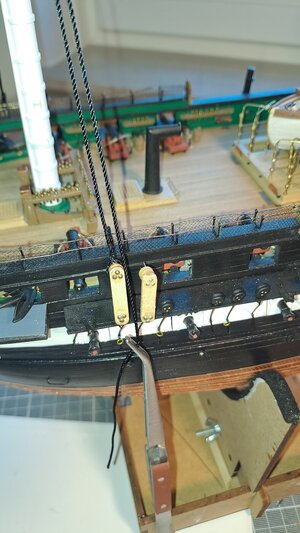
Start off rigging - installation of the S-Blocks and Bulleyes
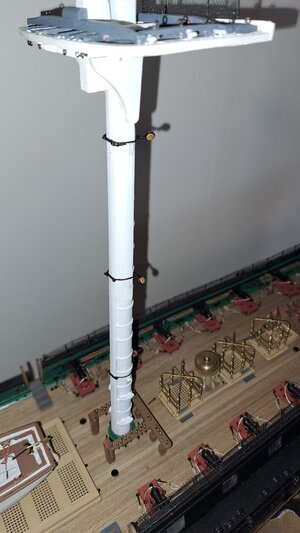
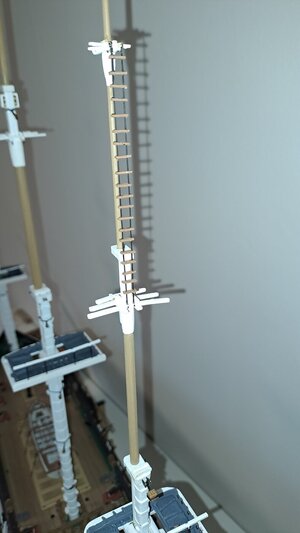
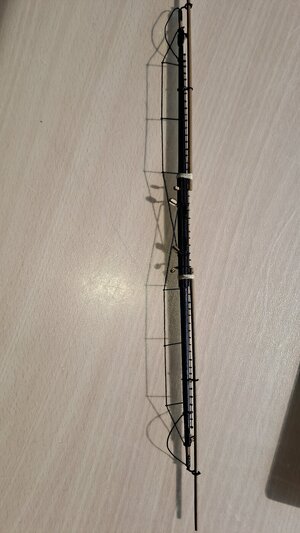
Wood rung ladder of the Mizzen - main and fore still to do
and last but not least the Rudder Chain....

:) :) :) :)

View attachment 442514

View attachment 442515

View attachment 442516

View attachment 442517

View attachment 442518

View attachment 442519

View attachment 442520
great job
 
Dear Tony,

Yes, I would like to receive some pictures from the Diana-Kit.
I fully agree with your comments....
Although this kit is rather expensive : +- 900 euro's....
On the other hand, I absolutely don't like rigging...
Hi Marc

Fantastic work, I love the rope ladder on the mast. I saw that on the drawing and was wondering how I would make them.
I have done a kit review for the HMS Diana.

Let me know if you need any further information.

Tony
 
Beautiful job on the decking Tony. The plank edge treatment with the sharpie works great too.
That's a nice looking deck Tony!

lines are crisp and deck is clean. Good job!
I now have something to aspire to when I get to that step in my Constitution build
right now I am going through the cannon doors and am noticing a lot of broken pieces. I have contacted Model shipways and they are sending me replacements at no cost to me. I have to say nothing but praises for their customer service.
I don't know how you do it, but it approaches perfection in terms of finish, accuracy.... :) :) :) :) :) :) :) :)

Marc
Thanks a lot for the comments and feedback they are all very encouraging.
 
Hi Marc

Fantastic work, I love the rope ladder on the mast. I saw that on the drawing and was wondering how I would make them.
I have done a kit review for the HMS Diana.

Let me know if you need any further information.

Tony
Hi Tony,

Concerning the rope ladder:
I used 1/64" bras rode (which I painted off course black) instead of a wire... Bras rode is stiff and easily to glide through the holes...
Additionally I used 1/16 wide and 1/32" thick wooden strips : 1/4" large. with 2 holes drilled into them...

Thx for the kit review....

Marc
 
Hello Capt. Jack Sparrow,

I'm just starting my MS Constitution, this will be my 5th ship. I'm astounded at just how big this thing is, a daunting project but I'm really enjoying it so far. I'm just now attaching the bow stem, keel pieces and the stern post. The directions indicate to drill holes on the underside of the keel and insert (glue drenched) dowels. I've put in two test dowels but I'm wondering, what did you do to make sure the keel is attached so firmly it won't break off? The dowels in question are the largest I can insert without having them shaved off during the rabbitting process to come. With a couple of my ships there was no rabbit to cut and I pounded in nails and that did the trick...but tiny little dowels? Will that be enough with this very heavy monster?
Hi
Good to see another Constitution underway.
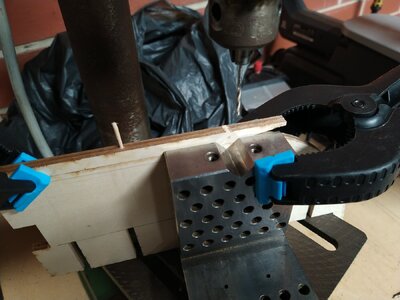
I used 3 wooden dowels around 1.5mm diameter in each section and have had no problems.

IMG_20230609_132001.jpg

Tony
 
Hi
It's been a while since I've updated my slow progress so here's where I'm up to. The decking is finished and the hatches only require stain and varnish.

View attachment 442408
The first planks where placed against a rule to insure it's straight. This is the first time I have planked directly on bulkheads, it's much easier to lay them onto a plywood base.

View attachment 442409
Some of the strips varied in width by as much as 0.5mm this nearly cought me out a few times.

View attachment 442411View attachment 442413
View attachment 442414
View attachment 442415
View attachment 442416
I used a Sharpie on one side of the plank to represent the caulking and pencil for the ends. A 4 plank shift is used and the planks are 150mm long. I wanted to ues shorter length planks but the distance between bulkheads was a problem.

View attachment 442410

Tony.
Good morning Tony. That is a “bewdy”. You owned that deck. Cheers Grant
 
Hello Capt. Jack Sparrow,

I'm just starting my MS Constitution, this will be my 5th ship. I'm astounded at just how big this thing is, a daunting project but I'm really enjoying it so far. I'm just now attaching the bow stem, keel pieces and the stern post. The directions indicate to drill holes on the underside of the keel and insert (glue drenched) dowels. I've put in two test dowels but I'm wondering, what did you do to make sure the keel is attached so firmly it won't break off? The dowels in question are the largest I can insert without having them shaved off during the rabbitting process to come. With a couple of my ships there was no rabbit to cut and I pounded in nails and that did the trick...but tiny little dowels? Will that be enough with this very heavy monster?
I think I may have missed the boat on that one. I just used epoxy resin. I hope that is enough.. Having said that, I am still debating whether I should put dowels in or not. I am hoping that with the dowels and the epoxy, that should be strong enough.
 
Hello Tony,

Again a question: As I'm going to start the rigging.
I'm wondering if I install first the MASTS without the Yards or should I pre-assemble the MASTS together with the yards ....
What would be the easiest way in order to install for example the shrouds ....
Hi Marc, I agree with Tony. I always go from bottom to top too. According to my experience, this is the easiest way.

Screenshot_20240421-144627_Facebook.jpg
 
Hi Tony,

Concerning the rope ladder:
I used 1/64" bras rode (which I painted off course black) instead of a wire... Bras rode is stiff and easily to glide through the holes...
Additionally I used 1/16 wide and 1/32" thick wooden strips : 1/4" large. with 2 holes drilled into them...

Thx for the kit review....

Marc
Hi Marc
That's very clever using brass wire, looking at the drawing I thought I would have to tie off all the rungs of the ladder which would be very hard to get even.
Thanks Tony
 
Back
Top