Phew! Ridiculously amazing build. Simply incredible skill.
You are using an out of date browser. It may not display this or other websites correctly.
You should upgrade or use an alternative browser.
You should upgrade or use an alternative browser.
Kingfisher 1770 1:48 POF
- Thread starter dockattner
- Start date
- Watchers 108
Sometimes I never quite make it through trying to "figure out what I'm doing" before I run out of time or I get "reassigned". Context switching is tough. Looks like some nice progress!The rest of the time was spent trying to figure out what I'm doing... Oh, and reading any number of very interesting posts (and responses to posts) on our forum. So much entertainment here!
Your lower deck looks superb Paul, i would leave it open as much as possible, otherwise you cover up all that stunning work
- Joined
- Sep 3, 2021
- Messages
- 4,242
- Points
- 688

You almost succeeded, but I must claim the honors; still fooling around, trying to establish on how to build a Fokker Spin, with almost nothing to show for.In my ongoing efforts to be identified as the most inefficient modeler on the SOS forum I'm pleased to announce that over the past week and a half I have made several hours of actual progress on my build.
Thank you again, dear friends, for the likes and nice posts.
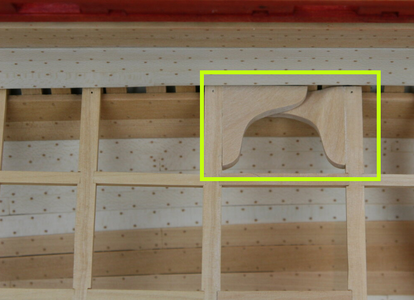
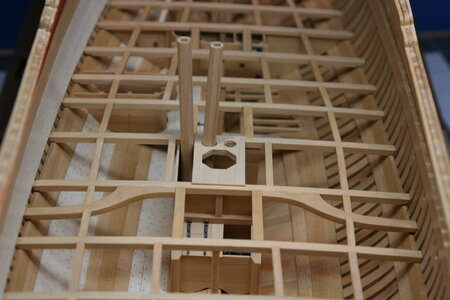
As I continue to think through how much of the lower deck I will be building, I turned my attention to the hanging and lodging knees. For sure I will include these on the finished side. The jury is still out on the unfinished side.
As the lower deck is omitted from the kit, these knees needed to be fabricated from my very limited supply of boxwood. I created the necessary patterns and traced those to the sheet stock. I paid little attention to grain in the crafting of these rather small pieces.
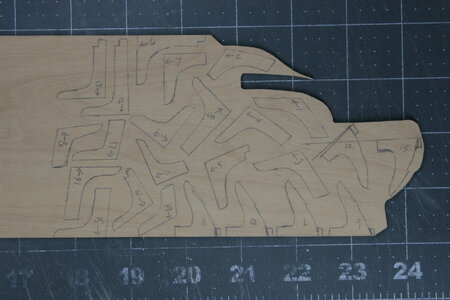
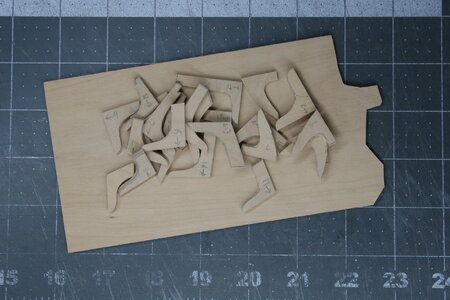
It took me a while to figure out how to approach this aspect of the build. I ended up fitting the hanging knees first (these do not appear at every beam on the lower deck - no heavy guns here) and then the lodging knees. Only halfway done at this point (the previously fitted hanging knees are not shown here)...
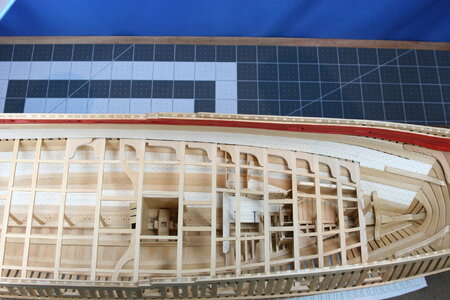
Please don't concern yourself with the precision of the fit to the hull - I will be installing a waterway on this side and that will cover some sins...
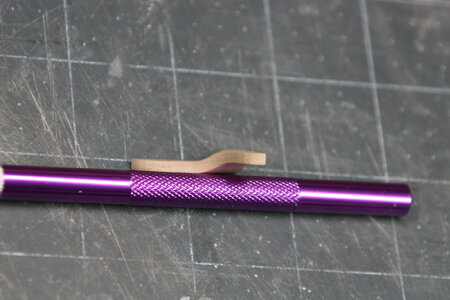
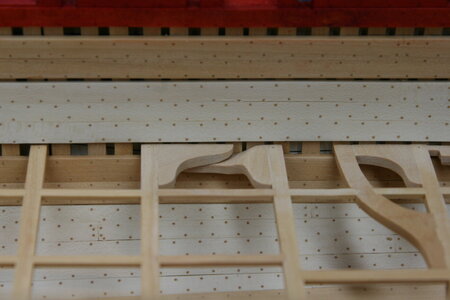
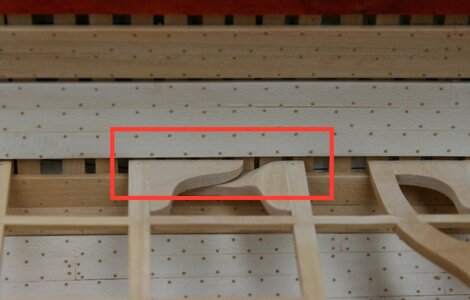
About the midship region there is a special situation where the lodging knees change direction relative to the beams. This means that there is a knee that sits to the aft of one beam, and a knee that fits forward of the neighboring beam. It took me a while to figure out how to make the necessary multilevel knee:
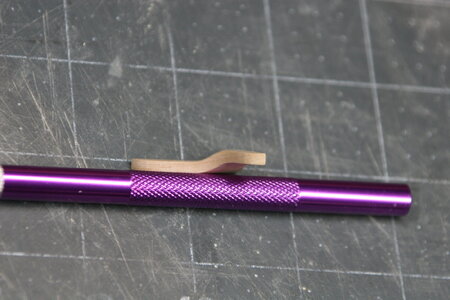
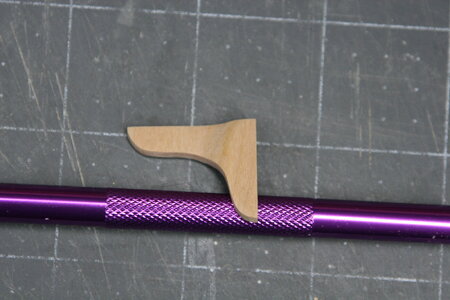
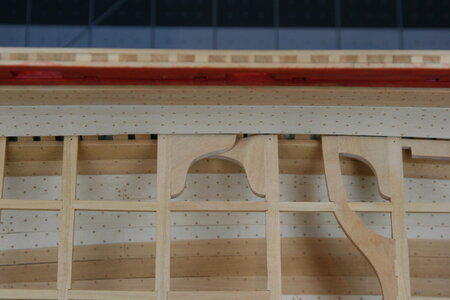
Some parts are easier than others!
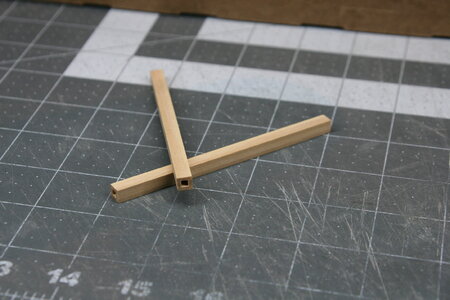
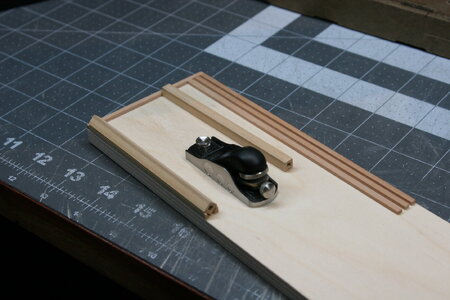
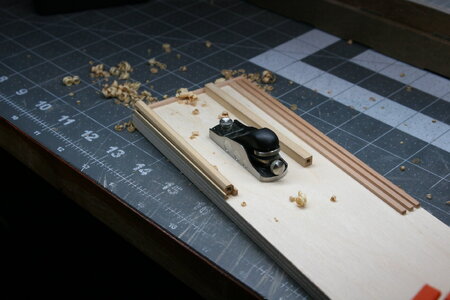
Finally, here is a photo essay showing my solution to making 8-sided pump tubes:
The cool kids use a mill - but this only took me about an hour...
Thanks for the visit!
As I continue to think through how much of the lower deck I will be building, I turned my attention to the hanging and lodging knees. For sure I will include these on the finished side. The jury is still out on the unfinished side.
As the lower deck is omitted from the kit, these knees needed to be fabricated from my very limited supply of boxwood. I created the necessary patterns and traced those to the sheet stock. I paid little attention to grain in the crafting of these rather small pieces.


It took me a while to figure out how to approach this aspect of the build. I ended up fitting the hanging knees first (these do not appear at every beam on the lower deck - no heavy guns here) and then the lodging knees. Only halfway done at this point (the previously fitted hanging knees are not shown here)...

Please don't concern yourself with the precision of the fit to the hull - I will be installing a waterway on this side and that will cover some sins...
About the midship region there is a special situation where the lodging knees change direction relative to the beams. This means that there is a knee that sits to the aft of one beam, and a knee that fits forward of the neighboring beam. It took me a while to figure out how to make the necessary multilevel knee:


Some parts are easier than others!
Finally, here is a photo essay showing my solution to making 8-sided pump tubes:


The cool kids use a mill - but this only took me about an hour...
Thanks for the visit!
Last edited:
- Joined
- Oct 23, 2018
- Messages
- 525
- Points
- 353

It's looking really really good Paul. Be careful with the grain of your wood and the knees. For parts 12 and 13 I woud use the other direction.
Good morning Paul. While you are making so many knees maybe you could make me one for my right leg…Thank you again, dear friends, for the likes and nice posts.
As I continue to think through how much of the lower deck I will be building, I turned my attention to the hanging and lodging knees. For sure I will include these on the finished side. The jury is still out on the unfinished side.
As the lower deck is omitted from the kit, these knees needed to be fabricated from my very limited supply of boxwood. I created the necessary patterns and traced those to the sheet stock. I paid little attention to grain in the crafting of these rather small pieces.
View attachment 438570
View attachment 438571
It took me a while to figure out how to approach this aspect of the build. I ended up fitting the hanging knees first (these do not appear at every beam on the lower deck - no heavy guns here) and then the lodging knees. Only halfway done at this point (the previously fitted hanging knees are not shown here)...
View attachment 438577
Please don't concern yourself with the precision of the fit to the hull - I will be installing a waterway on this side and that will cover some sins...
About the midship region there is a special situation where the lodging knees change direction relative to the beams. This means that there is a knee that sits to the aft of one beam, and a knee that fits forward of the neighboring beam. It took me a while to figure out how to make the necessary multilevel knee:
View attachment 438573
View attachment 438574
View attachment 438576
View attachment 438578
Some days are easier than others!
Finally, here is a photo essay showing my solution to making 8-sided pump tubes:
View attachment 438579
View attachment 438580
View attachment 438581
View attachment 438582
The cool kids use a mill - but this only took me about an hour...
Thanks for the visit!
 mine “kneeds “ replacing. Seriously good work and clever manufacture of the water pump base. I also love waterways to hide my sins. Awesome crafting of all those knees. Cheers Grant
Wow; very clean precise work.
I can imagine that the outcome of this knee has given you a lot of satisfaction. The knee looks great and sits neatly in place.It took me a while to figure out how to make the necessary multilevel knee:
Regards, Peter
Hello Paul, very neat work.
You write that you want to add a waterway to cover up small sins. When I look at your pictures, it will be very tight to add a waterway, but of course it could be misleading, especially since I am not familiar with the plans and English shipbuilding. I am already looking forward to the result and your implementation.
You write that you want to add a waterway to cover up small sins. When I look at your pictures, it will be very tight to add a waterway, but of course it could be misleading, especially since I am not familiar with the plans and English shipbuilding. I am already looking forward to the result and your implementation.

Your pump pipe casing and offset knees are over the top Paul!
Thanks Heinrich! I built that piece about ten times in my head before I made one out of wood
 .
.Thank you, Mirek!Witaj
Pawle kolana są zrobione bardzo dobrze a pomysł na robienie pomp świetny ,znowu się czegoś nauczyłem .Pozdrawiam Mirek
Good catch Christian. I wasn't really paying that much attention to grain, but those longer pieces should be redone. One of the hanging knees has disappeared off my workbench so I'll just redo these at the same time. Where do pieces go when they disappear? I looked EVERYWHEREIt's looking really really good Paul. Be careful with the grain of your wood and the knees. For parts 12 and 13 I woud use the other direction.
Yes, I am also in the cue for a new knee... And thanks for your nice words, Grant!Good morning Paul. While you are making so many knees maybe you could make me one for my right leg…mine “kneeds “ replacing. Seriously good work and clever manufacture of the water pump base. I also love waterways to hide my sins. Awesome crafting of all those knees. Cheers Grant
Yup. A LOT of work as each of the knees is different. Not very efficient construction of this ship. Plus, each of the knees has to be 'let down' onto the deck clamp. I would have made that differently if I had the foresight to know I'd be installing knees on the starboard side of my model. HindsightAgain a impressive update, very accurate and a lot of work.
Thanks, Herman.Wow; very clean precise work.
Actually, I AM rather happy with the outcome! Thanks for noticingI can imagine that the outcome of this knee has given you a lot of satisfaction. The knee looks great and sits neatly in place.
Regards, Peter
 .
.Keen eye Tobias! The beams are just sitting loose on this photo and the total deck construction is just so light that it needs to be pressed down along its length. BUT! For sure the waterway will need to be a custom piece. Hopefully I'll be able to hide any spacing issues...Hello Paul, very neat work.
You write that you want to add a waterway to cover up small sins. When I look at your pictures, it will be very tight to add a waterway, but of course it could be misleading, especially since I am not familiar with the plans and English shipbuilding. I am already looking forward to the result and your implementation.
View attachment 438687
Thank you kindly, Daniel! Happy Easter! I'm off to work in a few minutes. He is risen!Your pump pipe casing and offset knees are over the top Paul!
You are very kind Michael. Veritas Tools makes a line of miniature planes and such. They are available here in the US through a company called Lee Valley. Not sure who distributes them down under.OMG. This is a work of art, not a very well built piece of a model ship.
View attachment 438691
BTW can you please share your source for that gorgeous little hand plane.
I always need to buy things after reading your threads.
Thanks Paul.
Michael
Search - Lee Valley Tools
- Joined
- Sep 3, 2021
- Messages
- 4,242
- Points
- 688

Second that...Your pump pipe casing and offset knees are over the top Paul!
Wow, what and update!
I think it's really that the cool kids find a way around the mill. Beautiful fabrication. And that's a lot of knees to cut out in a single update. Inspiring work, as always
I think it's really that the cool kids find a way around the mill. Beautiful fabrication. And that's a lot of knees to cut out in a single update. Inspiring work, as always
That where only tiny bits, but WOW what a great sight it is. Magnificent work Paul
He is risen indeed!I'm off to work in a few minutes. He is risen!


