You are using an out of date browser. It may not display this or other websites correctly.
You should upgrade or use an alternative browser.
You should upgrade or use an alternative browser.
H.M.S. Victory by Caldercraft - Build Log
- Thread starter team118
- Start date
- Watchers 26
-
- Tags
- caldercraft victory
- Joined
- Oct 21, 2022
- Messages
- 68
- Points
- 103

Aint that the truth!Somewhere, in your basement, dwell a clutch of gremlins, no doubt playing with the two nuts from your airbrush and giggling gleefully over your dilemma. They snatch them as soon as you start looking, and will, no doubt, replace them (in plain view) on your basement floor as soon as the replacement parts come from Amazon. I believe they get kickbacks from Jeff Bezos. I believe, also, that they must be related to the clutch of gremlins living in my basement and in the USNA model workshop, the modus operandi being uniformly the same.
You worked at the Naval Academy?
- Joined
- Jun 17, 2021
- Messages
- 1,654
- Points
- 488

As a volunteer model shipwright in the museum workshop for 15 years or so.Aint that the truth!
You worked at the Naval Academy?
I posted a bunch of pictures on SOS from the shop last year. And of one of the restoration projects, I worked on, restoring the model up to masting and rigging which is no in another person's hands.
- Joined
- Oct 21, 2022
- Messages
- 68
- Points
- 103

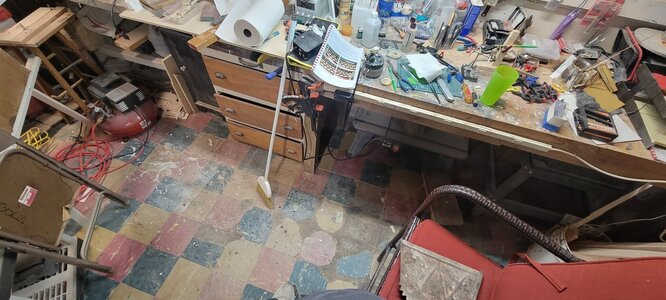
You are so right, every time I move something, I chip up a bit of another tile, adding to the little cubby hidey holes. I think the tiles were installed when the house was built back in the 50's soChris, I think I can see something under the compressor!
View attachment 439011
Sorry for having a laugh. Looks like there are plenty of good hiding spots in your basement. I know it can be very frustrating especially when it’s a unique part for the ship.
I hope you find it soon.
I am sure 'remediation' should be followed.....
I'm going to bite the bullet and move that drawer out, the air compressor, router table and table saw and see if they are there. Sigh.....
Pictures from the USNA MuseumAs a volunteer model shipwright in the museum workshop for 15 years or so.
I posted a bunch of pictures on SOS from the shop last year. And of one of the restoration projects, I worked on, restoring the model up to masting and rigging which is no in another person's hands.
Was a bit hard to find, still not used to the search engine. That is one hell of a shop, to have access to all those tools and other skilled modelers! Yikes!
Not sure what the warship in white and red is. At first glance I thought the cruiser Olympia, but she only had 2 masts. Some fine history there!
- Joined
- Jun 17, 2021
- Messages
- 1,654
- Points
- 488

That's a builder's model of the Maine. When the design was finalized, the navy did away with the vestigial masts, so they never finished the model and it became an artifact in the attic, kind of like the "Lost Ark". When they re-built the museum, years ago now, the model was brought into the shop. Two years ago, a concerted effort was put into effect to finish restoring the model according to its' original intent, masts and all.You are so right, every time I move something, I chip up a bit of another tile, adding to the little cubby hidey holes. I think the tiles were installed when the house was built back in the 50's so
I am sure 'remediation' should be followed.....
I'm going to bite the bullet and move that drawer out, the air compressor, router table and table saw and see if they are there. Sigh.....
Pictures from the USNA Museum
Was a bit hard to find, still not used to the search engine. That is one hell of a shop, to have access to all those tools and other skilled modelers! Yikes!
Not sure what the warship in white and red is. At first glance I thought the cruiser Olympia, but she only had 2 masts. Some fine history there!
Every time I look under a bench to find the thing I just dropped, I find one of the things I dropped and lost on a project years ago. I have boxes full of that stuff.
- Joined
- Jun 17, 2021
- Messages
- 1,654
- Points
- 488

The USNA model is gorgeous. I haven't been in a while. I'm curious to see the progress. A group of very skilled, highly dedicated people are working on different aspects of the model. Next time i get out there i will be sure to take more pics to share. 

- Joined
- Oct 21, 2022
- Messages
- 68
- Points
- 103

This model is INCREDIBLY hard. No new news there! And something everyone who has done it, is in the process of doing or has started only to find something else that grabs their attention (sadly, to stow away their partial attempt).
Should I have started a wooden ship with it's need for detail in laying out the hull, doing deck plank work and the future of all that standing and running rigging? I don't know, I think for me the most frustrating part is just how careful you need to be and how much experience with this type of model helps.
Caldercraft's instructions are really very good. This after spending 14 months building Trumpeter's Titanic. Those instructions were just pictures. I think the difference there is the shear volume of YouTube building blogs for the Titanic that help builders. I know there are building blogs for the Victory, but they vary between the various kits and there aren't as many out there.
As my biggest critic, I am so frustrated or unhappy with various parts of my build. I know that as I peruse other blogs, I see some areas where I have done a better job and some areas where I am sorely lacking.
Regardless, I will continue to plug away. England needs their ship and I will not let them down!
As I was waiting on the chucking nut for my airbrush, I decided to work on the gratings, cannon ball holders and stairs for the upper gun deck.
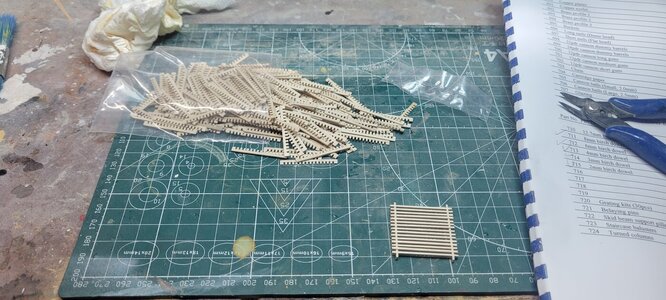
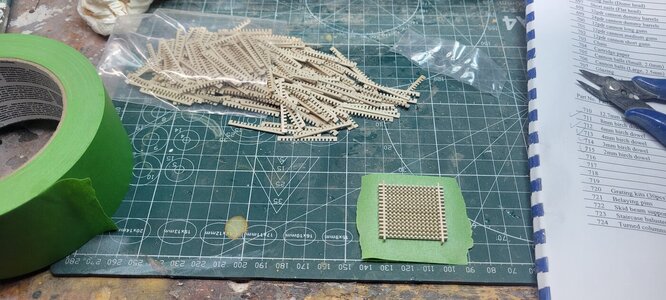
First was work on building 7 grating blocks. They were actually pretty easy. The first one I laid the first side of slats and then put a piece of masking tape over it to flip and work on the other side. The only issue with doing that was if they are perfectly square, they are hard to slide into place with the tape holding them tight.
The rest I would flip over and then peel the tape away allowing the structure to float back and forth as I put the first slats in. After, a good wash with watered down wood glue and they seemed fine.
Cutting the coamings to surround the gratings wasn't as easy as it appeared. The plans call for mitered corners. I have a full size band saw with a 1/4" blade and was able to cut the coamings, but not at a 45 degree angle.
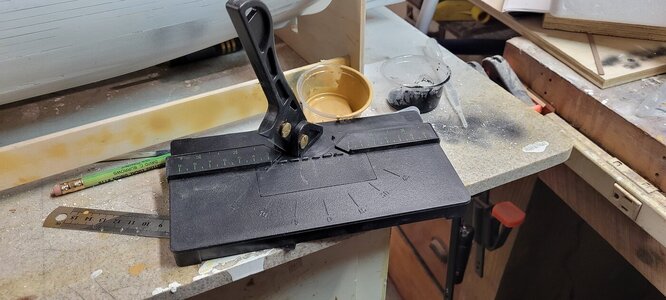
I bought a very cheap cutter on Amazon. It was plastic and really was pretty rickety. The blade broke after cutting 2 or 3 pieces of the 3mmx4mm walnut strips.
After flipping the blade I also found that cutter 45 degree angles was impossible and the cuts were never 'square'.
So I looked online and found another tool that cost about $20-$25 more and seems much more robust. I did a few practice cuts and I'm looking forward to using it. It also uses standard utility knife blades.
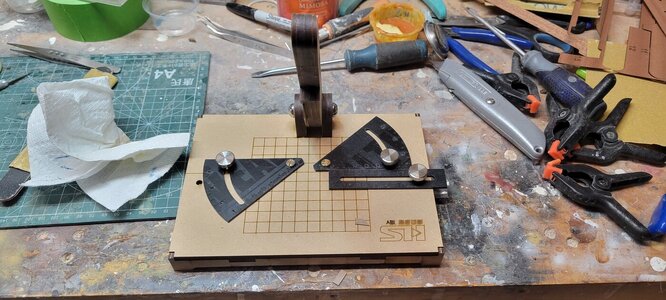
The coaming I did with straight on 90 degree angles. The rest I did with mitered corners using the cheap cutter and I was forced to fill in the gaps with wood putty.
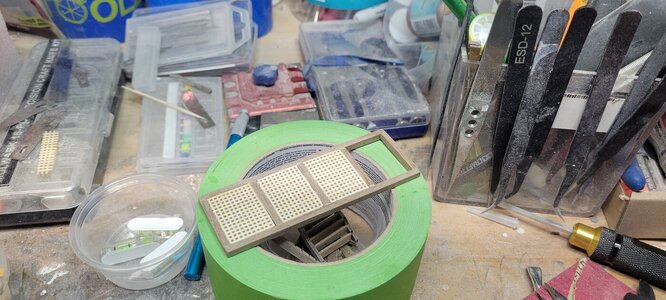
Placing the little cannon balls was easy. Kind of peaceful after all the things I've done to date. They do require a serious dollop of CA glue, but I think once I give the deck a coating of matt finish, it will cover any CA staining.
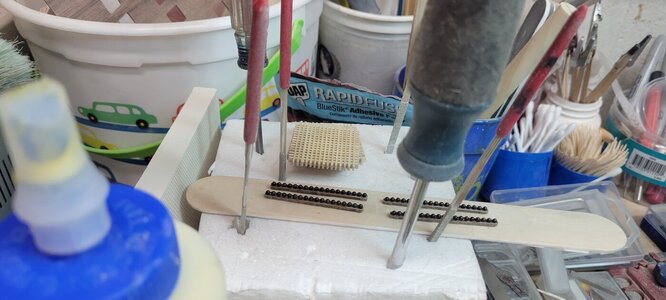
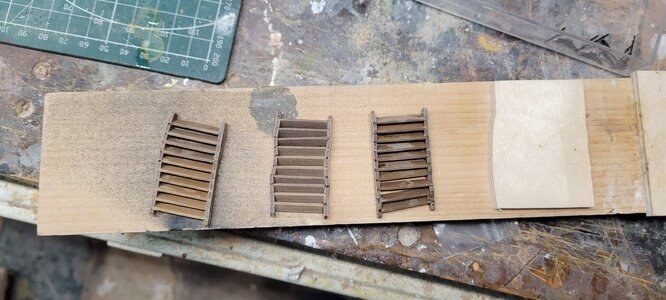
Finally, my first attempt at making stairs. The directions seem to suggest that 'ideally' a jig should be made.
Without it, there was NO WAY I could get it done. It was a comedy of errors and my first set looked like a staircase in one of them old fun houses or a Dr. Seuss book.
All I did was glue two pieces of wood sprue onto a board. This did help. The 1mm thick treads barely fit into the side rails. The jig makes that easier. After finishing a set, I coated with watered down glue. My fear was that the stairs would end up glued to the jig, so I removed them and the pressure the treads create on the side rails caused them to pop out.
It was an hour of pure hell.
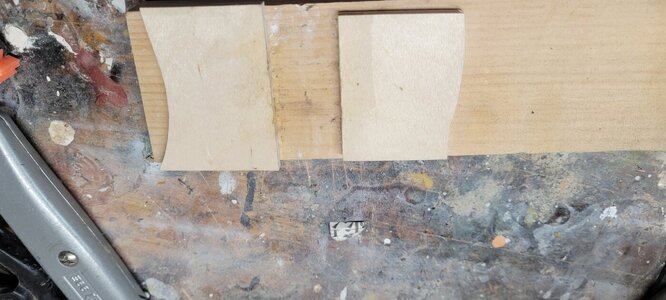
The middle one was my first attempt. LOL...so sad.
The far right was my 2nd attempt and I took it out too soon. The side rails disintegrated trying to keep it together
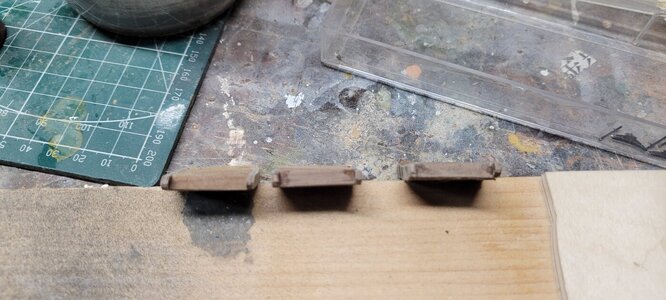
The far left one I left in the jig for a bit. Even after removing it, pressure did start to push it apart and I used a mini clamp to keep it together.
There is a bit of twist to it.
The only saving grace is that only the very top will be visible and gives me practice so I know what to watch for when I build the rest that are much more visible.
Sill...so sad!
Should I have started a wooden ship with it's need for detail in laying out the hull, doing deck plank work and the future of all that standing and running rigging? I don't know, I think for me the most frustrating part is just how careful you need to be and how much experience with this type of model helps.
Caldercraft's instructions are really very good. This after spending 14 months building Trumpeter's Titanic. Those instructions were just pictures. I think the difference there is the shear volume of YouTube building blogs for the Titanic that help builders. I know there are building blogs for the Victory, but they vary between the various kits and there aren't as many out there.
As my biggest critic, I am so frustrated or unhappy with various parts of my build. I know that as I peruse other blogs, I see some areas where I have done a better job and some areas where I am sorely lacking.
Regardless, I will continue to plug away. England needs their ship and I will not let them down!
As I was waiting on the chucking nut for my airbrush, I decided to work on the gratings, cannon ball holders and stairs for the upper gun deck.
First was work on building 7 grating blocks. They were actually pretty easy. The first one I laid the first side of slats and then put a piece of masking tape over it to flip and work on the other side. The only issue with doing that was if they are perfectly square, they are hard to slide into place with the tape holding them tight.
The rest I would flip over and then peel the tape away allowing the structure to float back and forth as I put the first slats in. After, a good wash with watered down wood glue and they seemed fine.


Cutting the coamings to surround the gratings wasn't as easy as it appeared. The plans call for mitered corners. I have a full size band saw with a 1/4" blade and was able to cut the coamings, but not at a 45 degree angle.
I bought a very cheap cutter on Amazon. It was plastic and really was pretty rickety. The blade broke after cutting 2 or 3 pieces of the 3mmx4mm walnut strips.
After flipping the blade I also found that cutter 45 degree angles was impossible and the cuts were never 'square'.
So I looked online and found another tool that cost about $20-$25 more and seems much more robust. I did a few practice cuts and I'm looking forward to using it. It also uses standard utility knife blades.


The coaming I did with straight on 90 degree angles. The rest I did with mitered corners using the cheap cutter and I was forced to fill in the gaps with wood putty.

Placing the little cannon balls was easy. Kind of peaceful after all the things I've done to date. They do require a serious dollop of CA glue, but I think once I give the deck a coating of matt finish, it will cover any CA staining.

Finally, my first attempt at making stairs. The directions seem to suggest that 'ideally' a jig should be made.
Without it, there was NO WAY I could get it done. It was a comedy of errors and my first set looked like a staircase in one of them old fun houses or a Dr. Seuss book.
All I did was glue two pieces of wood sprue onto a board. This did help. The 1mm thick treads barely fit into the side rails. The jig makes that easier. After finishing a set, I coated with watered down glue. My fear was that the stairs would end up glued to the jig, so I removed them and the pressure the treads create on the side rails caused them to pop out.
It was an hour of pure hell.

The middle one was my first attempt. LOL...so sad.
The far right was my 2nd attempt and I took it out too soon. The side rails disintegrated trying to keep it together
The far left one I left in the jig for a bit. Even after removing it, pressure did start to push it apart and I used a mini clamp to keep it together.
There is a bit of twist to it.
The only saving grace is that only the very top will be visible and gives me practice so I know what to watch for when I build the rest that are much more visible.
Sill...so sad!


- Joined
- Oct 21, 2022
- Messages
- 68
- Points
- 103

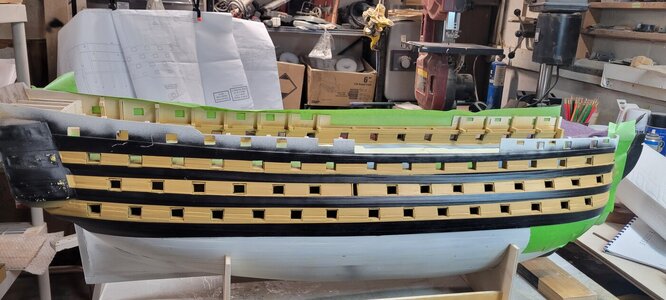
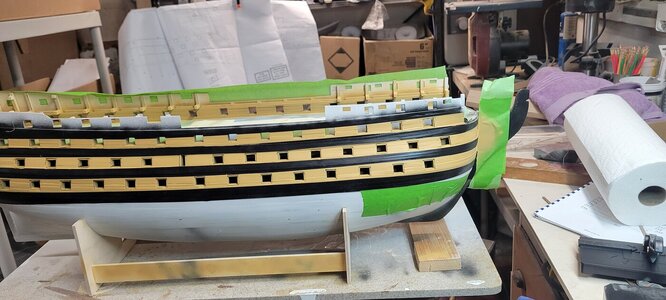
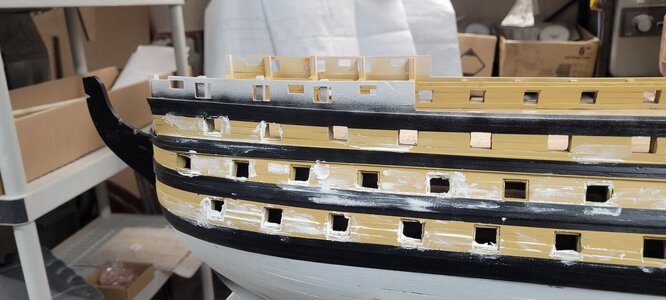
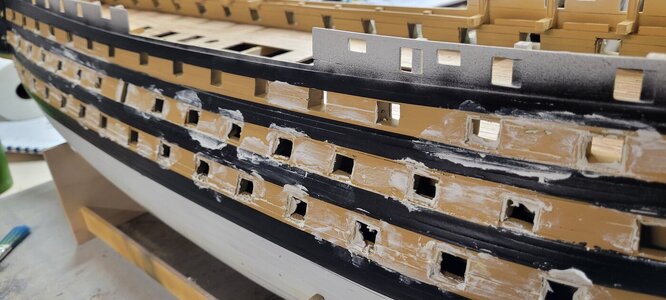
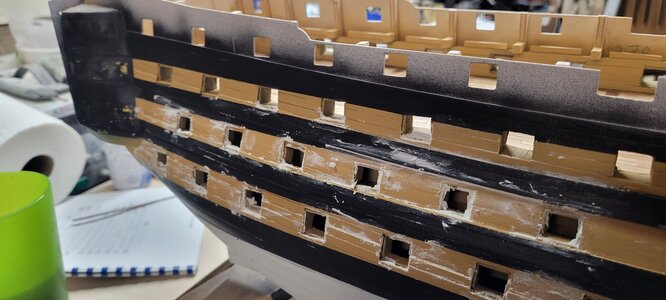
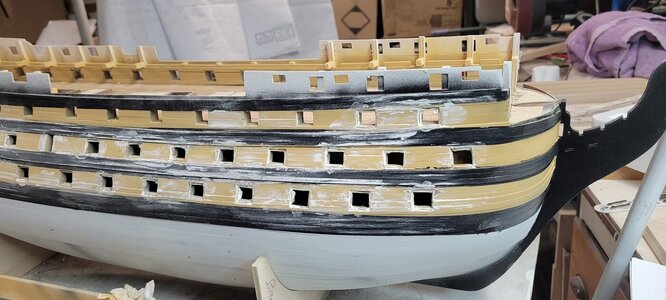
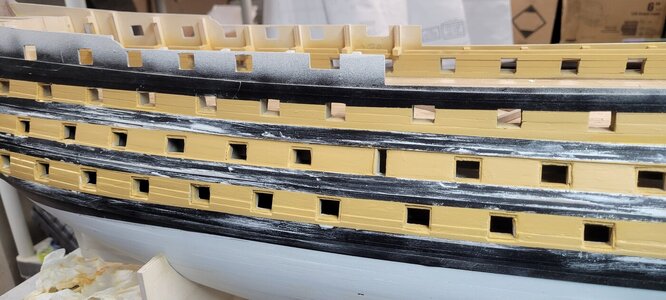
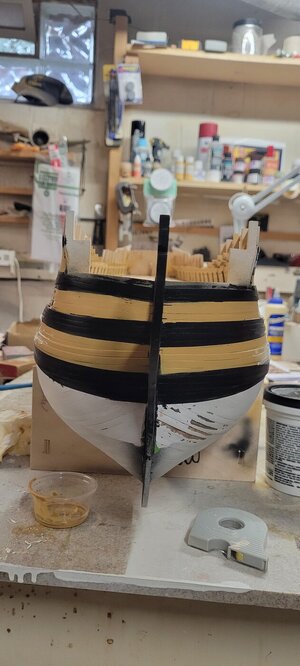
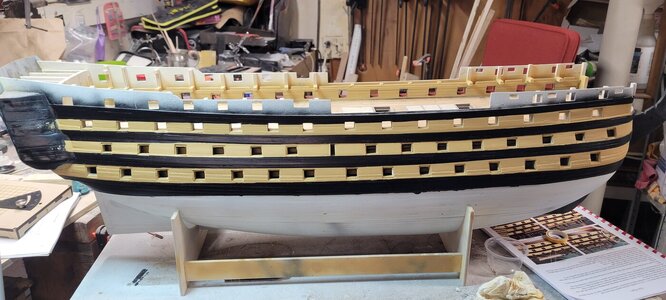
I finished painting the stripes over the wales and attempted to even out both sides so they match.
After doing this, all of the flaws became so visible. Gaps in the planking and gaps in the gun liners, gaps everywhere and it was driving me crazy.
I did add the masts to see if they fit. I like the extra long bowsprit....lots and lots of sails.
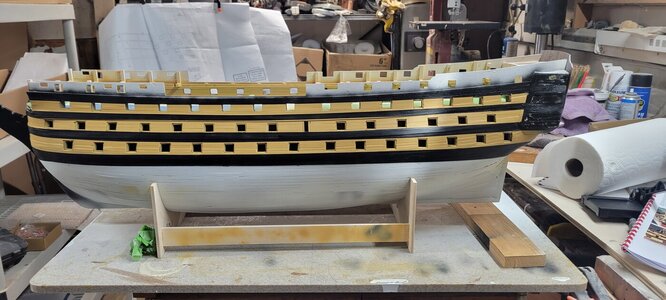
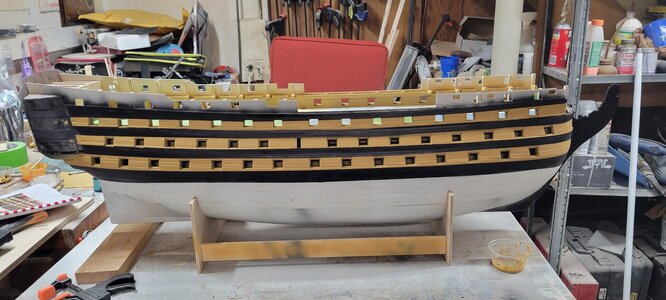
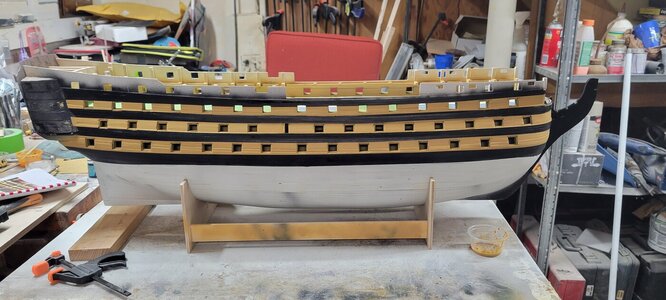
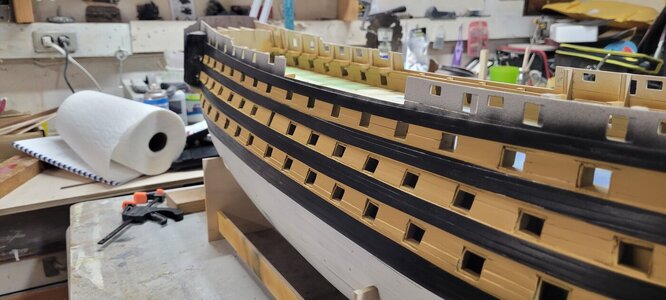
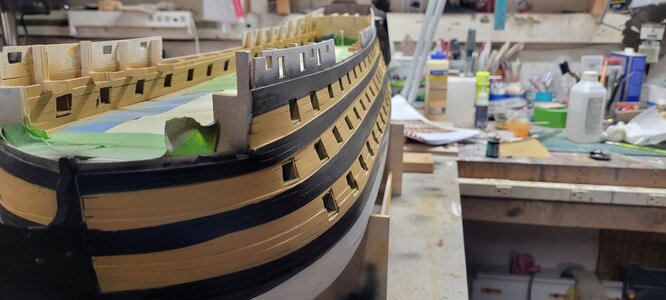
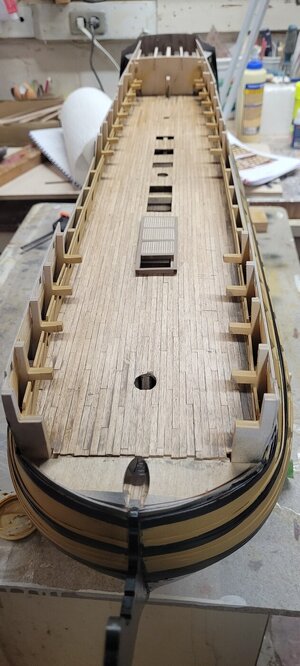
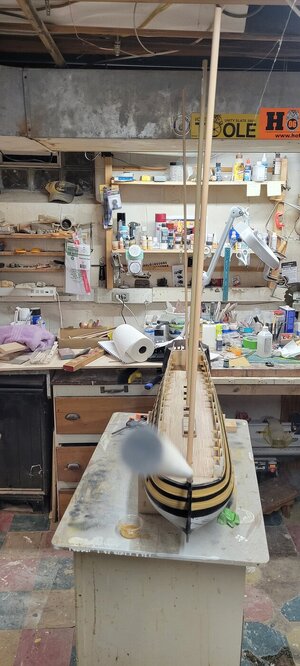
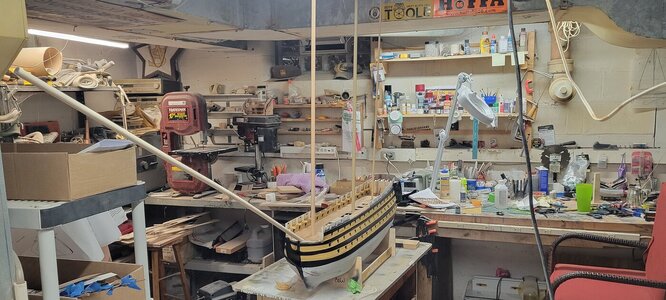
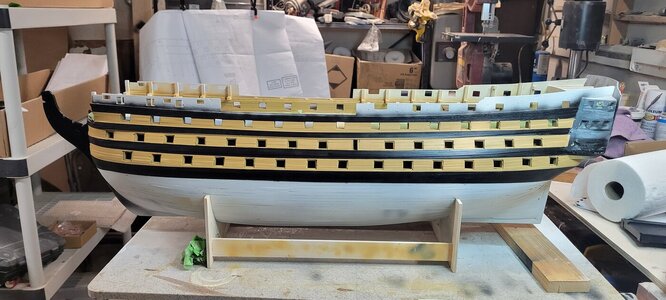
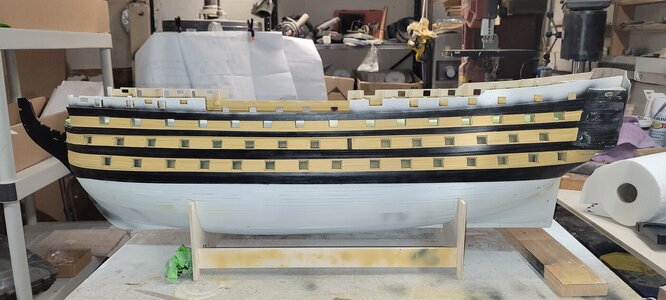
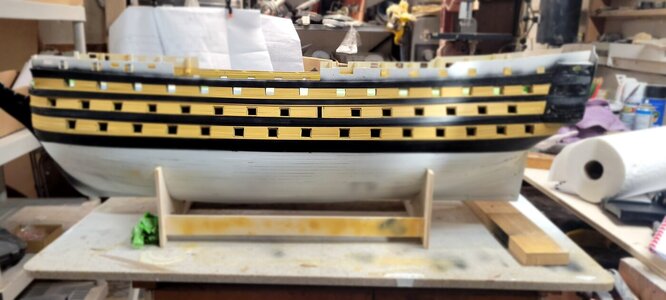
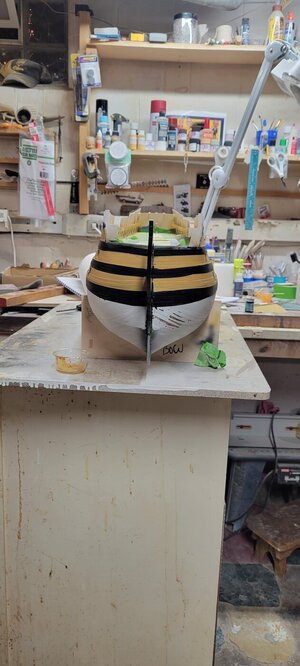
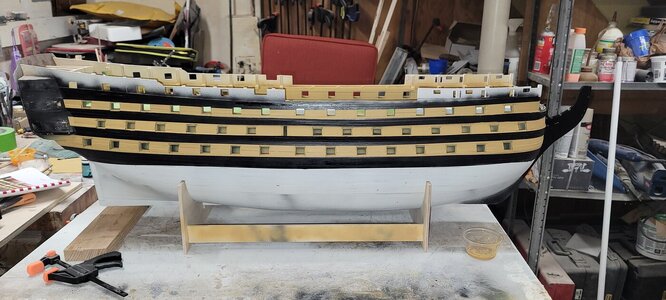
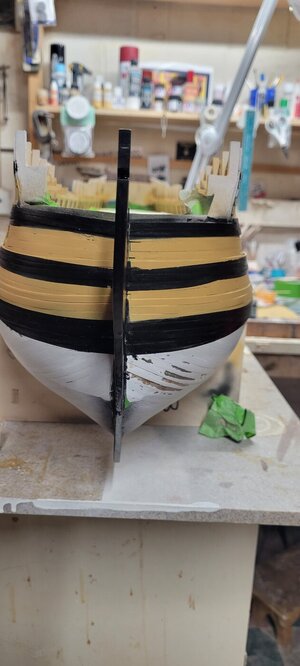
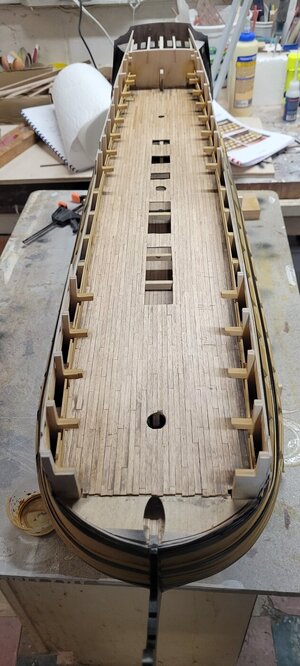
After doing this, all of the flaws became so visible. Gaps in the planking and gaps in the gun liners, gaps everywhere and it was driving me crazy.
I did add the masts to see if they fit. I like the extra long bowsprit....lots and lots of sails.


- Joined
- Oct 21, 2022
- Messages
- 68
- Points
- 103

I went over the deep end and started filling every gap I could see with filler. Sanding, filling, sanding and more filling.
I bought these little wooden sticks with sand paper on the ends to sand the gun liner edges.
I had to, I just had to try!
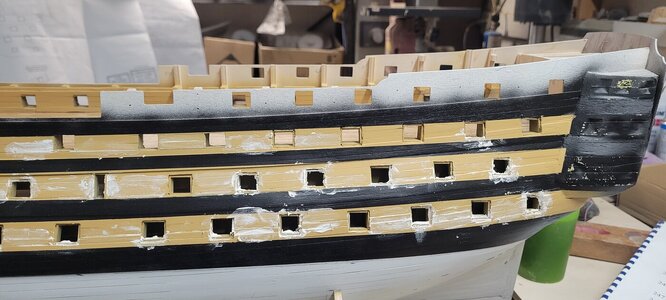
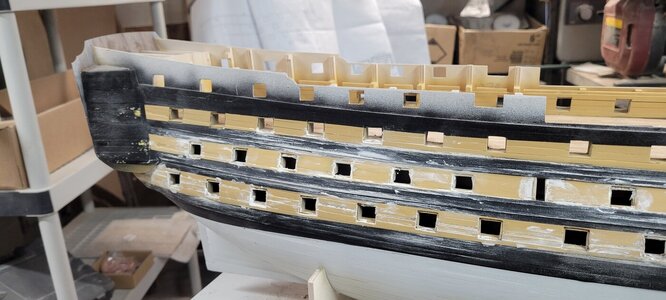
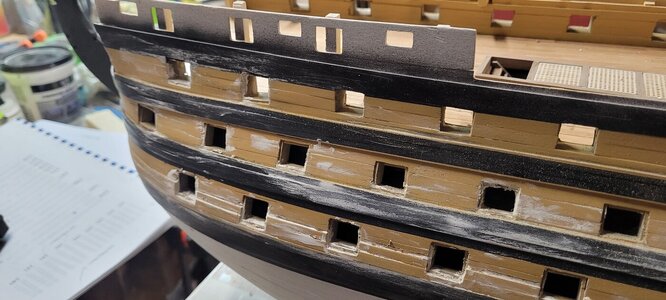
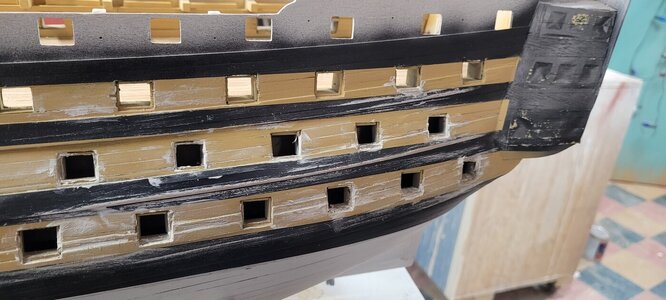
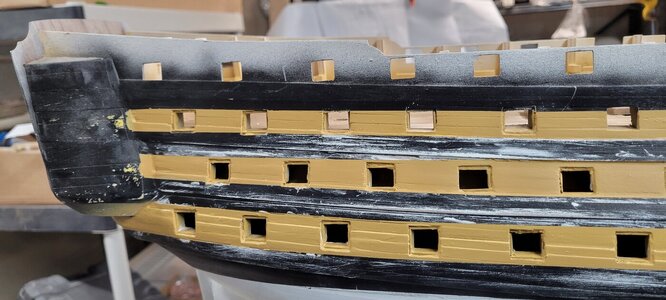
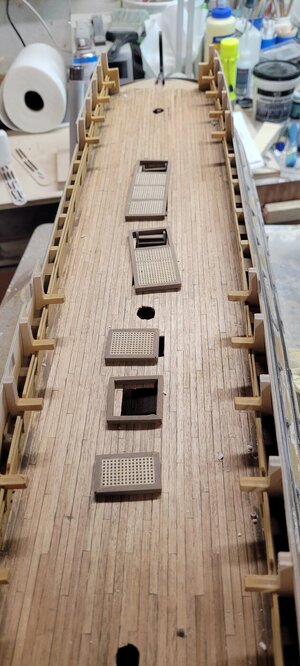
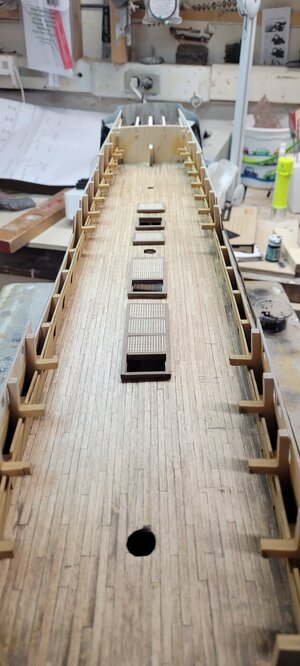
I did finish all the coamings and gratings and they look fine.
I bought these little wooden sticks with sand paper on the ends to sand the gun liner edges.
I had to, I just had to try!


I did finish all the coamings and gratings and they look fine.


- Joined
- Oct 21, 2022
- Messages
- 68
- Points
- 103

After sanding, I re-taped my lines (had to buy 2 more rolls of 6mm Tamiya masking tape) and repainted.
I used a brush rather than recover the entire boat.
There was some leaking that I had to tweak. Some of the pictures are different as I tried to use a different setting with camera to capture the correct colors.
I added the red ochre to the gun liners to the port side today and I will try to do the stbd side tomorrow.
I can do no more, other than completely removing the planking and starting from scratch. I would have to find comparable sized wood and I just don't want to face it. My hope is that the cannons, lids, chain plates and ultimately the rigging with create such a cacophony of detail that the viewer will be lost in the wonder of it all.....lol.
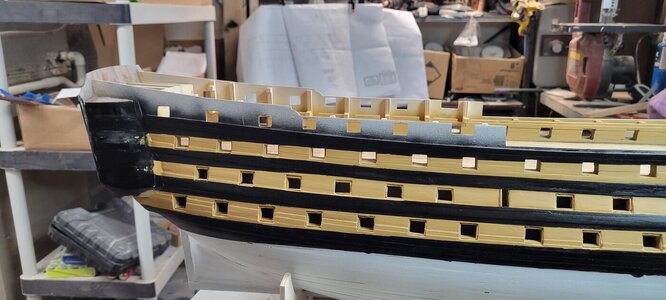
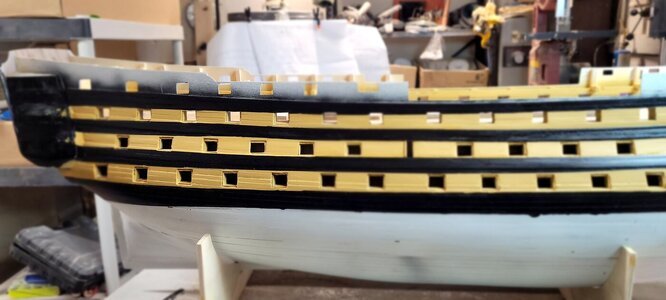
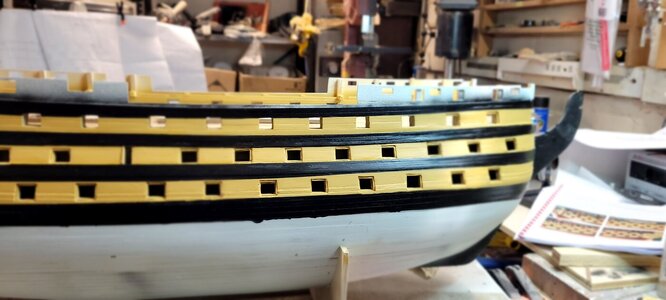
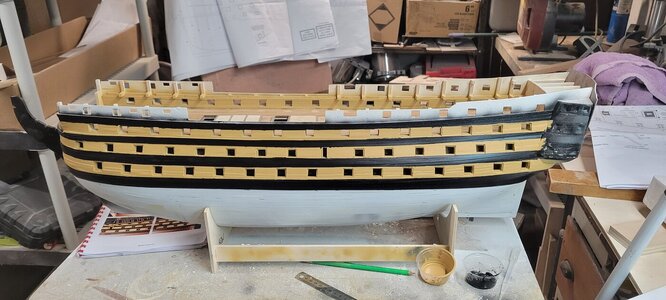
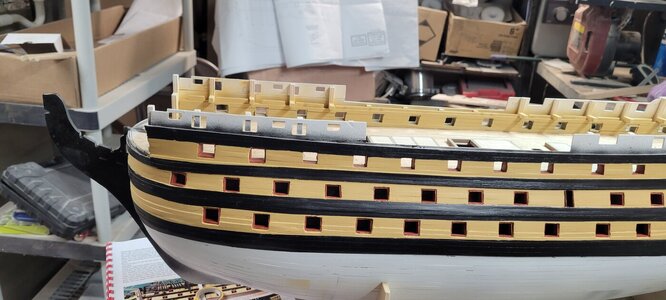
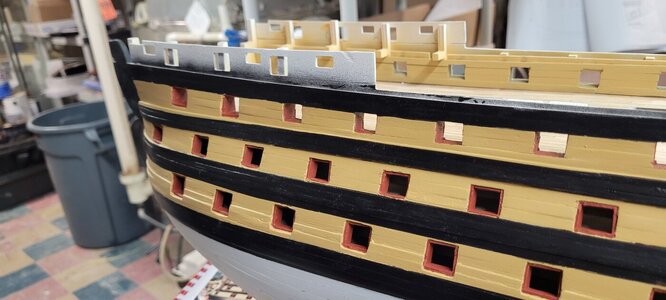
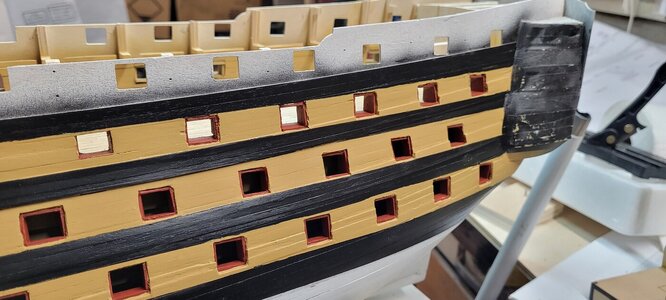
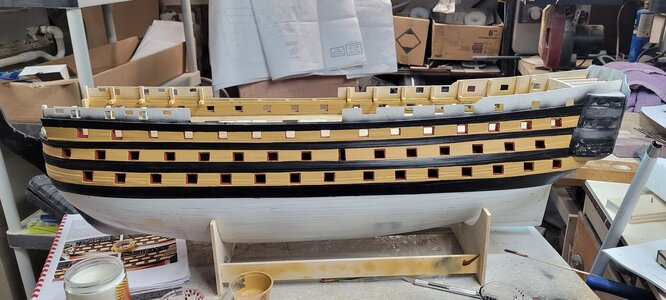
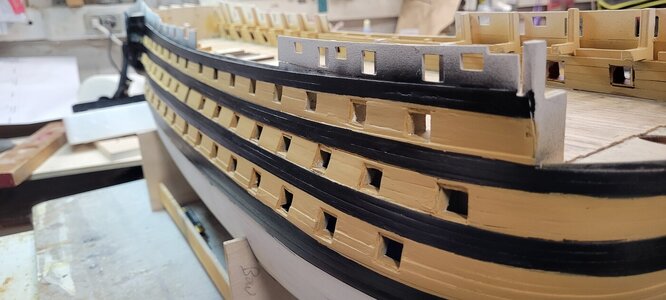
And finally, I was able to add the gratings and they look grate!
I used a brush rather than recover the entire boat.
There was some leaking that I had to tweak. Some of the pictures are different as I tried to use a different setting with camera to capture the correct colors.
I added the red ochre to the gun liners to the port side today and I will try to do the stbd side tomorrow.
I can do no more, other than completely removing the planking and starting from scratch. I would have to find comparable sized wood and I just don't want to face it. My hope is that the cannons, lids, chain plates and ultimately the rigging with create such a cacophony of detail that the viewer will be lost in the wonder of it all.....lol.


And finally, I was able to add the gratings and they look grate!

- Joined
- Jun 17, 2021
- Messages
- 1,654
- Points
- 488

re. paragraph #4 Welcome to the club. that forehead shaped dent in the drywall next to yours would be my own. There will come a point when you look at your model, still in progress, and say to yourself: "Damn! Looks pretty f***ing good!" Mostly it does already! Keep on pluggin! 

Last edited:
Hey Chris
Good to see you have had a period of reflection and correction.
Judging by your photos it appears as though your reparations work has been very effective.
The Victory is indeed one of the more challenging kits to build. You should not be too hard on yourself, you are doing a great job and obviously learning much along the way. That is priceless.
Keep up your assault.
true storyre. paragraph #4 Welcome to the club. that forehead shaped dent in the drywall next to yours would be my own. There will come a point when you look at your model, still in progress, and say to yourself: "Damn! Looks pretty f***ing good!" Mostly of it does already! Keep on pluggin!
- Joined
- Oct 21, 2022
- Messages
- 68
- Points
- 103

re. paragraph #4 Welcome to the club. that forehead shaped dent in the drywall next to yours would be my own. There will come a point when you look at your model, still in progress, and say to yourself: "Damn! Looks pretty f***ing good!" Mostly it does already! Keep on pluggin!
Hey Chris
Good to see you have had a period of reflection and correction.
Judging by your photos it appears as though your reparations work has been very effective.
The Victory is indeed one of the more challenging kits to build. You should not be too hard on yourself, you are doing a great job and obviously learning much along the way. That is priceless.
Keep up your assault.
Appreciate the boost guys!true story
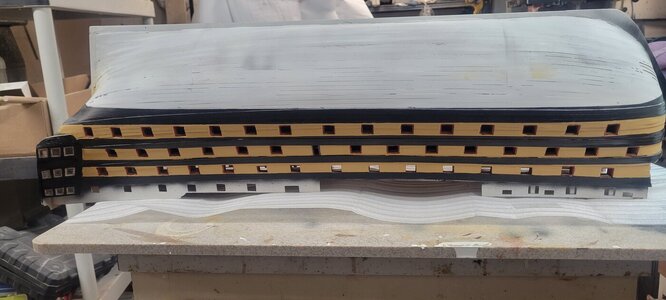
I finished touching up the gunports. I still have some minor spots to get at and needed to flip the hull upside down to get the 'top gun ports'
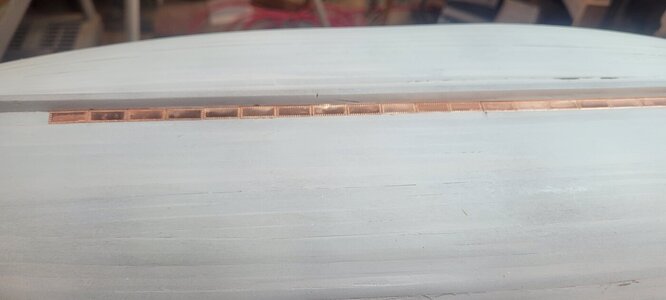
I didn't get any pictures of where I am so far but decided to start the copper plating. I started at 1:59pm in the first pic and the 2nd pic at 5:43pm.
I took about 30 minutes or so in the middle to eat lunch and check some other builds and my books to make sure I had a plan in place for laying out the tiles.
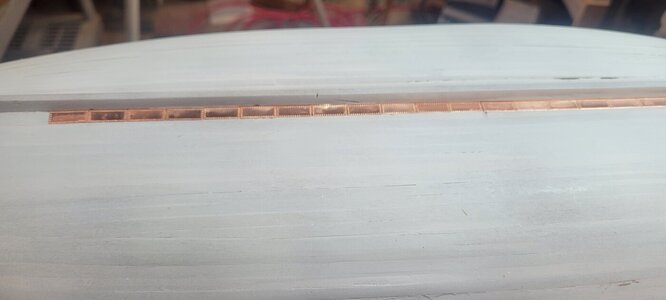
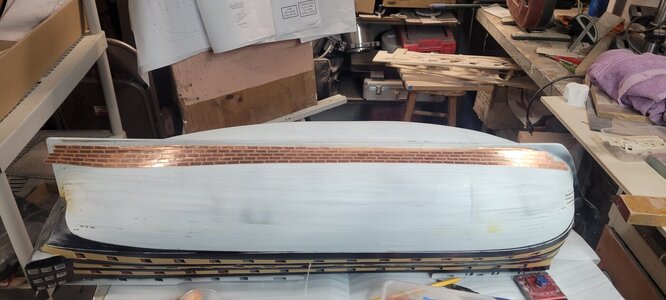
So 5 rows in about 3-3.5 hours. I'll see you when it's done!!!!
Last edited:
Copper plates are for the brave and patient fellows…,,enjoy. Cheers GrantAppreciate the boost guys!
I finished touching up the gunports. I still have some minor spots to get at and needed to flip the hull upside down to get the 'top gun ports'
I didn't get any pictures of where I am so far but decided to start the copper plating. I started at 1:59pm in the first pic and the 2nd pic at 5:43pm.
I took about 30 minutes or so in the middle to each lunch and check some other builds and my books to make sure I had a plan in place for laying out the tiles.
View attachment 441071View attachment 441072
So 5 rows in about 3-3.5 hours. I'll see you when it's done!!!!
- Joined
- Jun 17, 2021
- Messages
- 1,654
- Points
- 488

Nothing good ever got done in a hurry. Three+ hrs. well spent from what I see! 
She's shaping up!
Pete

She's shaping up!
Pete
Last edited:
- Joined
- Oct 21, 2022
- Messages
- 68
- Points
- 103

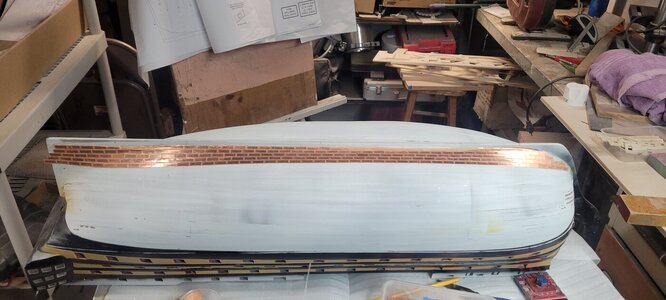
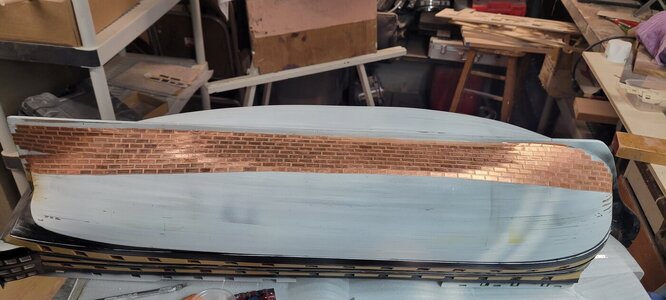
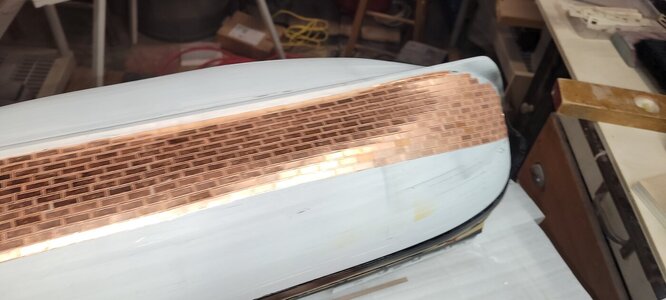
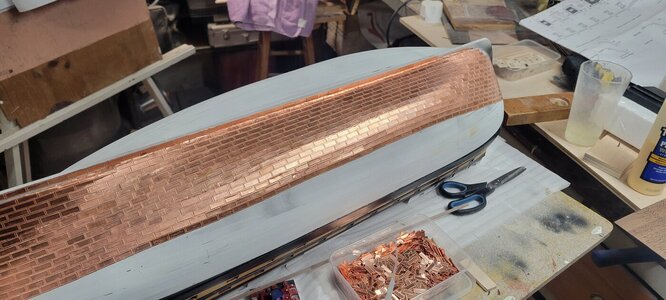
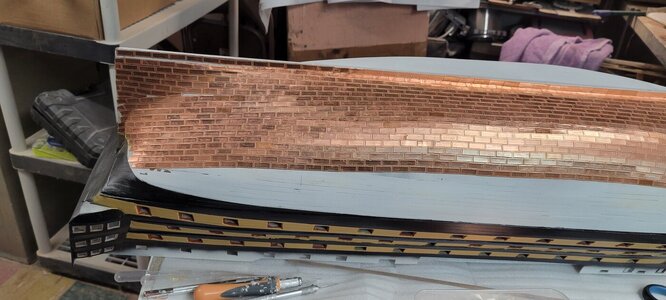
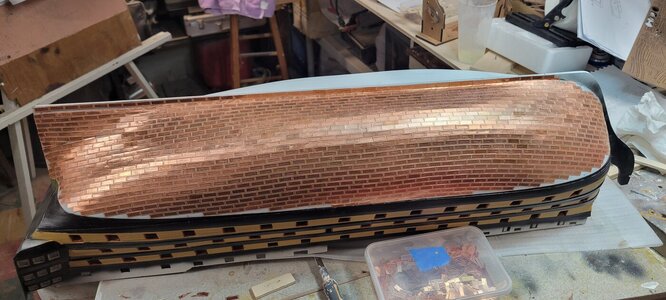
Well, it took 9 days of a little work here, a little work there. Usually about 3 hours at a time after spending time down at the marina.
I am not sure one way or another if it's ok. I did alter the runs a few times to create some areas where I am going to need stealer plates.
Also, I did attempt to add final cut pieces and after the fact, I am not happy. I used a regular pair of scissors to cut the plates and that was fine, but it does warp the plate. After a first attempt, I removed a lot of the little wedges and I'm going to wait till I'm done and circle back around.
I can see some areas where the CA glue is visible. Once I'm done, I'll see if Q-tips and acetone can help remove that. I've seen other builds where any attempt to work at the finished plating is worse.
Hopefully, filling in the wedges goes well! So on to the starboard side and I'll see you soon!!!!
Oh, I have been working on building the cannons. I have been cutting them out about six at a time and building the bases....just something to keep my sanity.


Last edited:
- Joined
- Jun 17, 2021
- Messages
- 1,654
- Points
- 488

Impressive!
The rate of your progress is astonishing.
The rate of your progress is astonishing.
Absolutely splendidWell, it took 9 days of a little work here, a little work there. Usually about 3 hours at a time after spending time down at the marina.
I am not sure one way or another if it's ok. I did alter the runs a few times to create some areas where I am going to need stealer plates.
Also, I did attempt to add final cut pieces and after the fact, I am not happy. I used a regular pair of scissors to cut the plates and that was fine, but it does warp the plate. After a first attempt, I removed a lot of the little wedges and I'm going to wait till I'm done and circle back around.
I can see some areas where the CA glue is visible. Once I'm done, I'll see if Q-tips and acetone can help remove that. I've seen other builds where any attempt to work at the finished plating is worse.
Hopefully, filling in the wedges goes well! So on to the port side and I'll see you soon!!!!
Oh, I have been working on building the cannons. I have been cutting them out about six at a time and building the bases....just something to keep my sanity.
View attachment 442737View attachment 442738View attachment 442739View attachment 442740View attachment 442741View attachment 442742
View attachment 442743View attachment 442744
Congrats


