Deadeye assembly?

Joined
Feb 1, 2024
Messages
120
Points
103

Location
Santimbù (Bergamo - Italia)
Is there a system/trick toinsert the wire inside the deadeyes without going crazy?
PS: what diameter of wire do you use on the 3mm deadeyes?

Esiste un sistema/trucco per infilare il filo dentro i deadeyes senza impazzire?
PS: sui deadeye da 3 mm che diametro di filo usate?
 
Here is how the mizzen topmast shrouds were rigged on La Couronne using 3mm triangular deadeyes.

for the futtock shrouds and mizzen topmast shrouds above them, 0.30mm black thread (75% poly, 25% cotton) was used, not wire.
Futtock shrouds and lower deadeyes are rigged first. The futtock shrouds are tied around the deadeyes, the passed through small holes in the railings of the tops, over the edge of the deck of the top, and are tied to the futtock staff on the mizzen course ratlines below.
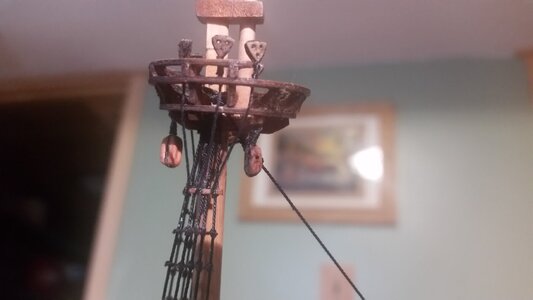
809 Rig Fore Topgallant Futtock Shrouds.jpg

A pair of shrouds is looped and siezed at the topgallant masthead, starting with the port side as shown below.
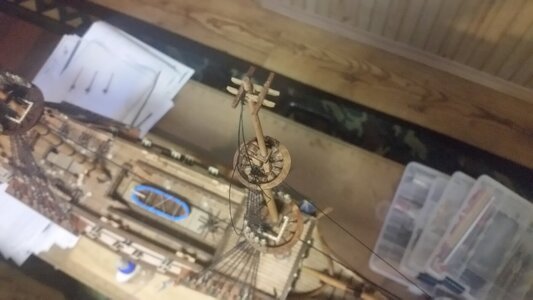
822 Making Shroud Lines on Fore Topgallant.jpg

When attaching the upper deadeye to each shroud, the length of the shroud is determined by using a deadeye spacing tool, placed temporarilt between the deadeyes, while the shroud is tensioned and tied to the upper deadeye. The smallest tool on the far left is for 3mm deadeyes on the mizzen mast and those on the sprit topmast. The tools were made using deadeyes and wire formed with pliers and locked together with glue. Wire staples are made to form the prongs on which the deadeyes to be rigged are fitted.
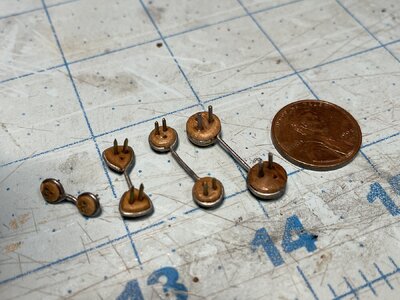
672a Make Deadeye Tools.jpg

You can see the tool behind the upper and lower deadeye whose shroud is being tensioned around the upper deadeye, and locked in place with a small bit of CA glue.
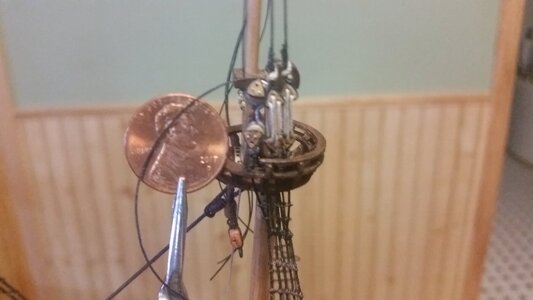
828 Rigging Mizzen Topmast Deadeyes.jpg

The deadeyes are now lashed with tan colored lanyards, and if you got the length of each shroud correct, the upper deadeyes should be in line with each other, and the tension of the shrouds should be mildly taut by adjusting the lashings, about the same tension for all the shrouds. Ready for ratlining.
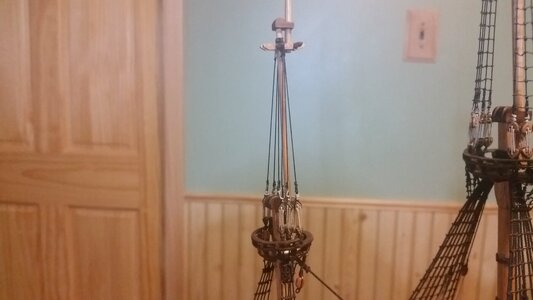
829 Mizzen Topmast Shrouds Done.jpg

After ratlines are done. Good luck with your rigging. 3mm deadeyes are very small and take plenty of patience to get them rigged.
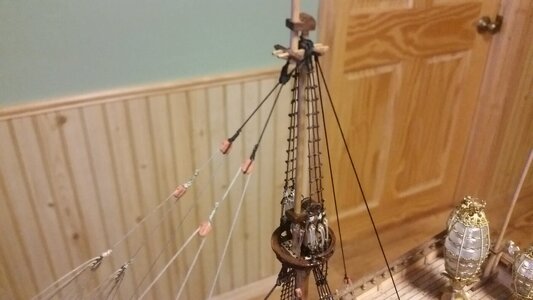
840 Mizzen Topmast Ratlines Done.jpg
 
Last edited:
Drop a drop of liquid superglue onto the tip of the thread - you will get a hard tip like a needle, which will be easier to thread into blocks and deadeyes. Then the tip is cut off along with the unnecessary remainder of the thread. This might make your job easier.
After hardening the end of the thread with CA glue, take a sharp scissors and cut the tip of the hardened thread at an extremely oblique angle, with the blades of the scissors almost parallel to the line. This will make the end as sharp and narrow as the end of a needle. If you hand drill the holes in the deadeye to ensure they are clear with a 0.30mm drill bit, and use a magnifying headset so you can see what you are doing, you should be able to pass the line through the deadeye with no problem. Use a tweezer to hold the line 8mm from the end and it will go straight through the holes every time. It gets easier with practice.
 
According to dead eye diameter you can use 0.25 - 0.5 mm yarn.For the shrouds I use thicker yarns 0.7-1.2mm depending on the scale of the ship.Additional to Dave’s tip with CA glue , cutting the hardened edge diagonaly is also simplifies finding the holes of the dead eyes
Buono Fortuna

IMG_5901.jpeg

IMG_5900.jpeg
 
After hardening the end of the thread with CA glue, take a sharp scissors and cut the tip of the hardened thread at an extremely oblique angle, with the blades of the scissors almost parallel to the line. This will make the end as sharp and narrow as the end of a needle. If you hand drill the holes in the deadeye to ensure they are clear with a 0.30mm drill bit, and use a magnifying headset so you can see what you are doing, you should be able to pass the line through the deadeye with no problem. Use a tweezer to hold the line 8mm from the end and it will go straight through the holes every time. It gets easier with practice.
This can also be done with a sharp blade on a flat surface. But this is depending on who is more convenient...
According to dead eye diameter you can use 0.25 - 0.5 mm yarn.For the shrouds I use thicker yarns 0.7-1.2mm depending on the scale of the ship.Additional to Dave’s tip with CA glue , cutting the hardened edge diagonaly is also simplifies finding the holes of the dead eyes
Buono Fortuna

View attachment 438157

View attachment 438158
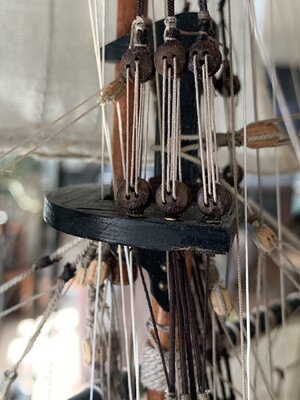
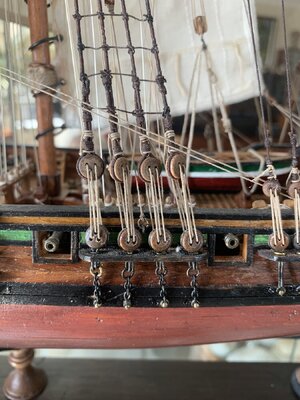
Unfortunately, the deadeyes in your photos are installed incorrectly - they are simply upside down. It is advisable to avoid such a mistake, as it is sometimes made.
 
As Dave noticed, the holes in the deadeyes should look like this:
1711722770915.png
If this is your first ship, don't worry about. Your next model will be 200% better, believe me. All of use make mistakes like this one on our first attempt. It is possible to cut the lashings, rotate the deadeyes, and re-lash them one set of deadeyes at a time, but it will be slow, careful, tedious work. But then again, most steps in building theses model are so.
 
My problem is not so much how to insert wire into the holes, but how to repeat this operation 180.. 240 times. In short, how to speed up the preparation of 30 .. 40 pairs of deadeyes. I am 79 years old and I would not like to leave my job as an inheritance to my granddaughter.
 
This can also be done with a sharp blade on a flat surface. But this is depending on who is more convenient...

Unfortunately, the deadeyes in your photos are installed incorrectly - they are simply upside down. It is advisable to avoid such a mistake, as it is sometimes made.
Thanks for your hint Dave , you are completely right .i didn't noticed that detail until now and i will correct to the right position. and also add more details shown below:
 
As Dave noticed, the holes in the deadeyes should look like this:
View attachment 438211
If this is your first ship, don't worry about. Your next model will be 200% better, believe me. All of use make mistakes like this one on our first attempt. It is possible to cut the lashings, rotate the deadeyes, and re-lash them one set of deadeyes at a time, but it will be slow, careful, tedious work. But then again, most steps in building theses model are so.
Thanks for the well exlained picture DA ,
Noship (nobody) is perfect and we get more experienced thru our mistakes and I also appreciate the ideas and hints of the SoS -Members.I will also add more details after correcting to the right position as shown below:
 
Thanks for your hint Dave , you are completely right .i didn't noticed that detail until now and i will correct to the right position. and also add more details shown below:
I'm not sure what ship that was, but I'm sure you can make an argument that some sailor... at some point in time... rigged their deadeyes that way. Seriously, nobody looking at the model in your living room will notice that or know the difference. I would just leave it as is but then I am lazy and eager to get on to the next project.
 
I'm not sure what ship that was, but I'm sure you can make an argument that some sailor... at some point in time... rigged their deadeyes that way. Seriously, nobody looking at the model in your living room will notice that or know the difference. I would just leave it as is but then I am lazy and eager to get on to the next project.
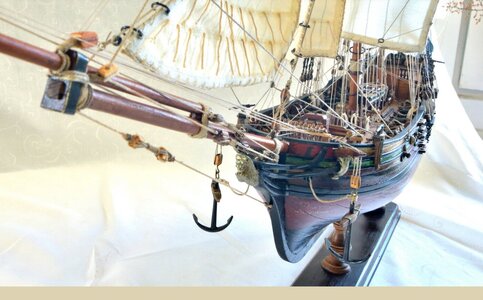
It is the Dolphyn from Corel (attach.)I do not want to accuse an innocent sailor. I will say it is the Captains choice and make the correction in a free time when i have nothing to do.In the meantime i have posted a very detailed video how to assemble dead eyes lanyards etc. to the community.at the moment i am building La Couronne from Corel 1:100 and finished the final sanding of the hull.and all the corrections i can make by this model even binding the pairs of the lanyards
Wish You a Nice Weekend

IMG_4957.jpeg
 
I have never successfully used a deadeye spacing jig. I tried it once but after final rigging the upper deadeyes were not as well aligned as I would have liked. It was on an early ship and I probably didn't stretch the shrouds in a uniform way, so with some practice I'm sure it can give good results.

Personally, I find it easier to first rig one complete shroud with an appropriate deadeye spacing, and then cut a strip of wood to match the spacing between those two deadeyes to be used as a measuring tool. I then sieze the next shroud around a deadeye, but leave the siezing un-glued. The siezing can be slid away from the deadeye a bit and the shroud end or the free end can be pulled to shorten or lengthen the shroud/deadeye assembly to match the wood measurement. I put some tension on the shroud to account for any stretch there may be in the material and re-adjust the length. The deadeye can then be rotated into the correct orientation before glueing the siezing.


20231226_121458.jpg
 
My problem is not so much how to insert wire into the holes, but how to repeat this operation 180.. 240 times. In short, how to speed up the preparation of 30 .. 40 pairs of deadeyes. I am 79 years old and I would not like to leave my job as an inheritance to my granddaughter.
Me too and I don’t have heirs anyway,
 
After hardening the end of the thread with CA glue, take a sharp scissors and cut the tip of the hardened thread at an extremely oblique angle, with the blades of the scissors almost parallel to the line. This will make the end as sharp and narrow as the end of a needle. If you hand drill the holes in the deadeye to ensure they are clear with a 0.30mm drill bit, and use a magnifying headset so you can see what you are doing, you should be able to pass the line through the deadeye with no problem. Use a tweezer to hold the line 8mm from the end and it will go straight through the holes every time. It gets easier with practice.
This is very much my process. Works great for me.
 
Use a simple needle threader pushed thru the hole of the deadeye to pull the thread thru. Beats eye - hand coordination on such a small scale for us old folks.
 
Back
Top