
This, I will say, is an extremely successful completion! I am very interested in your sailcloth with its barely perceptible weave. It looks very good at 1:100. What is the cloth?

You are using an out of date browser. It may not display this or other websites correctly.
You should upgrade or use an alternative browser.
You should upgrade or use an alternative browser.
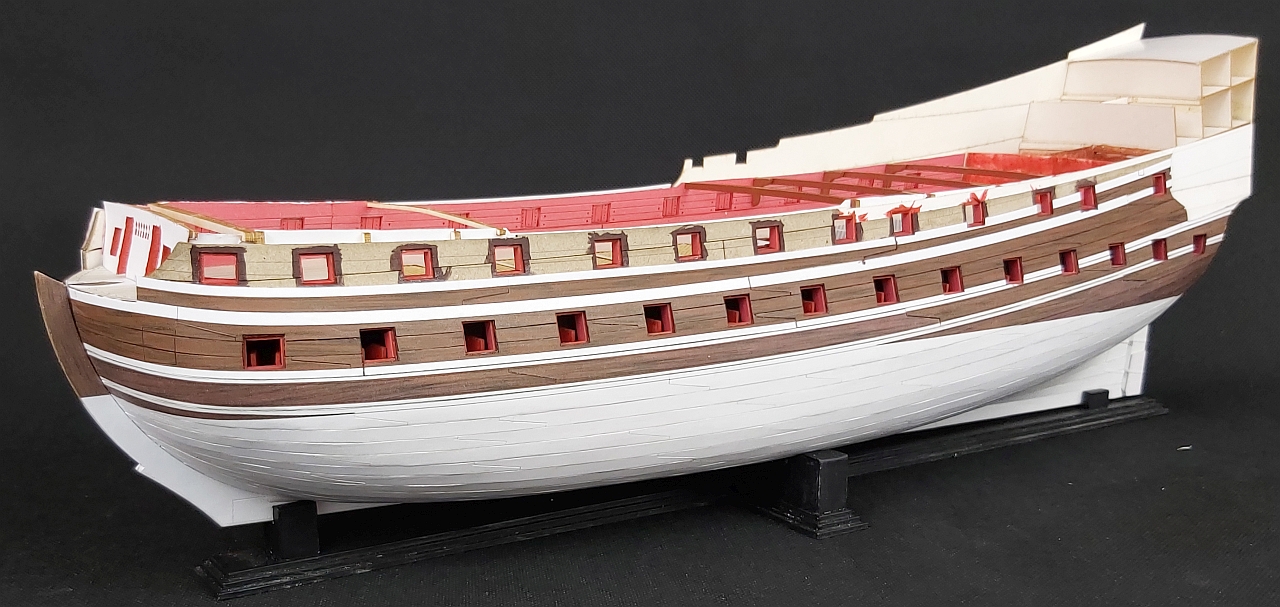
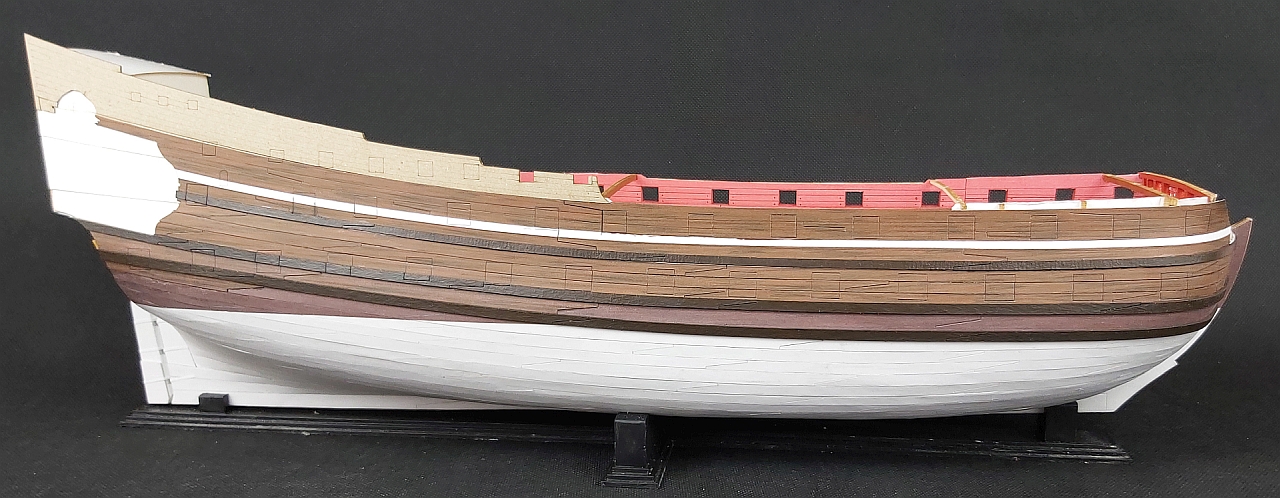
"De Zeven Provincien" 1:100 (scratch) - Seahorse New Design [COMPLETED BUILD]

@0Seahorse it is so soft on the eyes to view, so dreamy. Immaculate and magnificent. And, that deck, wow and stunning. Congratulations, Tomek on completing De Zeven Provincien and providing the pictures.

Thank you for comments.
@Hubac's Historian@ For the first time I used printed sails, which I add to my models at my e-shop. Yes, it's strange I've been selling something I've never used, but most of the time I build test models, so sails are test, too. Then, when all is correct I order printed sails at a company specialized in cloth printing. The name of the cloth is "woal 77g/m2", which I believe means "veil /voile 77g/m2". But there are many types of veil and some are very loosely woven and transparent, so they are unlikely to work well in sailing ship models. Unfortunately, this company does not sell clear, unprinted material, I would buy it right away at 100 meters. If you are more interested in the subject, here is the link: https://ctnbee.com/en/custom-print-voile-fabric
@Hubac's Historian@ For the first time I used printed sails, which I add to my models at my e-shop. Yes, it's strange I've been selling something I've never used, but most of the time I build test models, so sails are test, too. Then, when all is correct I order printed sails at a company specialized in cloth printing. The name of the cloth is "woal 77g/m2", which I believe means "veil /voile 77g/m2". But there are many types of veil and some are very loosely woven and transparent, so they are unlikely to work well in sailing ship models. Unfortunately, this company does not sell clear, unprinted material, I would buy it right away at 100 meters. If you are more interested in the subject, here is the link: https://ctnbee.com/en/custom-print-voile-fabric

My Congratulations - Bravo !!! This model is looking very good
And I agree with the before mentioned - the sails are very good also

And I agree with the before mentioned - the sails are very good also
Thank you for the link!
- Joined
- Sep 14, 2020
- Messages
- 132
- Points
- 88

Model looks great, fantastic work, I think that using paper as a medium in all modeling and ship modeling in particular On the salis can you talk more about the process on how you placed an ordered them
Hello @0Seahorse , I started building your model a month ago. It's great fun, but I also see that there are many questions. I would therefore be very happy if you could help me here and there, as the building instructions unfortunately don't answer some questions. I am currently preparing the front bulkhead, which is based on part 51a. What I see from the instructions and also from your photos here is that the whole red-colored front points into the interior of the ship. So far, so good. But then I see this picture here: https://shipsofscale.com/sosforums/attachments/21-09-21-05m-jpg.257400/ and look in vain in the instructions for how to design this side. What numbers do the parts have that I need for this? It would be nice if you could help.
Many thanks in advance - and see you soon for the next question.")
Best regards
Bonden
Many thanks in advance - and see you soon for the next question.
Best regards
Bonden
Last edited:


Hello Tomek,
thank you very much for the quick reply. Thanks to your pictures I have now found the parts. But be prepared for more questions - the kit is very sophisticated and not everything is immediately recognizable from the instructions. I will definitely create a separate build report here in the next few days, then we can exchange ideas there. (You can have a look at what I've done so far on my homepage...)
Best regards
Bonden
One more question about the bulkhead I'm looking for: If I'm reading the instructions correctly, the parts I'm looking for for the outside should only be fitted once the bulkhead has already been installed, right? But I would much rather do this "on land" - there's nothing wrong with that, is there?
It will certainly be easier to build the entire bulkhead outside the model, but consider part 87P/Lb, which is to be glued on the inside at the very front near the front deck. You'll probably have to trim it a bit. But I guess that shouldn't be a problem.


Tomek
Tomek
Ok, thanks for the tip! I will take it into consideration.
Hello Tomek,
I need help again. I can't find the parts 107e. I see in the instructions that this is a beam under the foredeck (part 107), and I assume that it is made of several layers of cardboard. Unfortunately, I can't find the parts. Thank you in advance...
I need help again. I can't find the parts 107e. I see in the instructions that this is a beam under the foredeck (part 107), and I assume that it is made of several layers of cardboard. Unfortunately, I can't find the parts. Thank you in advance...
Sorry, it looks I made a mistake. It's marked as 72a (not 107e). It's on this sheet (left upper corner)

Tomek
Tomek
Looking through the sheets, I already thought: 72a could fit.
Great, thank you, then we can continue!
Great, thank you, then we can continue!
- Joined
- Nov 8, 2022
- Messages
- 166
- Points
- 88
You are doing extremely well! I love building in paper; one can build in any scale to match a collection. And, the detail is spectacular!Hello after a long break.
Progress is hardly visible, mainly because the preparation of "Leudo" for release took me (as usual) 4 times more time than I expected. But something has been built, so some photos of the progress on de Ruyter's flagship are.
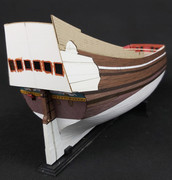
The sides rose very slowly, more the right one, where the gun ports will be closed.
It was all glued as in the photo below:
1 - the first plating layer which extends above the deck
2 - brackets
3 - "spacer" strips on the deck
4 - inner bulwark planks (amidships)
5 - next outer layers
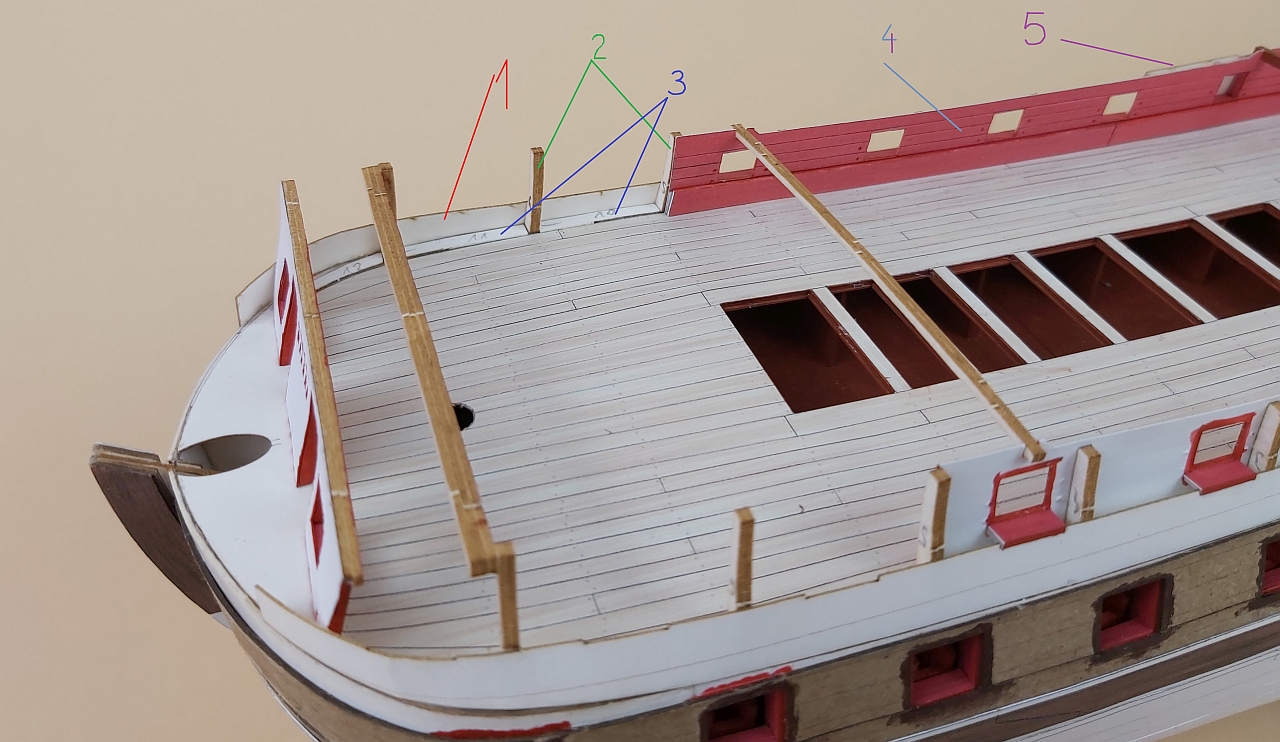
The gunports frames were gradually glued into the bulwark prepared in this way. And it worked, because even if there were slight shifts in relation to the internal and external openings, pasting separate individual parts of the frames hid and eliminated minor errors.
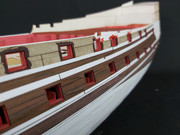
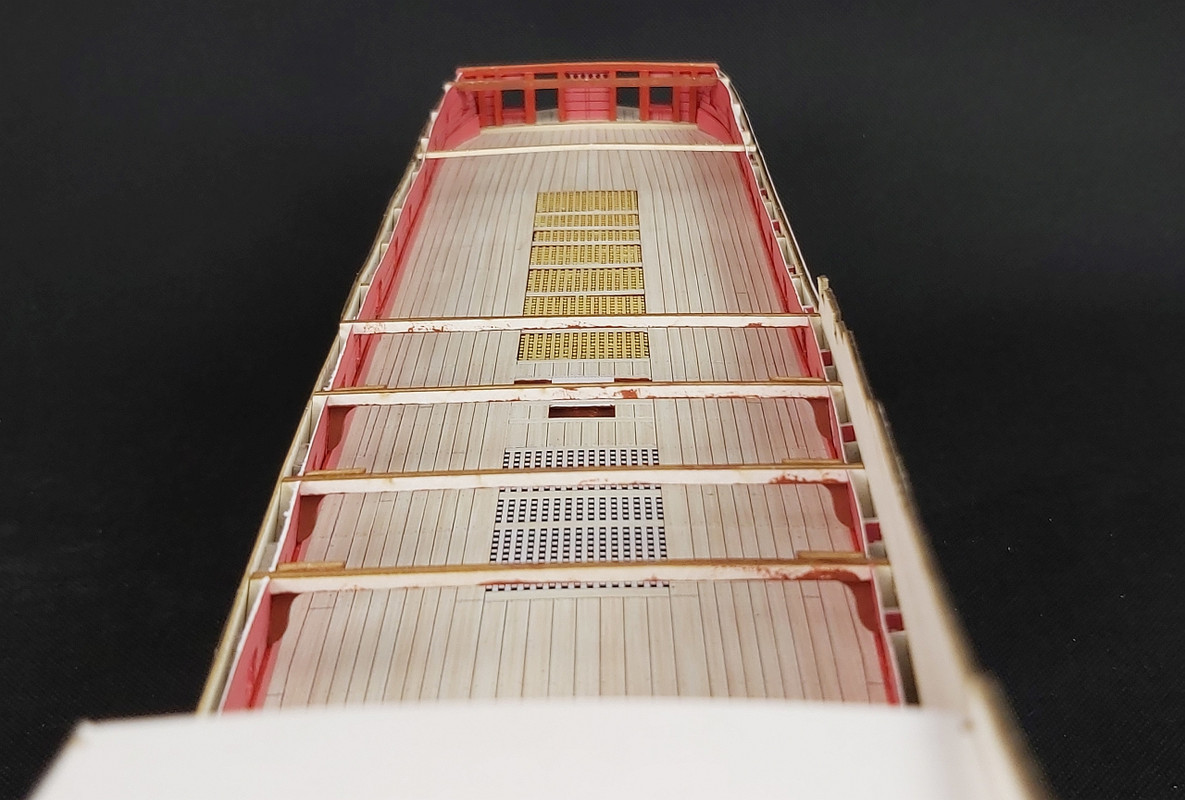
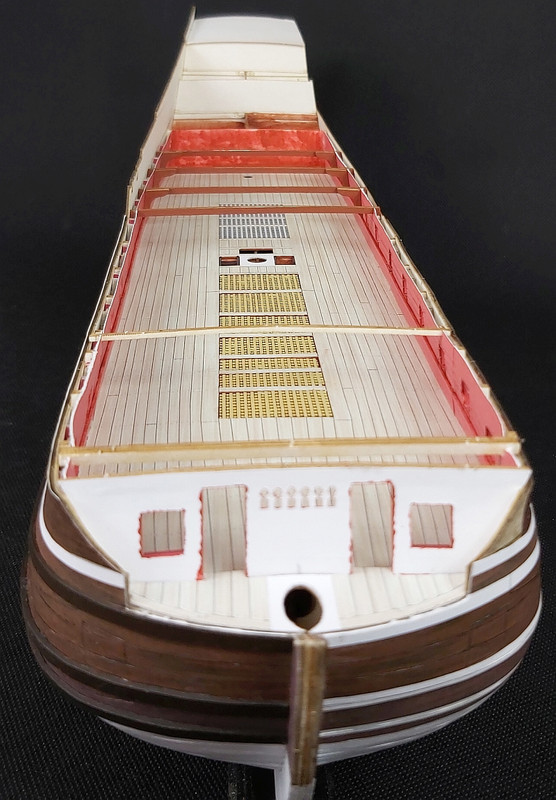
The front wall was created, but now it has only a structural role and you still have to wait for its decoration and charm:

I don't even remember why, but I glued some parts of the planking three or even four times:
or I printed the wrong version and after gluing something did not fit, or I wanted to change something, and after gluing I came to the conclusion that the previous version was better, etc. etc. The strained material can be seen e.g. at the last gunport at the stern:
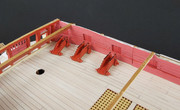
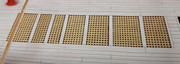
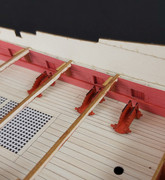
I put in the gratings and some of the gun carriages.
Some artillery will be hardly visible, so I treated it as a sample. However, midship artillery will be printed and cut out manually - it will take more time, but I'm expect a better effect. It is comforting that you can use 2 mm blocks - you will always see what you are doing without a microscope:
Best wishes
Tomek
Bill