Billing Boats - Friese Tjalk -398

Joined
May 27, 2021
Messages
38
Points
58

Location
Brugge, Belgium
Hi everyone,

Well, it finally happens, my first Post on SOS. I've been active on other forums, not only ship modeling, and have been a member of this forum for a while now. I have a few projects that are ongoing but undocumented. Given that these are pretty time-consuming, I decided to go for an 'in-between', not too complicated kit, and the choice fell on this Billing boats kit.

I know that Billing kits often are basic and can be improved. So I plan to add details or do some scratch building where I deem this to be a requirement, or an interesting addition to the kit.

Photo's do more justice than words, so here goes:


Good morning fellow builders,

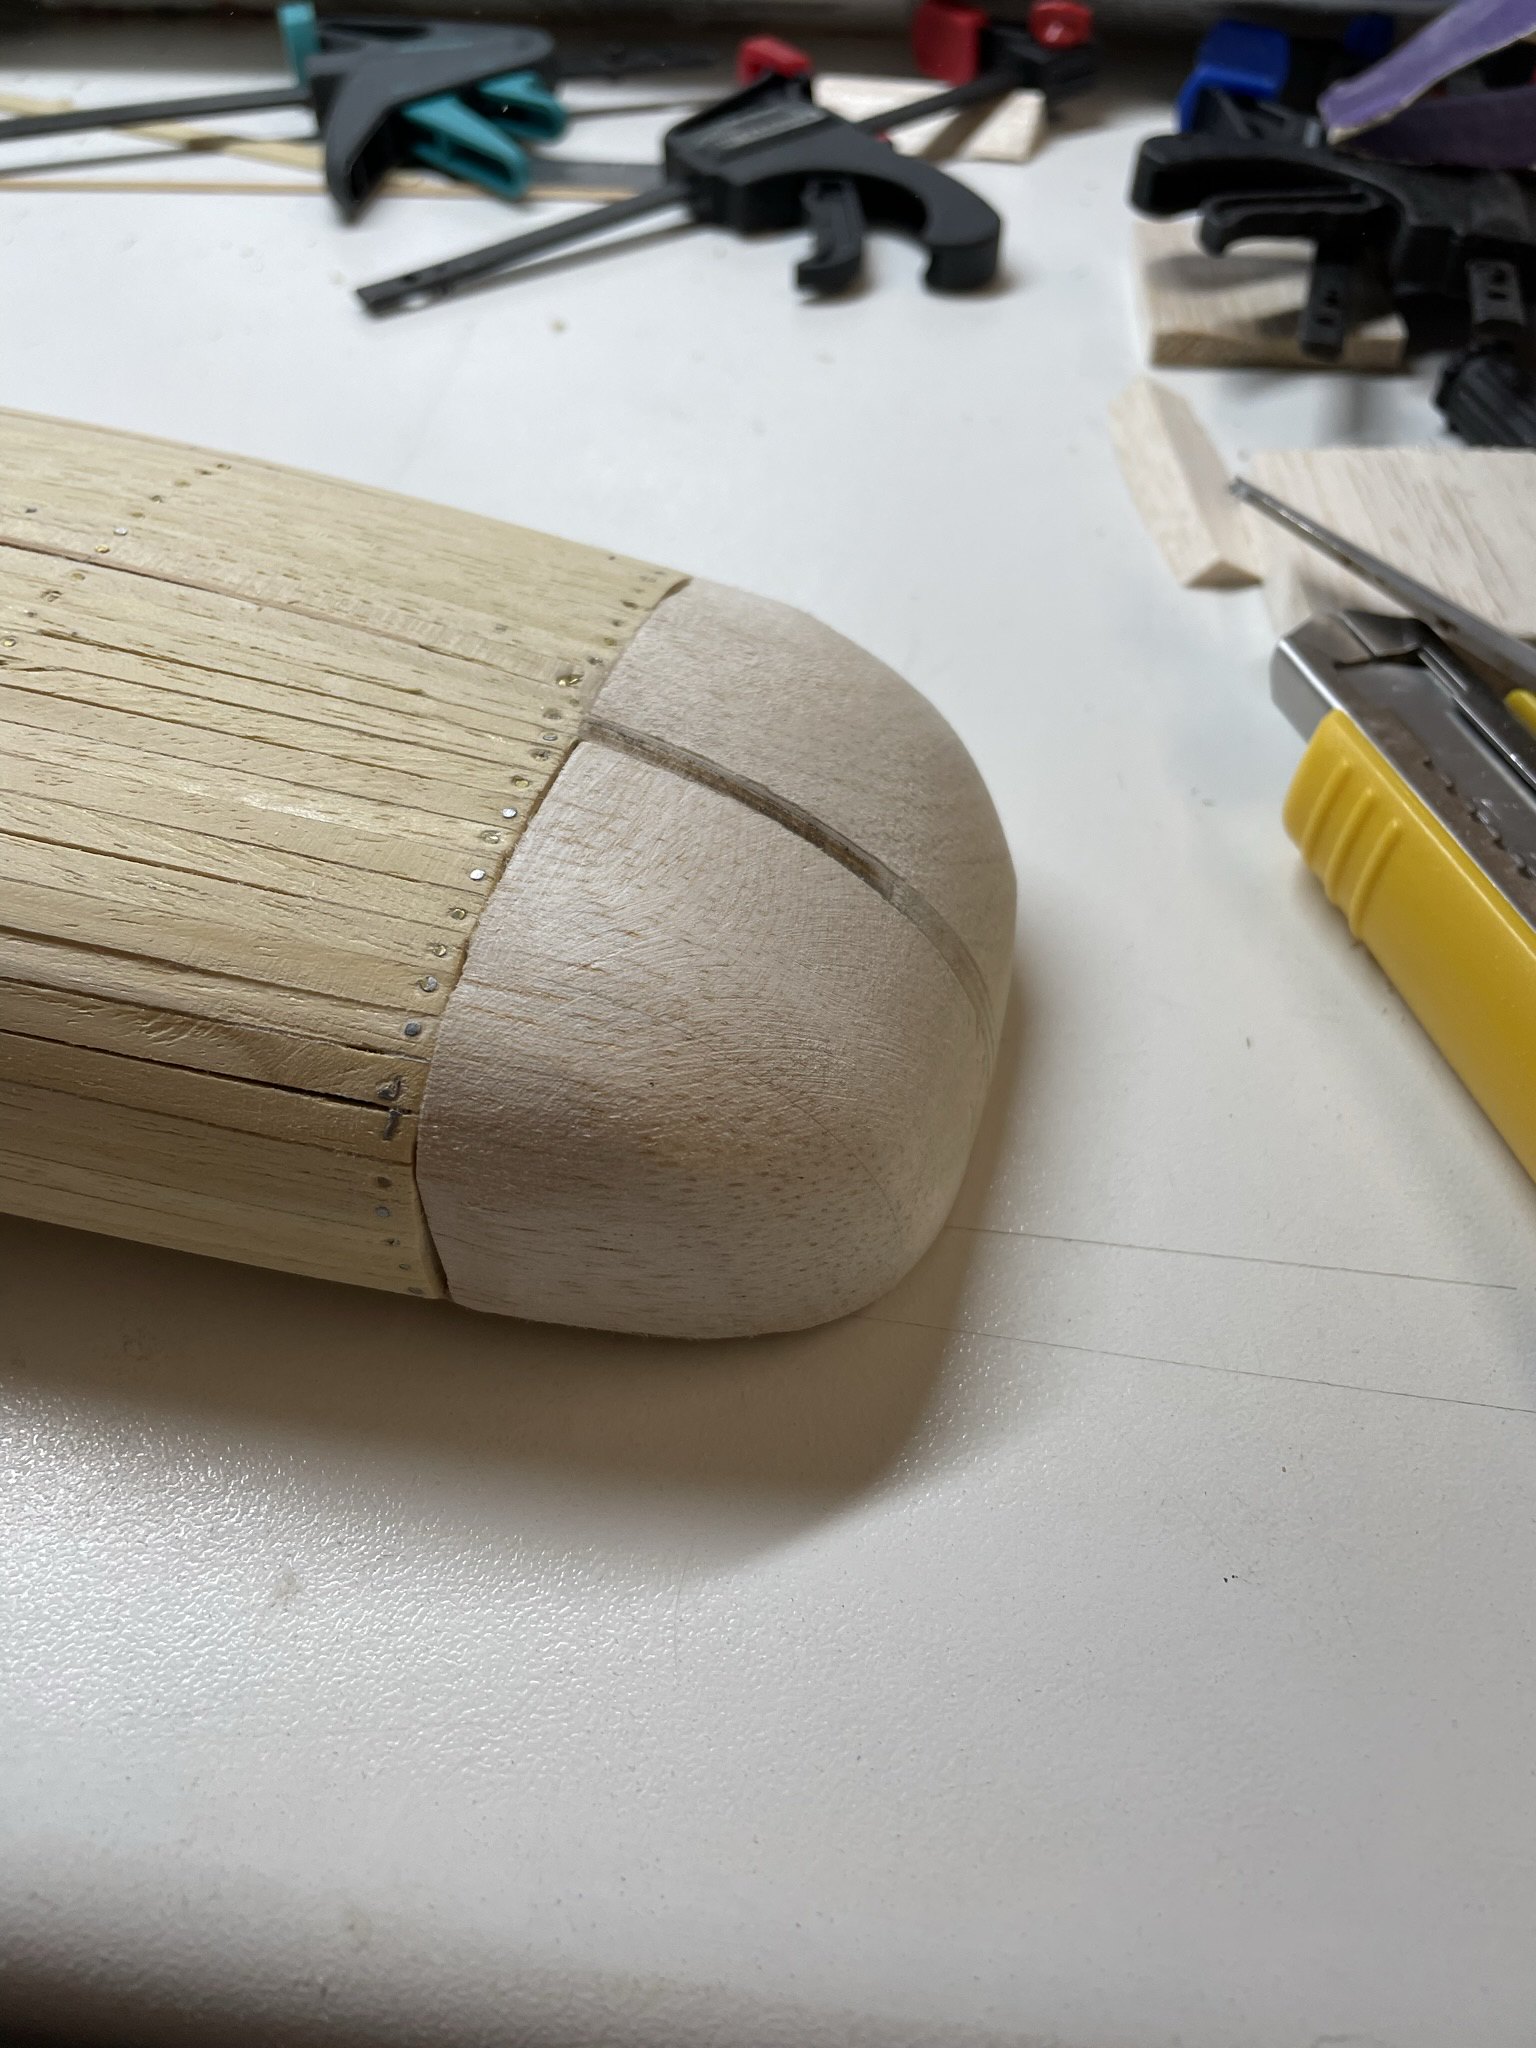
Some more progress on the Billing Tjalk. Planking of the hull is done where, according to the instructions, both ends of the hull are filled with balsa blocks that have to be sanded to shape. This makes planking easy as it avoids bending at stem & stern. The hull will be painted, so wood filler & sanding is the process applied.

Photos say more than words so here goes:

1) Planking using small nails:


2) The ends are being filled with balsa wood blocks and shaped:


3) Once the Balsa blocks are shaped, we apply wood filler across the whole hull. This fills any gaps and levels imperfections. Once dry the hull is sanded to attain a smooth finished surface. I use regular wood filler that I buy at a DIY store. The final result was reached after 3 filling and sanding sessions.


4) Once the hull was done, preliminary work starts on the small cabin.


That's it for now, more to come soon.

Kind regards,

Dirk
 
Y very interesting ship model your are building ..... many thanks for starting the log
 
Y very interesting ship model your are building ..... many thanks for starting the log
Thanks @Uwek . It is a small and basic kit, but I like the challenge to upgrade it and make it into something that is at a higher level than an OOB build. We have not yet come to the point of improving, but that will come soon.
Kind regards,
Dirk
 
Good afternoon fellow builders,

It was a known fact that Billing Boats kits usually come with some challenges, and this kit is no exception.
Instructions and plans are
The plans and instructions are brief and one has to find out a lot yourself, test, measure, compare, etc.
It also means that my intention to build this boat OOB has disappeared like snow in front of the sun.
Building this kit OOB would only yield half a boat I'm afraid.

The work on the hull is now as good as finished, here is the story:

- After filling with wood-filler, the hull was sanded and then given a layer of varnish.


- Next we install the keel:


- Once the hull is ready, the bulwarks must be placed. The kit includes 2 pieces of wood that should be cut into the right shape...
In addition, it is not clear in the instructions how the bulwark can be attached to the hull in a correct but firm manner. This is the only picture in the manual:


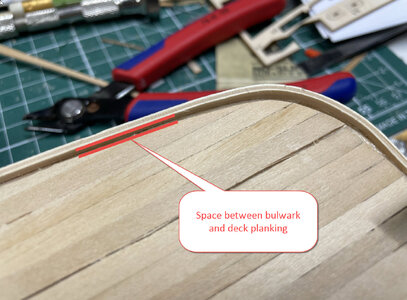
- Since the hull does not have any place where the curved bulwark can be securely attached, I decided, after some thought, to plank the deck with 2mm thick slats, and then place the top bulwarks at the same height, creating a slot around the deck of 2mm. The bulwark fits perfectly into it and can therefore be firmly glued.


romp-english.jpg
- Once we were done with this, the next challenge popped up. The shape of the bulwark does not match the curve of the hull. There is certainly a clearance of 5mm so that the bulwark in the middle of the hull does not touch the hull.


- Following solution was applied:
  • The curved ends of the bulwark (part of the kit) were cut off and place at the ends of the hull.


  • Then a new middle piece was made from a piece of duplex. As a base I used the part from the kit, and then correctly marked the curvature and cut it out of the Duplex. On the right side of the picture is part of the kit, on the left the new custom part.


  • Now all fits well.
- Here is the hull after the adjustment works:
 
Good afternoon fellow builders,

The cabin was further finished and here too we had to conclude that the kit is very rudimentary.
Since we have thrown the OOB principle overboard, we have improved this part of the boat.

The structural work had already been assembled (see previous post) and it continues as follows:

1) According to the kit instructions, the windows with shutters are built as follows:


So, obviously open for improvement:
- We added a window frame to make the windows look more realistic.
- We glued the hatches to the rails and provided them with a handle.
- The windows were fitted with a acrylic pane with a paper curtain behind it.


The door was also fitted with hinges and doorknobs.


Subsequently, the roof hatches were installed and fitted with metal brackets.


Subsequently, a fence was provided on the roof with rope.


As well as a chimney and support bracket for the sail mast.


And after a few coats of paint, this is the end result of the cabin.


Here is a comparison between the version according to the Billing kit (left) and the improved version (right):

 
Hi everyone,

Well, it finally happens, my first Post on SOS. I've been active on other forums, not only ship modeling, and have been a member of this forum for a while now. I have a few projects that are ongoing but undocumented. Given that these are pretty time-consuming, I decided to go for an 'in-between', not too complicated kit, and the choice fell on this Billing boats kit.

I know that Billing kits often are basic and can be improved. So I plan to add details or do some scratch building where I deem this to be a requirement, or an interesting addition to the kit.

Photo's do more justice than words, so here goes:
Hallo @leysend
we wish you all the BEST and a HAPPY BIRTHDAY
Birthday-Cake
 
Hallo Zuiderbuur! (Hollander hier) ;-)

Fantastic build and great improvements to the kit!
I don't know how important historical accuracy is to you (to me it isn't).
I'd just like to point out that these ships were/are built in steel, including the deck and deck-house.
Window shutters and other details, cargo hatches, 'zwaarden', masts and rudder are -almost always- wood.

Looking forward to the next steps!
groet,
John
 
Hallo John,

Thanks for the compliments and information. I wasn't sure about the boat's construction materials and the kit has no information on this either.
I suspected the hull to be metal, going by pictures I found on the web; but the deck was unclear to me.

The hull has been filled, sanded, and varnished, and will be painted, so this will for sure look as if it's a metal hull. I will leave the deck as is so this will be an exception.

Dirk
 
Back
Top