You are using an out of date browser. It may not display this or other websites correctly.
You should upgrade or use an alternative browser.
You should upgrade or use an alternative browser.
A new carving project - a lion figurehead of the ship la Belle Poule
- Joined
- Apr 20, 2020
- Messages
- 5,180
- Points
- 738

thank you very much my dear friend, you and The professional members who are partners in our special forum are an inspiration to meA much better effort which is testimony to your dedication and commitment.

- Joined
- Mar 11, 2020
- Messages
- 154
- Points
- 143

WOW, that is some amazing carving skills you are showing here. I have a somewhat difficult time with carving in 3D. I can do 2D which the Zeehaen has several pieces of. As Maarten said, "you have to think in 3D.
Marcus
Marcus
- Joined
- Apr 20, 2020
- Messages
- 5,180
- Points
- 738

Innate skill and patience. Your progress is astounding
thank you very much my dear friendsWOW, that is some amazing carving skills you are showing here. I have a somewhat difficult time with carving in 3D. I can do 2D which the Zeehaen has several pieces of. As Maarten said, "you have to think in 3D.
Marcus
That looks very good,well done!!! Looking forward to seeing more as it takes shape.
Hi Shota,
Nice work on the crown. One tip, milling bits I only use for the course milling. The mill bits cut and are good for removing more material. Fine tuning you can do with a bit but then use diamond grinding bits, these sand away material which is a much slower and controlable process.
These are not expensive at all.
Last edited:
I have yet to try carving . Its on my bucket list. The one thing i know is that the more you work on something the better you get.
- Joined
- Apr 20, 2020
- Messages
- 5,180
- Points
- 738

Hello dear friends
Today I approached the main thing - carving the lion's body.
First I made sure that all relevant chisels intended for the job were properly sharpened.
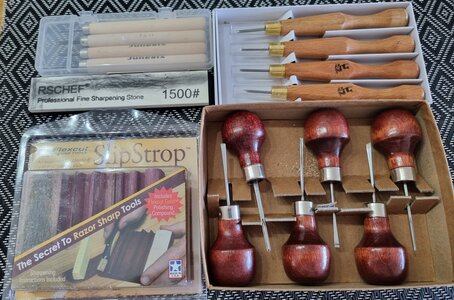
Today I used a sharpening kit based on leather and another lubricant, I am attaching a picture (my dear friend stuglo lent it to me).
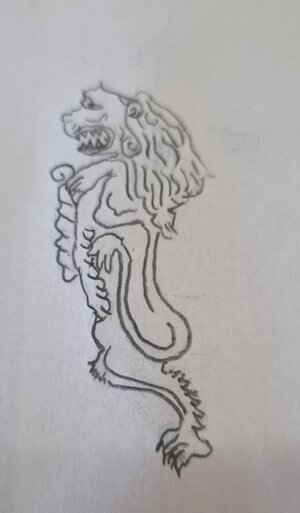
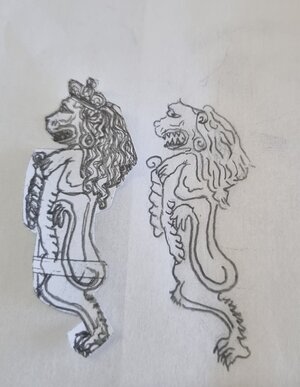
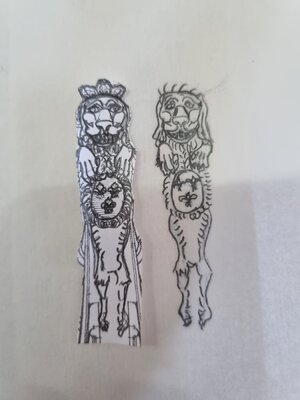
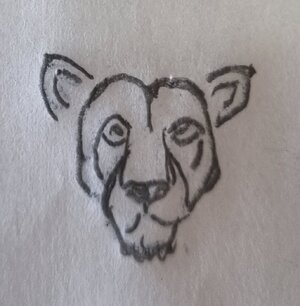
After about an hour of sharpening the chisels, I started Drawings of the figure of the lion, I used the drawings from the internet that teach in stages how to draw a lion, as well as its head.
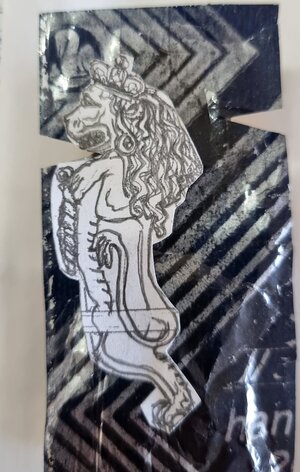
Later I drew with the help of blue copy paper that we used to decades ago for reproduction (before the era of home printers). In the carving course I took a few months ago, the teacher taught us the technique. I also used transparent wax paper that allows the drawing to be transferred to another surface/wood.
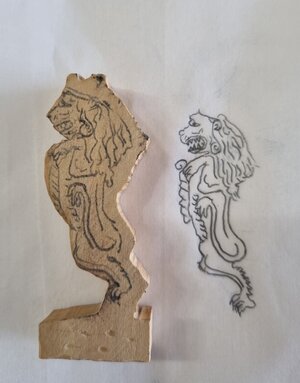
In the next step I transferred the drawing to the block of wood I cut a few weeks ago. It is clear to me that some of the drawings will be erased during the carving, but they should help me with the three-dimensional vision of the carving.
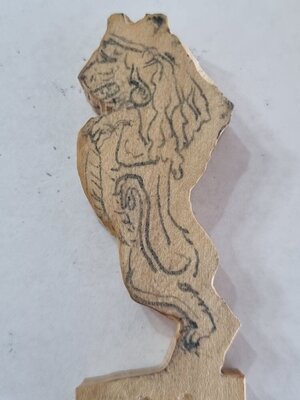
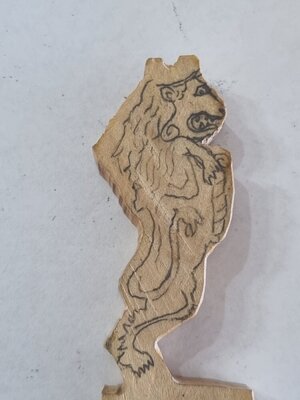
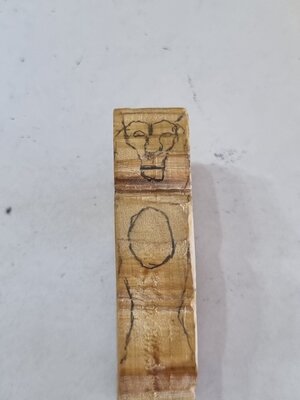
After all these preparations I started carving slowly. While working, the block of wood began to take on the future configuration of the lion. Don't worry, I have a lot more and complex work waiting for me, especially the delicate carvings of the small detail
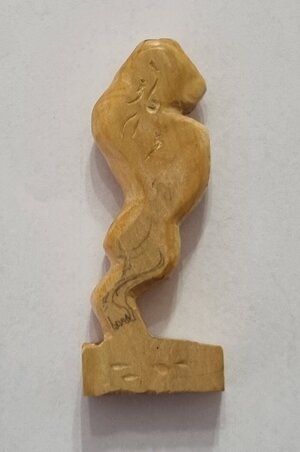
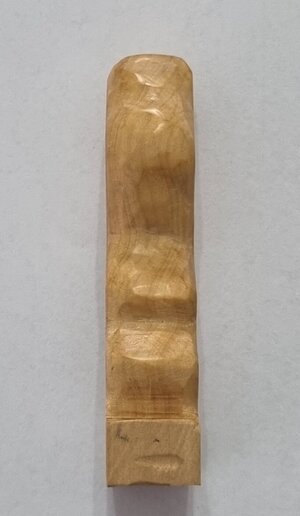
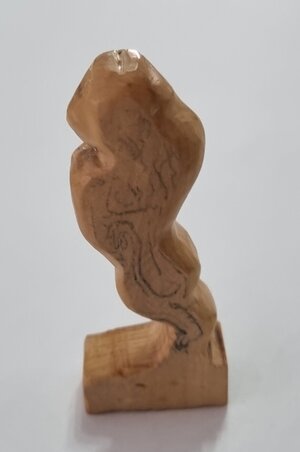
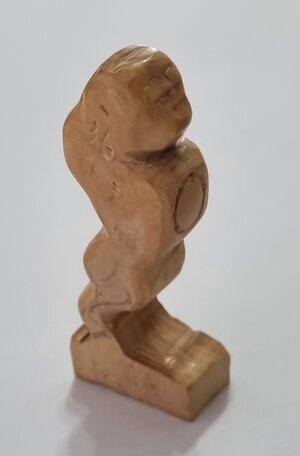
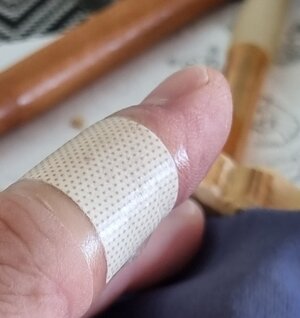
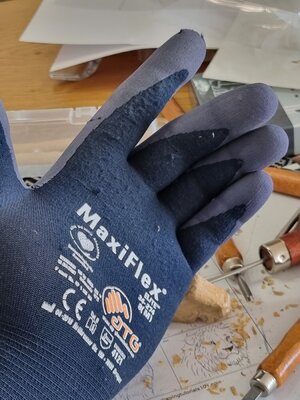
Unfortunately, this time too I managed to cut my finger even though I was wearing a work glove, it turns out that the sharpening was good (this time the cut was less deep)
I wish you all a pleasant and enjoyable weekend
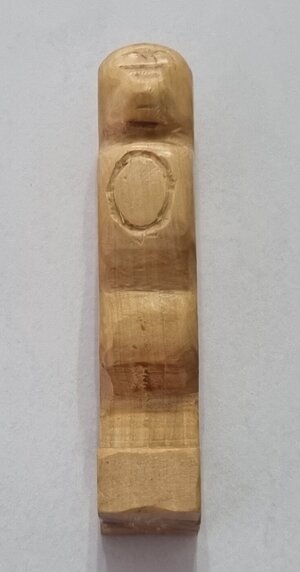
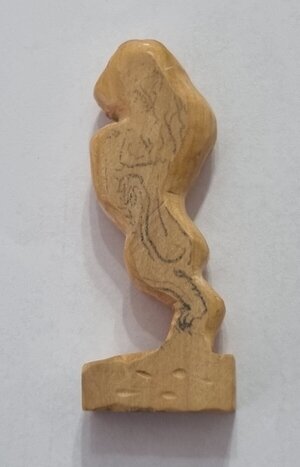
Today I approached the main thing - carving the lion's body.
First I made sure that all relevant chisels intended for the job were properly sharpened.
Today I used a sharpening kit based on leather and another lubricant, I am attaching a picture (my dear friend stuglo lent it to me).

After about an hour of sharpening the chisels, I started Drawings of the figure of the lion, I used the drawings from the internet that teach in stages how to draw a lion, as well as its head.


Later I drew with the help of blue copy paper that we used to decades ago for reproduction (before the era of home printers). In the carving course I took a few months ago, the teacher taught us the technique. I also used transparent wax paper that allows the drawing to be transferred to another surface/wood.

In the next step I transferred the drawing to the block of wood I cut a few weeks ago. It is clear to me that some of the drawings will be erased during the carving, but they should help me with the three-dimensional vision of the carving.


After all these preparations I started carving slowly. While working, the block of wood began to take on the future configuration of the lion. Don't worry, I have a lot more and complex work waiting for me, especially the delicate carvings of the small detail


Unfortunately, this time too I managed to cut my finger even though I was wearing a work glove, it turns out that the sharpening was good (this time the cut was less deep)


I wish you all a pleasant and enjoyable weekend


- Joined
- Apr 20, 2020
- Messages
- 5,180
- Points
- 738

my dear friendThe hand chiseling seems to give a much "smoother" look to the wood than the milling bits. That was good advice. Just take care with the sharp tools.
thank you very much for the support and Compliments
- Joined
- Apr 20, 2020
- Messages
- 5,180
- Points
- 738

my dear friendHi Shota,
Nice work on the crown. One tip, milling bits I only use for the course milling. The mill bits mill bits cut and are good for removing more material. Fine tuning you can do with a bit but then use diamond grinding bits, these sand away material which is a much slower and controlable process.
These are not expensive at all.
thank you very much for the support , and for the link to those mill bits , I ordered them
- Joined
- Apr 20, 2020
- Messages
- 5,180
- Points
- 738

Dear KevinI have yet to try carving . Its on my bucket list. The one thing i know is that the more you work on something the better you get.
thanks that you're interested, I agree with you, The practical training creates experience and ability.
- Joined
- Apr 20, 2020
- Messages
- 5,180
- Points
- 738

Dear GAStenThat looks very good,well done!!! Looking forward to seeing more as it takes shape.
thank you very much for the support and Compliments
Hi Shota,
There are special working gloves with cutting protection.

 www.bowork.nl
There are even steel handgloves used by oyster cutters.

 www.bowork.nl
Be aware to keep the rubber surface of your glove on the inside of your handpalm.
There are special working gloves with cutting protection.

SafetyJogger Shield Snijbestendige Werkhandschoenen
Snijbestendige werkhandschoenen | SafetyJogger Shield De Shield werkhandschoenen van SafetyJogger zijn naadloze snijbestendige werkhandschoenen die grip, veiligheid en vingergevoeligheid garanderen. De Shield is gemaakt van Polyethyleen met een PU coating voor grip. Deze veiligheidshandschoenen...
There are even steel handgloves used by oyster cutters.

Maliënkolder handschoen RVS
Snijbestendige maliënkolder werkhandschoen Deze snijbestendige maliënkolder werkhandschoenen zijn gemaakt van roestvrij staal vlechtwerk. Ze bieden maximale bescherming tegen snij en steekwonden door dit ringvlechtwerk van chroomnikkelstaal. De handschoenen zijn zowel links- als rechtsdragend -...
Be aware to keep the rubber surface of your glove on the inside of your handpalm.
- Joined
- Apr 20, 2020
- Messages
- 5,180
- Points
- 738

thanks, my Dear friendHi Shota,
There are special working gloves with cutting protection.

SafetyJogger Shield Snijbestendige Werkhandschoenen
Snijbestendige werkhandschoenen | SafetyJogger Shield De Shield werkhandschoenen van SafetyJogger zijn naadloze snijbestendige werkhandschoenen die grip, veiligheid en vingergevoeligheid garanderen. De Shield is gemaakt van Polyethyleen met een PU coating voor grip. Deze veiligheidshandschoenen...www.bowork.nl
There are even steel handgloves used by oyster cutters.

Maliënkolder handschoen RVS
Snijbestendige maliënkolder werkhandschoen Deze snijbestendige maliënkolder werkhandschoenen zijn gemaakt van roestvrij staal vlechtwerk. Ze bieden maximale bescherming tegen snij en steekwonden door dit ringvlechtwerk van chroomnikkelstaal. De handschoenen zijn zowel links- als rechtsdragend -...www.bowork.nl
Be aware to keep the rubber surface of your glove on the inside of your handpalm.
Witaj
Jestem pełen podziwu dla Ciebie że podjąłeś się takiego wyzwania. Czymam kciuki za powodzenie twojego projektu . Pozdrawiam Mirek
WitajHello dear friends
Today I approached the main thing - carving the lion's body.
First I made sure that all relevant chisels intended for the job were properly sharpened.
Today I used a sharpening kit based on leather and another lubricant, I am attaching a picture (my dear friend stuglo lent it to me).
View attachment 319716
After about an hour of sharpening the chisels, I started Drawings of the figure of the lion, I used the drawings from the internet that teach in stages how to draw a lion, as well as its head.
View attachment 319717View attachment 319718View attachment 319720View attachment 319721
Later I drew with the help of blue copy paper that we used to decades ago for reproduction (before the era of home printers). In the carving course I took a few months ago, the teacher taught us the technique. I also used transparent wax paper that allows the drawing to be transferred to another surface/wood.
View attachment 319722
W kolejnym kroku przeniosłem rysunek na wycięty kilka tygodni temu klocek drewna. Jest dla mnie jasne, że niektóre rysunki zostaną wymazane podczas rzeźbienia, ale powinny mi pomóc w trójwymiarowej wizji rzeźby.
View attachment 319725View attachment 319726View attachment 319727View attachment 319728
Po tych wszystkich przygotowaniach zacząłem powoli rzeźbić. Podczas pracy drewniany blok zaczął przybierać przyszłą konfigurację lwa. Nie martw się, czeka mnie o wiele więcej i bardziej skomplikowana praca, zwłaszcza delikatne rzeźbienia drobnego detalu
View attachment 319731View attachment 319733View attachment 319734View attachment 319735
Niestety i tym razem udało mi się skaleczyć palec mimo, że miałem na sobie rękawicę roboczą, okazuje się, że wyostrzenie było dobre (tym razem cięcie było mniej głębokie)
View attachment 319736View attachment 319737
Życzę wszystkim miłego i udanego weekendu
View attachment 319729
View attachment 319730
Jestem pełen podziwu dla Ciebie że podjąłeś się takiego wyzwania. Czymam kciuki za powodzenie twojego projektu . Pozdrawiam Mirek
- Joined
- Apr 20, 2020
- Messages
- 5,180
- Points
- 738

Dziękuję bardzo kochany MirekWitaj
Witaj
Jestem pełen podziwu dla Ciebie że podjąłeś się takiego wyzwania. Czymam kciuki za powodzenie twojego projektu . פוזדרוויאם מירק
Thank you very much dear Mirek
- Joined
- Sep 3, 2021
- Messages
- 4,264
- Points
- 688

Hello Shota,
What a brave undertaking to sculpt your own figurehead, my respect!
I also commend you for your perseverance, this is the kind of project I would walk away from.
Looking forward to your next steps and of course the final result.
Johan
What a brave undertaking to sculpt your own figurehead, my respect!
I also commend you for your perseverance, this is the kind of project I would walk away from.
Looking forward to your next steps and of course the final result.
Johan


