Cross-section of a 17th-century Pinas by Peter

Good morning Peter. Stunning work. I agree that drawing wood through a draw plate is the way to go with treenails. I wish I had done this. Cheers Grant

Thanx for the compliment Grant, and who knows, in a next build you can always try it, i have to say, it is a lot of work, but the looks is fantastic
 
it has been almost 3 weeks since the last update, so it is about time to show something.

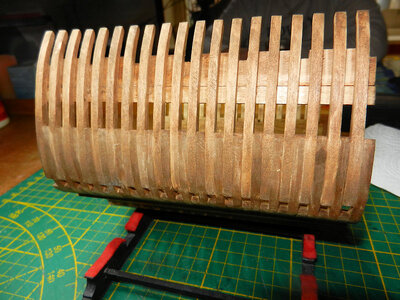
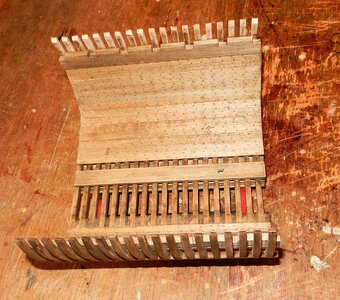
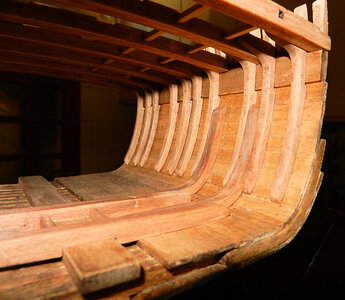
I stained the crossection first, and this was the result

DSCN5455.jpg.JPGDSCN5456.jpg.JPG

I think that the sight of the treenails is quite good, and i like it.
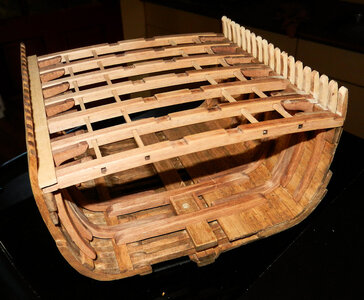
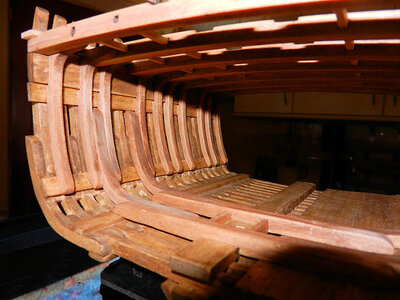
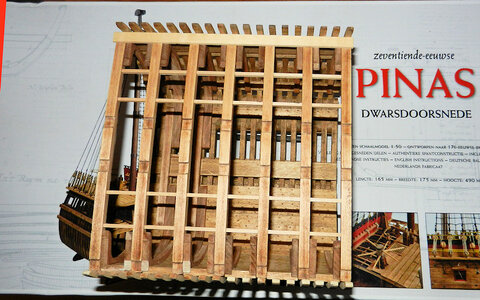
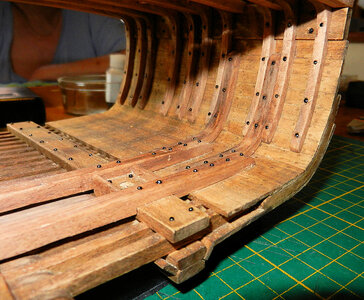
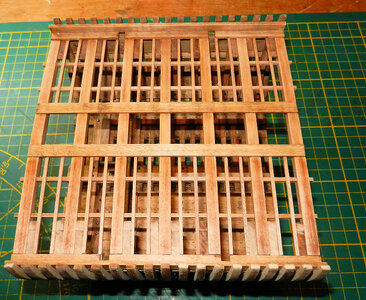
After this, it was time to place the Maststep, the Beams and the Knees, i also placed the Carlings.
Except for the knees and the Maststep, everything is dry-fit, because i also want to place some iron bolts in the knees, the maststep, and the Keelson.
I don't know how i will do this, but i'll try something out on some spare wood, in the next updat i hope to show you some of it.

DSCN5489.jpg.jpg.JPG

DSCN5492.jpg.JPG

DSCN5493.jpg.JPG

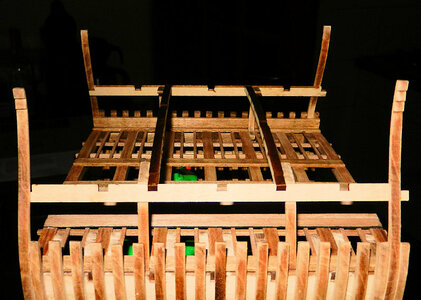
And last, an overvieuw of the Deckbeams and the Carlings

DSCN5495.JPG

I'll see you all next time.
 
it has been almost 3 weeks since the last update, so it is about time to show something.

I stained the crossection first, and this was the result

View attachment 443328View attachment 443329

I think that the sight of the treenails is quite good, and i like it.
After this, it was time to place the Maststep, the Beams and the Knees, i also placed the Carlings.
Except for the knees and the Maststep, everything is dry-fit, because i also want to place some iron bolts in the knees, the maststep, and the Keelson.
I don't know how i will do this, but i'll try something out on some spare wood, in the next updat i hope to show you some of it.

View attachment 443330

View attachment 443331

View attachment 443332

And last, an overvieuw of the Deckbeams and the Carlings

View attachment 443333

I'll see you all next time.
The staining and the outcome of the treenailing looks very nice, Peter.
The deck breams gives her body.
Regards, Peter
 
it has been almost 3 weeks since the last update, so it is about time to show something.

I stained the crossection first, and this was the result

View attachment 443328View attachment 443329

I think that the sight of the treenails is quite good, and i like it.
After this, it was time to place the Maststep, the Beams and the Knees, i also placed the Carlings.
Except for the knees and the Maststep, everything is dry-fit, because i also want to place some iron bolts in the knees, the maststep, and the Keelson.
I don't know how i will do this, but i'll try something out on some spare wood, in the next updat i hope to show you some of it.

View attachment 443330

View attachment 443331

View attachment 443332

And last, an overvieuw of the Deckbeams and the Carlings

View attachment 443333

I'll see you all next time.
Good afternoon Peter. Looking good!!! I also like the way your treenails have come out with the stain. The beams etc all fit really and ready to go. Cheers Grant
 
Good afternoon Peter. Looking good!!! I also like the way your treenails have come out with the stain. The beams etc all fit really and ready to go. Cheers Grant
You completely nailed it Grant, i love the outcome of the treenails as well, and the fitting of the deckbeams and the knees etc, is spoton, just a bit of filddling with some sandpaper, and it is looking good.
 
It is time for an update of the crossection of the Pinas, I first put some bolts in the heavyer parts of the construction, such as the Keelson, Deckbeamshelfs, the Knees, and the Maststep.
At first i have been trying to copy the handforged bolts with the square head, but i could not get them right, there was to much difference in the size of the boltheads. It now looks like this.

DSCN5535.JPG

Then i went on to the deck, the Nibbingstrakes where placed and after that the spirkettings ( one of the Spirkettings was taken away again, because it was not placed correctly ), the Binding Strakes came also in place
The Ledges have been made,

DSCN5527.JPG

and after the placement of the Ledges, the crossection looked like this.
I am quite satisfied in the way it is looking

DSCN5532.JPG

Now was the time to place the first Deck Shelves, and i am sorry to say, i was a bit to fast with the stain, because the treenailing has to be done as well, of course. But there is a solution for everything, so that wil be done a bit later as planned.
And then the time came for the Top Timbers, first i did the Top Timbers at the front of the model, and when the glue had dried the Timbers of the rearend where placed
After this was done, it was time to check if everything could pass the quality control, and unfortunatly this was not the case.
The Top Timbers at the rear stood perfectly upright, but the Timbers at the front stood lousy, the model became to wide for the Deck Beam Shelves of the main deck, so they where removed, for a re-do,
After this correction the model looked like this:

DSCN5555.JPG

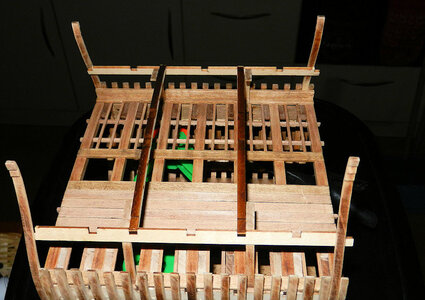
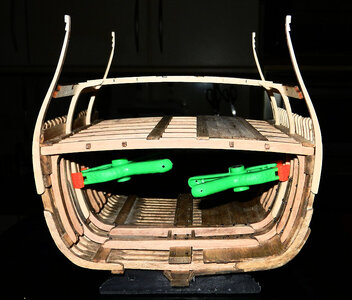
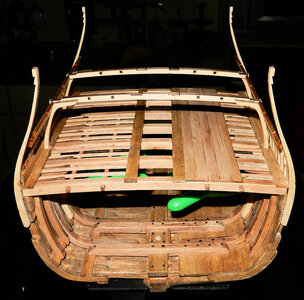
As you can see, i could not resist the temporarely placement of the Trusses, and the Deck Beam Shelves of the maindeck, together with a couple of deckbeams, so i could see if i am still on the right track, and it looks like i am.
I am very happy with it. I think it is looking great like this.
A few more pictures of how it is looking at this moment.

DSCN5557.JPG

DSCN5558.JPG

DSCN5559.JPG

That is all for now, see you next time.
 
It is time for an update of the crossection of the Pinas, I first put some bolts in the heavyer parts of the construction, such as the Keelson, Deckbeamshelfs, the Knees, and the Maststep.
At first i have been trying to copy the handforged bolts with the square head, but i could not get them right, there was to much difference in the size of the boltheads. It now looks like this.

View attachment 448600

Then i went on to the deck, the Nibbingstrakes where placed and after that the spirkettings ( one of the Spirkettings was taken away again, because it was not placed correctly ), the Binding Strakes came also in place
The Ledges have been made,

View attachment 448607

and after the placement of the Ledges, the crossection looked like this.
I am quite satisfied in the way it is looking

View attachment 448608

Now was the time to place the first Deck Shelves, and i am sorry to say, i was a bit to fast with the stain, because the treenailing has to be done as well, of course. But there is a solution for everything, so that wil be done a bit later as planned.
And then the time came for the Top Timbers, first i did the Top Timbers at the front of the model, and when the glue had dried the Timbers of the rearend where placed
After this was done, it was time to check if everything could pass the quality control, and unfortunatly this was not the case.
The Top Timbers at the rear stood perfectly upright, but the Timbers at the front stood lousy, the model became to wide for the Deck Beam Shelves of the main deck, so they where removed, for a re-do,
After this correction the model looked like this:

View attachment 448616

As you can see, i could not resist the temporarely placement of the Trusses, and the Deck Beam Shelves of the maindeck, together with a couple of deckbeams, so i could see if i am still on the right track, and it looks like i am.
I am very happy with it. I think it is looking great like this.
A few more pictures of how it is looking at this moment.

View attachment 448617

View attachment 448618

View attachment 448619

That is all for now, see you next time.
Nice progress and nice pictures, Peter.
Regards, Peter
 
Back
Top