Question: about second planking

Joined
Feb 1, 2024
Messages
165
Points
103

Location
Santimbù (Bergamo - Italia)
And here I am, as usual, asking you for advice.
1) we are talking about second planking
2) as I said I bought 5 x 0.5 mm walnut strips
3) the hull is 500mm long
4) what glue should I use? contact glue or quick vinyl?
5) do I cut the slats to 80.. 120 mm or leave them whole?
Thank you
 
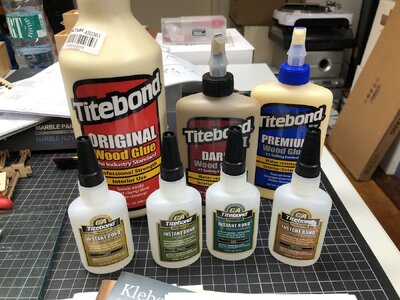
to 4) you have a wooden base with your first planking, so I agree here with Brian - why not wood glue - if you use one which is water based you can also remove if necessary - and there are wood glues which are drying already after some minutes
I combine this sometimes with superglue - there are some special ones existing for wood from

IMG-6633.jpg

Vinyl glues I am not using

to 5) It is more work to make shorter "planks", but the result is more realistic and is looking like real planking - also it is not easy, definitely not easy to adjust a plank correctl at the bow and also at the stern using one plank for the whole length of the model - you als did not make it on your first planking - imagine you have to make such a planking and it will be visible at the end
you are reducing problems with shorter planks
 
Bryian .. UweK...
I think I followed your advice "enough".
I use a quick PVA glue and the usual CA glue in the critical places.
For the slats I decided to cut them 100 mm which seems like a good compromise..
Grazie per la vostra pazienza e disponibilità ... ops ... thank you for your patience and availability

colle.jpg
 
4) I have always used contact glue (Bostik 99) to glue the second planking of all the models made so far and I am now using it for the Victory Panart model I am building. Once the glue has been spread on the hull and on some strips of planking, just wait about an hour to let the glue solvents evaporate. Positioning is very simple because at that point the glue is no longer sticky and allows you to evaluate the positioning of the strips very well by slightly placing the pieces and applying pressure only when you are sure you want to glue them definitively. Once the parts have been compressed, the glue acts immediately and they no longer separate.

5) I prefer to position the strips whole, to have greater control over the curves and general appearance of the hull. However, once a strip has been positioned and before gluing the next one, I make vertical cuts with a scalpel, in order to simulate the planking boards in a more realistic way. The distance of the cuts depends on the scale of the model; for the Victory, which is 1:78 scale, I make cuts of approximately 8 /10 cm.
 
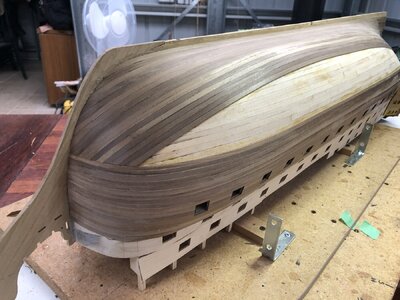
Morghy, I agree with Ismaele. I am 3/4 through second planking of my Caldercraft Victory and have followed Paul Vicker’s YouTube videos and used contact glue. We are using a SikaFlex Contact glue which I believe is available in most parts of the world and is an excellent, strong and easily applied contact cement.

The beauty of contact glueing is that it allows for errors. You have to apply the glue to both the hull and the new plank, but it is all quite calm and can be slow as the glue only really sticks permanently when you apply pressure (by rubbing with a hard stick, dowel or plastic against the first planking). Before that, some freedom is available to adjust position or shape of the second layer plank.

0769ACB4-B338-4136-A9D6-34D4CCCFDE4B.jpeg

Note I too am using Walnut which is 1.0 x 4mm. The change in plank orientation on this model, I have used for ease of application (minimal tapering and spoilers), and I am below the waterline with the change in orientation so it will be covered by coppering anyway. Above the waterline, the planking are tapered and with appropriate plank lengths for the model scale.

Hope this helps,

PeterG
 
I listened to everyone... I stole here and there... and here's my version.
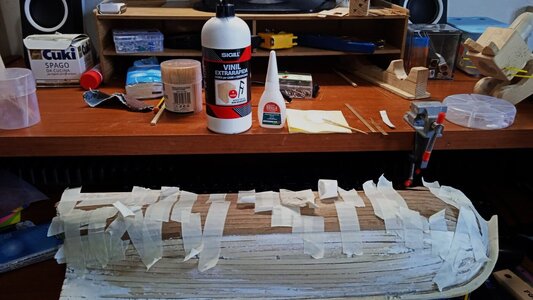
I used 100mm strips and some 50mm. For the glue I used a quick vinyl that hardens in 4 minutes.
I acted in this way:
I glue the first strip and block it with the tape..
I cut the second strip..
I spread the glue and glue it in place...
I block it with the tape and off I go..
I reached the end of the hull I noticed that about 7 minutes have passed... so the glue on the first strip has already done its job... I remove the tape and proceed with the second row of strips.
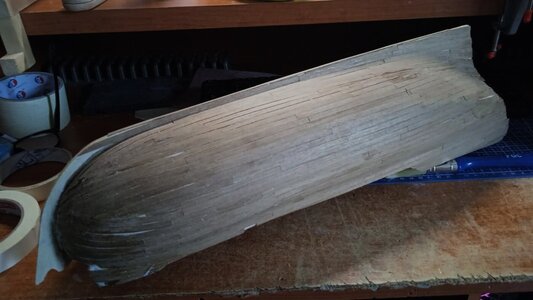
For the strips I used walnut 5 x 0.5 mm. I did one of the sides of the hull by wetting the slats but I wasn't very satisfied.
I made the second side with dry strips and with the help of CA super glue.
Now it's a matter of giving it a light sandpaper and we'll see what comes of it

fasciame_03.jpg
 
Last edited:
Back
Top