Revell 1/50 viking ship by DanBArt

Joined
Dec 23, 2023
Messages
15
Points
48

Location
Montana, United States
Hello All,
Though I'm really wanting to try wooden ship modeling, I'm really a plastic guy...nearly all my modeling experience has been in styrene. This one presents a unique challenge because it's a material I'm most familiar with but I'm tasked with making it look like an entirely different material! This has been difficult so far, but I think I'm getting the hang of some techniques that might work. I can't claim to have thought up the methods, only that this is my own attempt.
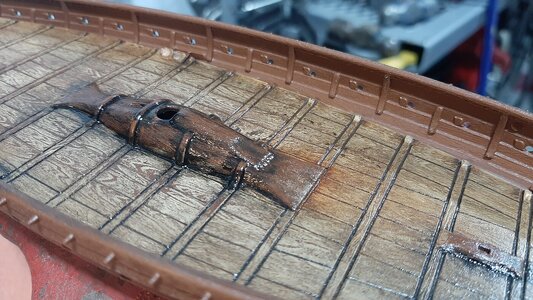
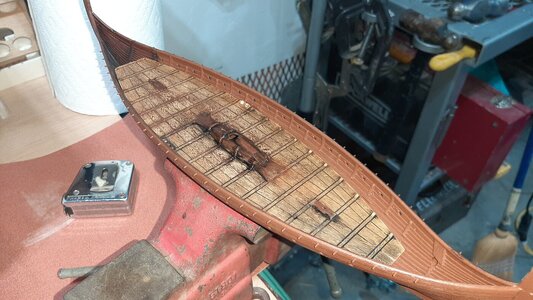
The Revell Germany kit has good...if a tad heavy...wood grain and texture molded into this kit. The base brown color is useful in some circumstances but I do wish they had mixed up the molding color a bit. I started experimenting on the main (only) deck with some Vallejo acrylics several years ago when I started the kit. It got boxed up for a couple moves until I played around with some artists oil paints on it today. I sanded the acrylic base (the color was a buff or tan of some sort) to reveal some of the darker wood grain below. Using dabs of Ivory Black, Burnt Sienna, and Titanium White, along with some linseed oil, I was able to work some color and variation into the existing acrylic base. I then just wiped it off to lighten and reveal some of the lighter graining below. I was careful to get some good darks deep into the recesses molded into the deck as well. Overall I'm pleased with the outcome thus far.
20231218_134521.jpg
20231218_134554.jpg
Since I'm feeling confident with my plans and technique for trying to simulate wood on the plastic, so I'm starting to think about the next construction phases of the model.
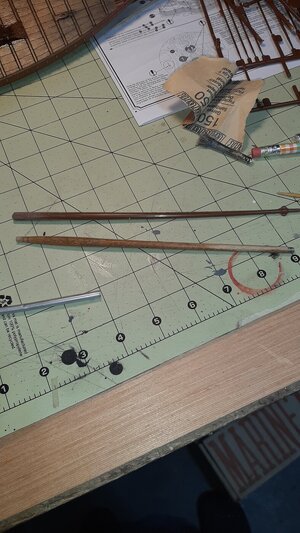
The kit mast is truly miserable. Aside from being bent out of the box and barely able to hold it's shape against gravity, I shudder to think what the meager amount of rigging tension that will be imposed on it would do to it. On top of that it is smooth and shiny, lacking any kind of texture or simulated wood grain. Usually that simulated grain is over the top, an occurrence that is all-too prevalent on this particular kit, but then a major piece like the mast is left devoid of any character at all. Odd.
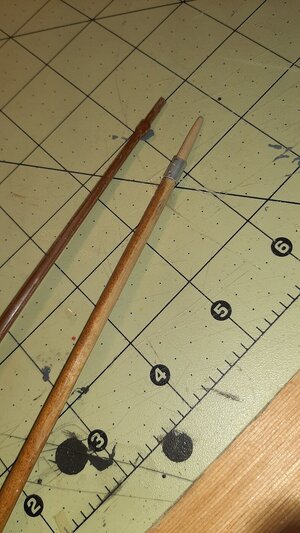
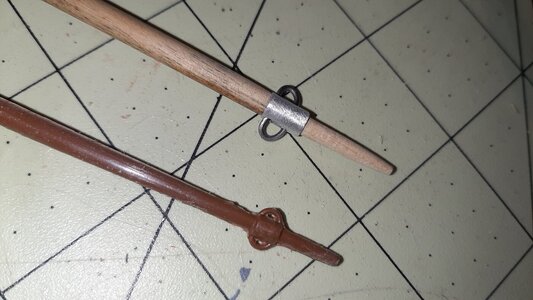
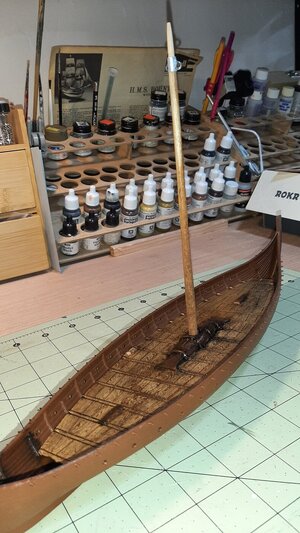
For a suitable replacement I only had to look at my junk brushes I use for weathering. One was a good diameter, length, and shape, not to mention having beautiful and fine grain. The cast-in rigging fitting at the top of the kit mast is nice, but nothing that I couldnt duplicate with some wire, aluminum tubing, and CA. I needed to build a new top portion of the mast above the fitting, which I accomplished by turning a dowel of bamboo (I think, a cooking skewar of some sort) down in my drill press with a file and sandpaper. The sanded portions of the mast will get some manner of stain to match the darker color of the mast, and the rigging fitting will likely be painted in some type of steel/rust combination.
Thanks for looking.
20231231_154509.jpg
20231231_160326.jpg
20231231_162639.jpg
20231231_163856.jpg
 
It's looking awesome so far. The wood grain effect with the paint looks amazing. Makes me wish I did more with this model, when I had it.
 
Thanks for following it. It will be slow-moving, just to warn you. Right now I only have a couple hours a week to dedicate to modeling. Using oil paints slows the process too. I appreciate your interest though.
 
I like what you have accomplished with both the wood grain effect on the styrene and the decision for the wood mast. Both look realist!
 
DanBArt- After looking at your job on this kit, I'm rethinking whether to buy it! Beautiful work!
Rick1011
 
Br
The kit mast is truly miserable. Aside from being bent out of the box and barely able to hold it's shape against gravity, I shudder to think what the meager amount of rigging tension that will be imposed on it would do to it. On top of that it is smooth and shiny, lacking any kind of texture or simulated wood grain. Usually that simulated grain is over the top, an occurrence that is all-too prevalent on this particular kit, but then a major piece like the mast is left devoid of any character at all. Odd.
Brother Dan:
Agreed on all counts. I would add that plastic spars are often inaccurate in regard to the longitudinal taper and/or the cross section. You're right to use wood. As far as simulated wood grain, it is almost always exaggerated and goes out where it should go in. In other words, the grain on real wood shows as small, linear indentations. Models often have the grain as lumps above the wood surface. Same for the joints between planks. Often, it's more accurate and better looking to sand off the "grain." Looking at a model can be thought of as looking at a real ship at a distance. Look at a real vessel from 50 feet away and if you can see the grain, that boat has problems.

Your Viking ship is looking good. Fair winds!
 
Thanks to all for the responses! The kit is looking good if I do say. I'm pleased with the meager progress, especially given the small amount of time I am able to put into it every week...perhaps a couple hours...and the fact that I haven't modeled in several years. I had begun to worry that I may be losing my dexterity and vision for it, but its coming back to me quicker than I'd hoped.
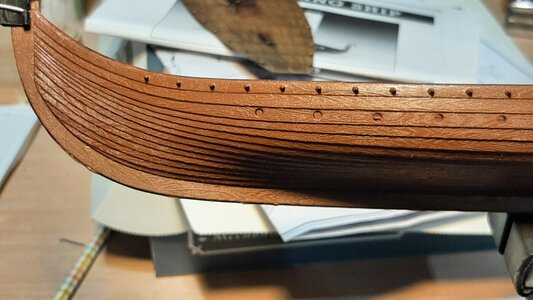
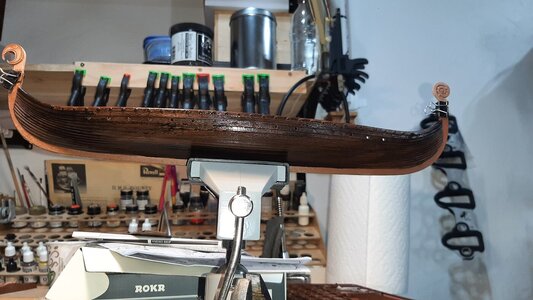
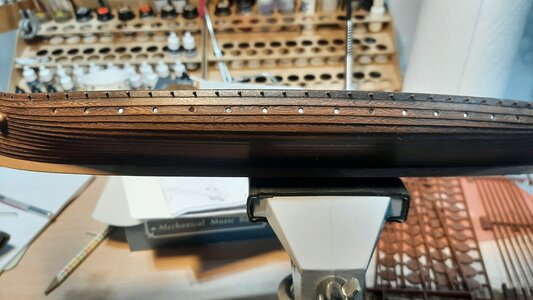
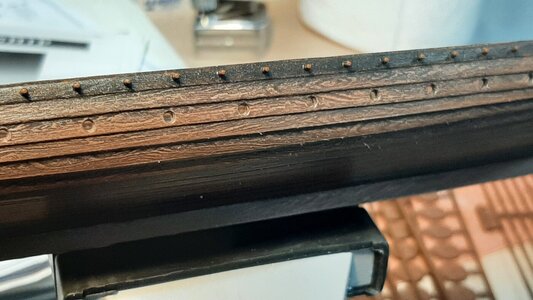
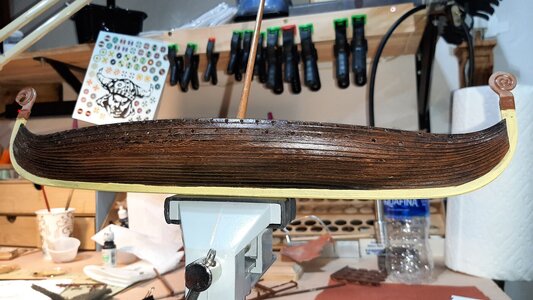
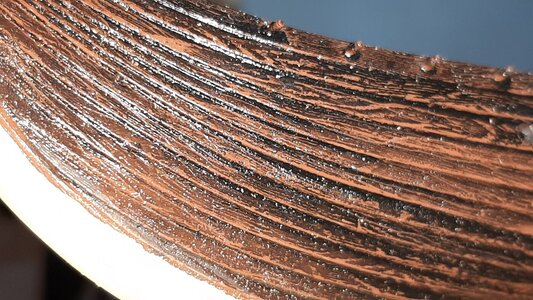
The update today concerns continued finishing experiments to make the plastic look as wood-like as I can. I think this model used the Oseberg ship as a rough inspiration, and I'm running with that. I like the darkened planks and lighter-hued keel of the Oseberg so I'm kind of using that as an inspiration for my model. When I started this kit several years ago I had applied a wash of Testors flat black enamel to one side of the ship with the intentions of picking out the wood grain details against the black undercoat. Today I finally got around to trying my technique and it worked well. I very lightly sanded...like a light single pass...with very fine sanding sticks across each hull plank and the result is pleasing to my eye. I applied the wash to the rest of the hull and interior surfaces with the intent of continuing this process. Shown in the photos are the bare kit plastic, then the black wash applied, and 2 photos showing the lightly sanded planking.
Now, I do agree with AndyA in that the grain effect is overdone...without a doubt, however I'm running with it for the simple fact that I don't see a real alternative. I feel that in the case of the hull, and the deck in this case, trying to turn the negative of exaggerated wood grain into a positive is my best course of action. If I remove the texture I'm left with smooth plastic and an effort to create my own wood color and texture using paint, which to me is an even less realistic course. I do agree that scale effect is very real, however I'm using some artistic license with this model. That said, I completely agree with regards to spars. The kit yard looks OK, but, again, is lacking in any texture or grain effect. It will look out of place on that wooden mast, so I'll have to make a yard. With that, I have concerns about achieving believable, let-alone accurate, taper. I don't own a lathe, so I'll figure something out.
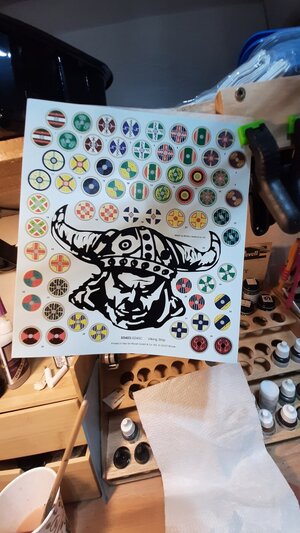
I'm also trying to consider alternatives to the shield decals. They are interesting and add some needed color, but I feel like it might almost be too much. Would such bright and varied shields have really been displayed as Revell thinks they would have? Opinions please, along with any historical input anyone might have. Thanks!!

20240108_141212.jpg

20240108_143519.jpg

20240108_141143.jpg

20240108_141152.jpg
 
Brother Dan:
Looking good with painting techniques! I believe model making involves a balance, or at least a combination, of accuracy and aesthetics. The model maker gets to choose how they navigate that universe taking into account the inevitable limitations in what is physically practical and possible. In regard to Viking vessels, there have been many full-size reproductions built lately and photos of these are on line, giving modelers a chance to see what real ones looked like, assuming that the builders did their homework. Your model certainly has the look of photos I have seen, with the exception that a few vessels have the top strakes painted. I had the pleasure of seeing the Draken Harald Harfagre when she was visiting Mystic Seaport and her three top strakes are painted.

Lathes are not used for making spars. They have been made for many centuries by the following steps: 1) find a suitable tree 2) cut away sides until you have a square cross section 3) cut from all four sides to establish the desired taper 4) cut off the four corners until you have an octagonal cross section 5) cut off the eight corners until you have a 16-sided cross section 6) and so forth until the desired degree of roundness is reached. Sometimes, all or part of a spar is left square or octagonal. In model making, we can skip steps 1 and 2 and start with a square piece of softwood with grain running parallel with the stick. Depending on the size of the spar, tools may include a sharp knife, finger plane, miniature spoke shave, sanding block, and loose sandpaper.

Research on how shields were used and displayed on Viking ships seems generally inconclusive. However, a basic rule of seamanship is that things need to be in safe places and fastened securely in place. I find it hard to imagine that Vikings would have thought that shields, which were valuable fighting equipment, should be lashed to the outside of the hull in anything but calm conditions. Also, I'm guessing that Viking shields were not as colorful as some modern depictions.
Thanks for more awesome input! Yes, in my years of plastic modeling of other subjects I've come to learn and appreciate the value of balance and compromise. My end goals for a model play heavily into the project as well, and a realization that what is (or seems) "right" does not always look right. I generally prefer heavy weathering however with wood ship modeling I think I wish to pursue a more prototypical appearance and display style than with my other subjects. That this kit is plastic presents a bit of a conflict there as in order for me to emphasize the wooden nature of the subject I feel I need to display it with moderate to high weathering to create the illusion of wood. I could certainly finish it in a slicker, more prototypical way but that wouldn't serve my own senses as a modeler and artist. That such a conflict exists is also a display of my own deficiencies as a modeler and artist, something my experimentation seeks to remedy. Isn't personal improvement one of the points of what we do?
Concerning the spars, we'll see how things go...given that I don't own a lathe anyway, using the technique you described would be the most doable for me given the tools I have at my disposal. I now own enough books on masting and rigging to get the information I need to build them, it should mostly be a matter of learning and doing the work.
Concerning the shields, your input echoes what I've read so far. I don't really have an issue with the shields mounted overlapping like the kit designates, and I've read that there is archeological evidence that this was done in some cases. I don't love the look of it on the Revell ship, and may not use all of them. I appreciate your input too about the designs and colors used on the shields. The kit decals are incredibly bright and busy, but I'm inclined to agree with your comments about the possibility of the shield paint and designs being more muted. While I don't want the model to be too monochromatic I don't want it to look like a float in a parade either.
I also want to make a cloth sail for it too. Recommendations?
 
So a little more progress on this kit this past weekend. It's been a couple weeks since I've worked on it because we got hit with some -35 weather and I don't yet have heat in my shop.
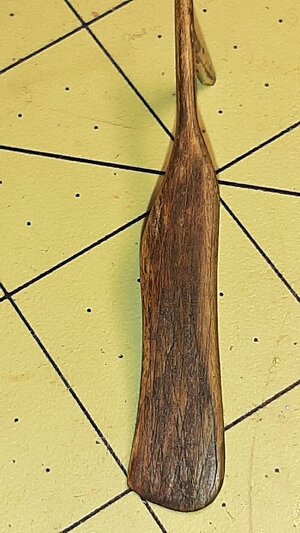
I'm continuing on painting and weathering the hull and other miscellaneous parts. I hit the rudder plank with some oil paints after scrubbing and scratching it with the tip on my knife and I'm very pleased with how it looks. I'll be employing the same technique on th keel, oars, and other bits.
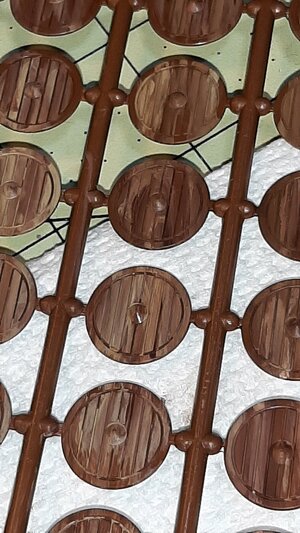
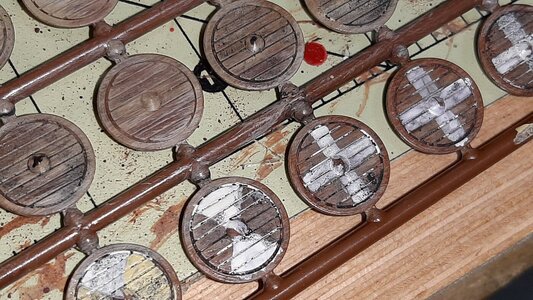
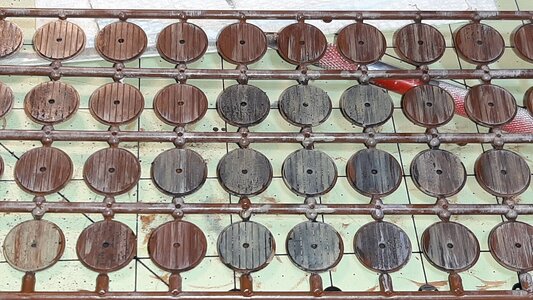
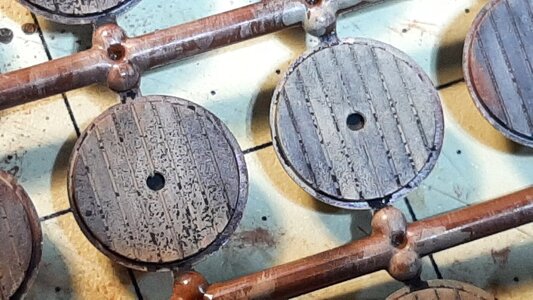
I also made good progress on the shields. I brushed them with a variance of Vallejo acrylics to simulate wood grains and colors in different stages of weathering. Once dry I hit them with a black enamel wash (Testors). I also started playing with painting my own designs on the shields in a muted and weathered pallet. The Revell decals are, frankly, obnoxious as hell. Please bear in mind they are no where near finished.
I got some handkerchiefs for making sails and bought a small handheld sewing machine. I'll try my hand at that soon and need to get some small dowels for the yard. Thanks for looking!

20240121_135854.jpg

20240121_153721.jpg

20240122_150736.jpg

20240122_150826.jpg

20240122_150925.jpg

20240122_150934.jpg

20240122_151028.jpg

20240122_151213.jpg

20240122_151249.jpg
 
Back
Top