Rainbow, J-Class America's Cup 1934 - Amati - 1:80, by JKvalvaag

Joined
Sep 17, 2023
Messages
11
Points
58

Location
Rogaland, Norway
Hi all!
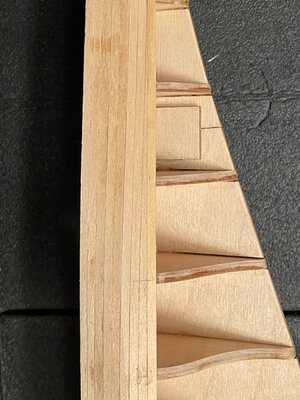
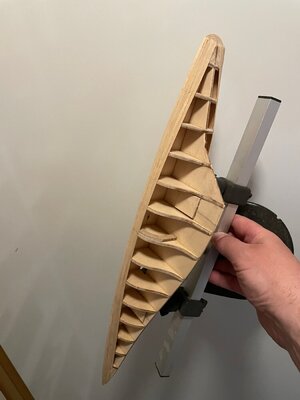
This is my first attempt of a build log and my first attempt of building a wooden model. I purchased the model somewhere around 2011, and started the build. I assembled the bulkheads and a few strips of the first layer of planking. We then moved from an apartment to a house that required quite a lot of work. The model has been dormant until a couple of months ago. Luckily there has been no damage to it and continuing on the build has been very enjoyable. Back in 2011 I was unaware of forums for this hobby, today the forum threads of other builders of various models have been extremely helpful.

This was the state of the model when I left off more than 10 years ago.
IMG_1321.jpeg

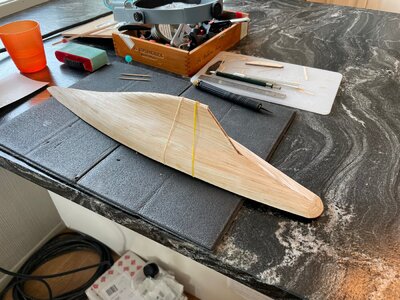
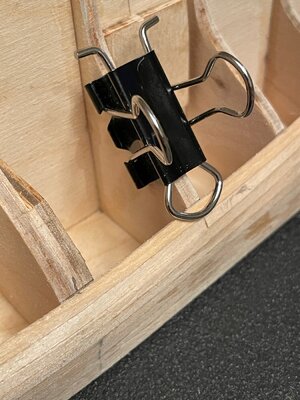
Continuing the planking. The paperclip idea was picked up in a forum thread. excellent!
IMG_1392.jpeg

Some details of the first planking.
IMG_1394.jpeg

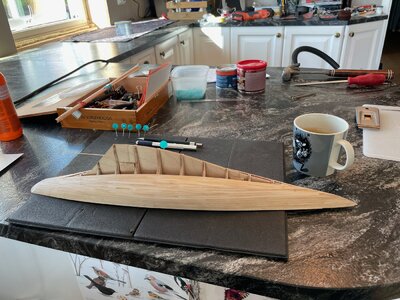
Yes. my better half is kind enough to let me work on the kitchen counter :) Also, as you can see, new windows just installed.
IMG_1403.jpeg

Getting there with the first layer.
IMG_1420.jpeg

The planks of the first layer are 1 x 3 millimeters.
IMG_1429.jpeg

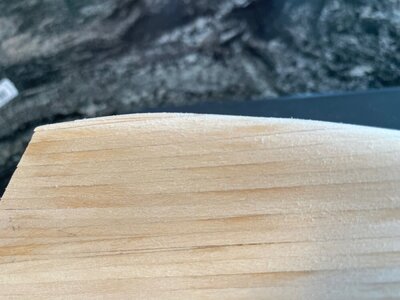
After sanding of the first application of putty.
IMG_1435.jpeg

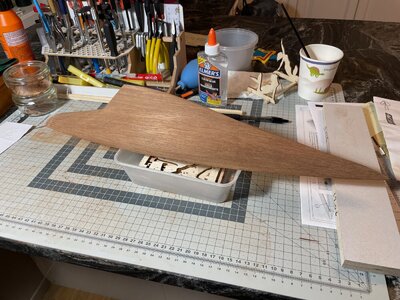
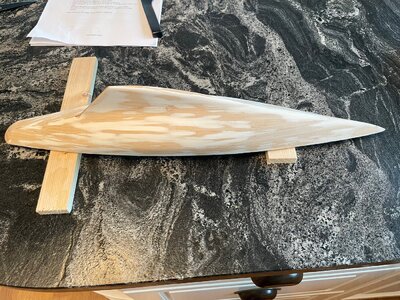
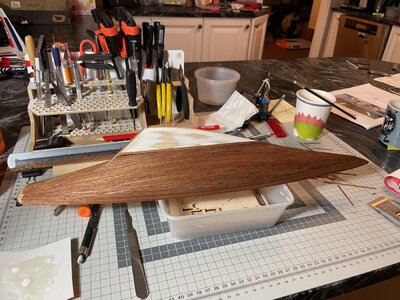
Second layer of planking is walnut. The quality of these planks were very poor. The edges of most planks were very ragged, and the width of the planks were uneven. Not very easy to work with :-(
The second layer planks are 0,5 x 3 millimeters.
IMG_1479.jpeg

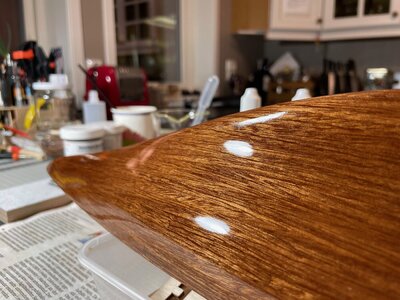
More planking of the second layer. The white "spots" are residue of the white glue I am using. Regular indoor wood glue.
IMG_1499.jpeg

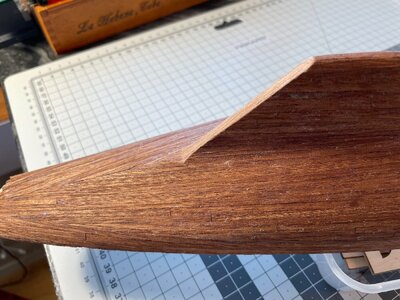
Initial sanding.
IMG_1500.jpeg

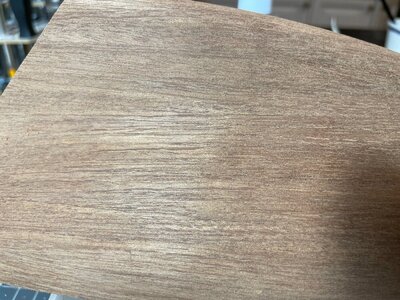
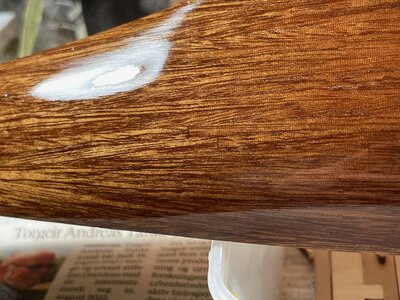
Close up after initial sanding.
IMG_1501.jpeg

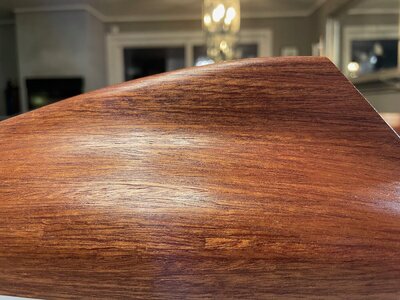
Looking a bit better after a couple of coats of shellac. The wood have very large pores.
IMG_1507.jpeg

Some more coats of shellac.
IMG_1514.jpeg

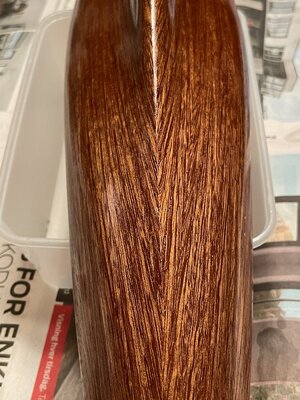
After around 20 coats of shellac the surface is starting to improve.
IMG_1525.jpeg

This is how far I have come for now. I will try to follow up this log from time to time.

I started planking using CA glue, as the instructions suggest, but soon switched to regular wood glue. I got tired of glued fingers when the CA seeped through the very thin strips. Also, all planks were held in place until the glue set using my fingers only. The thin bulkheads and thin first planking did not encourage me to use nails.

--
Jøran
 
Last edited:
Very good work on the hull and the hull planking - it is looking very good - clean and accurate work
 
and btw also a warm welcome here on board of our forum
 
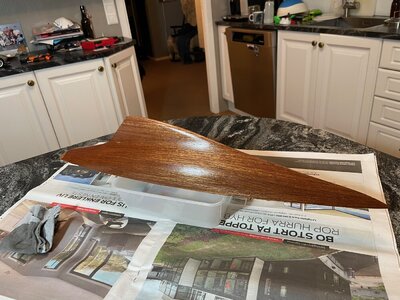
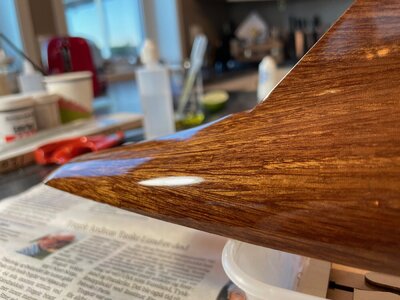
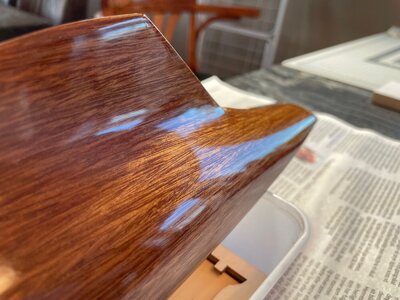
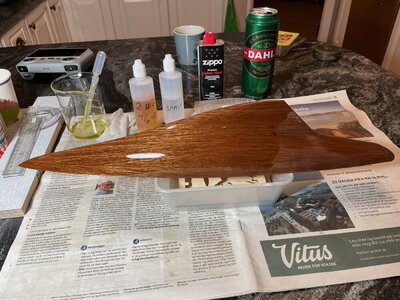
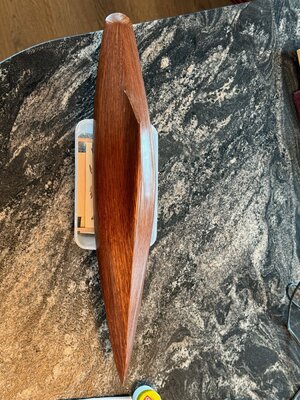
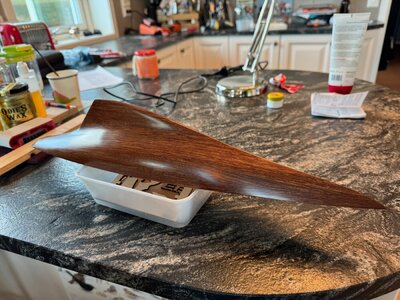
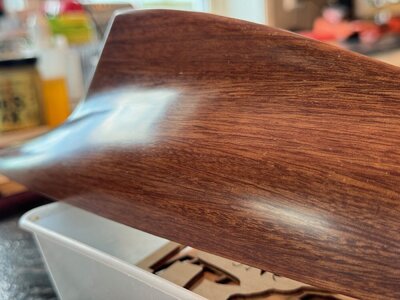
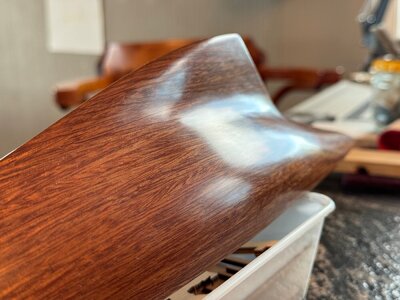
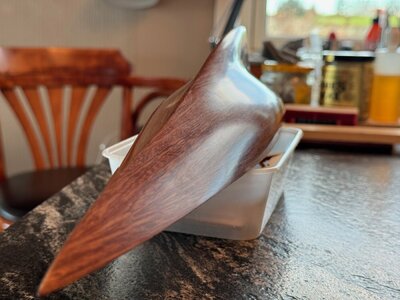
Today I have been practicing french polishing of small objects with weird shapes :) First time trying french polishing. This is not the final finish. Way to glossy in this case.

The original had a painted steel hull, and the instructions suggest to paint the whole hull white or leave the part below the water line unpainted. I am not sure what to do yet. The lines of the hull is what makes this model beautiful. I think painting only the upper part of the hull will disturb the impression of the lines of the hull. Any suggestions or input?

The current finish will be sanded back with 400 grit paper to remove some beginner mistakes done in earlier stages. Then I will start over again. I think/hope the french polish will be a good base for whatever finish I end up with. Maybe 0000 steel wool and a good wax would be nice.

IMG_1527.jpegIMG_1528.jpeg

Thanks,
Jøran
 
Last edited:
What a great wood finish! You've really made something of those awful little ragged super thin strips that come with many kits.
 
Hi all!
This is my first attempt of a build log and my first attempt of building a wooden model. I purchased the model somewhere around 2011, and started the build. I assembled the bulkheads and a few strips of the first layer of planking. We then moved from an apartment to a house that required quite a lot of work. The model has been dormant until a couple of months ago. Luckily there has been no damage to it and continuing on the build has been very enjoyable. Back in 2011 I was unaware of forums for this hobby, today the forum threads of other builders of various models have been extremely helpful.

This was the state of the model when I left off more than 10 years ago.
View attachment 401066

Continuing the planking. The paperclip idea was picked up in a forum thread. excellent!
View attachment 401082

Some details of the first planking.
View attachment 401083

Yes. my better half is kind enough to let me work on the kitchen counter :) Also, as you can see, new windows just installed.
View attachment 401084

Getting there with the first layer.
View attachment 401085

The planks of the first layer are 1 x 3 millimetres.
View attachment 401086

After sanding of the first application of putty.
View attachment 401087

Second layer of planking is walnut. The quality of these planks were very poor. the edges of most planks were very ragged, and the width of the planks were uneven. Not easy to work with :-( Dimension. of planks are 0,5 x 3 millimetre.
View attachment 401088

More planking of the second layer. The white "spots" are residue of the white glue I am using. Regular indoor wood glue.
View attachment 401089

Initial sanding.
View attachment 401090

Close up after initial sanding.
View attachment 401091

Looking a bit better after a couple of coats of shellac. The wood have very large pores.
View attachment 401092

Some more coats of shellac.
View attachment 401099

After around 20 coats of shellac the surface is starting to improve.
View attachment 401100

This is how far I have come for now. I will try to follow up this log from time to time.

I started planking using CA glue, as the instructions suggest, but soon switched to regular wood glue. I got tired of glued fingers when the CA seeped through the very thin strips. Also, all planks were held in place until the glue set using my fingers only. The thin bulkheads and thin first planking did not encourage me to use nails.

--
Jøran
The hull looks awesome! I am about to start the second planking on my Endurance, and I too am not a fan of using CA on the thin veneer. I wanted to try regular wood glue or Weldbond but wasn't sure how the planks would stick to the wood putty. Did you have any issues?
 
What a great wood finish! You've really made something of those awful little ragged super thin strips that come with many kits.

Thanks a lot!

I wish I started looking at Youtube videos on french polishing earlier. That would have saved me a lot of time. Guitar makers have a lot of excellent videos on this topic.

--
Jøran
 
The hull looks awesome! I am about to start the second planking on my Endurance, and I too am not a fan of using CA on the thin veneer. I wanted to try regular wood glue or Weldbond but wasn't sure how the planks would stick to the wood putty. Did you have any issues?

Thank you for the nice words!

I have had no issues using wood glue at all. I have been using a quite viscous and quick setting wood glue (Casco brand), and just kept the planks in place with my fingers until the glue sets. On longer planks I did not glue more than around 6-7 inches at a time.

--
Jøran
 
Sanded back the shellac, to bare wood in some places. I was afraid this would cause blotches or color variations, but is seems to have worked well. I then added 3 or 4 coats of shellac before starting to polish. Here are a few pictures just after starting to polish the front half. Almost all pores are gone.

IMG_1541.jpegIMG_1540.jpegIMG_1542.jpeg


--
Jøran
 
Thank you for the nice words!

I have had no issues using wood glue at all. I have been using a quite viscous and quick setting wood glue (Casco brand), and just kept the planks in place with my fingers until the glue sets. On longer planks I did not glue more than around 6-7 inches at a time.

--
Jøran
Thanks! I'll give it a shot.
 
Watching this thread with interest as I'm building a 1:80 J-Class Endeavour (from Amati).

Your first planking has put mine to shame! Very neat work :)
 
Hi all,

After some more polishing I used 0000 steel wool, then applied Odies Wax using a light grey Scotchbrite pad. The hull was then buffed using an old t-shirt, after about two hours of drying time. I am happy with the finish, but I'll try to apply wax one more time, just to see if it makes a difference. Thanks for stopping by, and please apologise for not cleaning the dust off the hull before taking pictures.

IMG_1561.jpeg

IMG_1557.jpeg

IMG_1558.jpeg
IMG_1559.jpegIMG_1560.jpeg
 
Last edited:
Wow! Looks fantastic. I can't believe those thin kit planks are holding up to all of this, really showing what they could do with lots of elbow grease.
 
For a first model you are doing an astounding job! I have a few models under my belt, and I have never achieved a finish like that. I liked the look of the French polish, but I think you are right - it is a bit too glossy. This finish looks amazing.
 
Hi all!
This is my first attempt of a build log and my first attempt of building a wooden model. I purchased the model somewhere around 2011, and started the build. I assembled the bulkheads and a few strips of the first layer of planking. We then moved from an apartment to a house that required quite a lot of work. The model has been dormant until a couple of months ago. Luckily there has been no damage to it and continuing on the build has been very enjoyable. Back in 2011 I was unaware of forums for this hobby, today the forum threads of other builders of various models have been extremely helpful.

This was the state of the model when I left off more than 10 years ago.
View attachment 401066

Continuing the planking. The paperclip idea was picked up in a forum thread. excellent!
View attachment 401082

Some details of the first planking.
View attachment 401083

Yes. my better half is kind enough to let me work on the kitchen counter :) Also, as you can see, new windows just installed.
View attachment 401084

Getting there with the first layer.
View attachment 401085

The planks of the first layer are 1 x 3 millimeters.
View attachment 401086

After sanding of the first application of putty.
View attachment 401087

Second layer of planking is walnut. The quality of these planks were very poor. The edges of most planks were very ragged, and the width of the planks were uneven. Not very easy to work with :-(
The second layer planks are 0,5 x 3 millimeters.
View attachment 401088

More planking of the second layer. The white "spots" are residue of the white glue I am using. Regular indoor wood glue.
View attachment 401089

Initial sanding.
View attachment 401090

Close up after initial sanding.
View attachment 401091

Looking a bit better after a couple of coats of shellac. The wood have very large pores.
View attachment 401092

Some more coats of shellac.
View attachment 401099

After around 20 coats of shellac the surface is starting to improve.
View attachment 401100

This is how far I have come for now. I will try to follow up this log from time to time.

I started planking using CA glue, as the instructions suggest, but soon switched to regular wood glue. I got tired of glued fingers when the CA seeped through the very thin strips. Also, all planks were held in place until the glue set using my fingers only. The thin bulkheads and thin first planking did not encourage me to use nails.

--
Jøran
Hallo @JKvalvaag
we wish you all the BEST and a HAPPY BIRTHDAY
Birthday-Cake
 
Back
Top