Help with rigging needed

Joined
Jun 9, 2023
Messages
3
Points
1
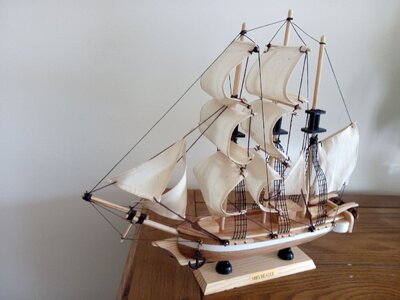
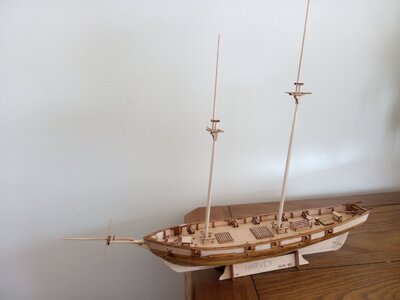
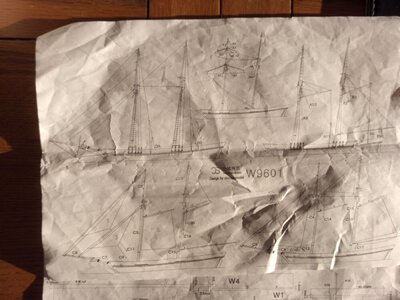
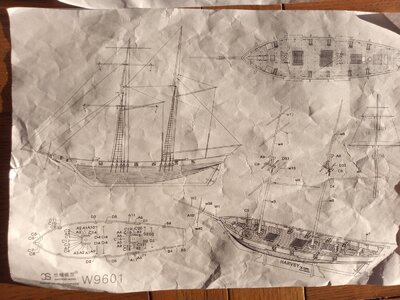
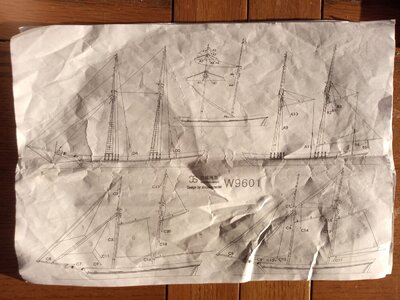
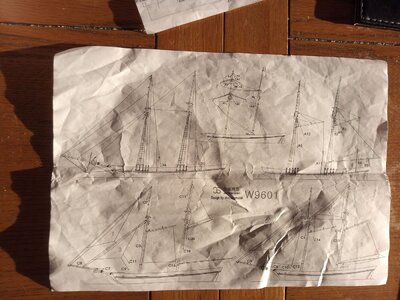
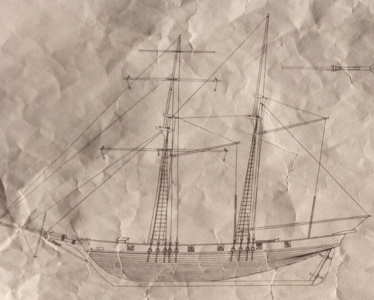
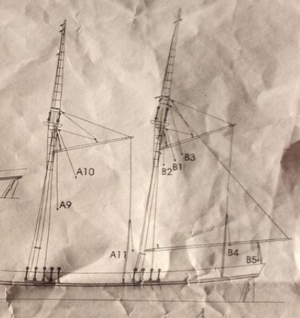
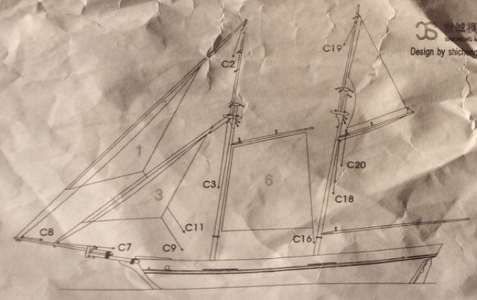
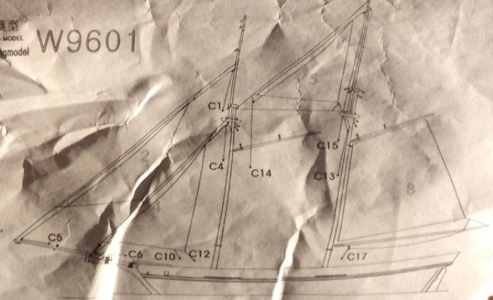
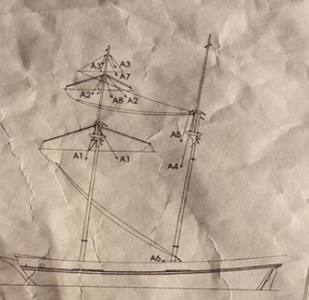
Hi there, I have just found this Forum and wondered if anyone could help me understand rigging. I have built one ship and am halfway through second one. First ship was HMS Beagle which had a solid hull. I am now building Harvey, but the instructions for rigging are unclear as the plans do not show detailed attachments to the masts etc. Attached plans are all I have for the rigging. I am unsure what to use for attachments D2 and D4, do I fix some sort of ring to the deck? What attachments go on W8 and W9? and what are the things dangling from W10 and W11. These are just a few of my questions, but any help would be appreciated. I can understand the rope ladders and have bought a loom, only things in kit are round wooden three eyed parts which I shall attempt to use and two eyed rectangular blocks. The professionally built ship on the sellers site shows some sort of pulleys or tackle. HMS Beagle.jpgHarveyn awaiting rigging.jpgplan1.jpgplan2.jpgplan3.jpgplan4.jpg
 
This is not an easy cquestion to answer quick. I did a lot of research and making a buildl9g to get help during the build. Research I got from books.
Look here

There is a lot to find and read on this forum
Look for more usefull books here
 
Even for a simple model, rigging will require study of each of the lines, and knowing what their function is before putting them on the model. The Beagle is so oversimplified as to be useless. First off, rigging is divided into two groups; standing rigging, usually black in color, is for supporting the masts, and running rigging, usually tan in color, is what positions the yardarms and sails and runs through block to accomplish this. Even the Harvey model you have is so oversimplified such that the lines as rigged on the model will not indicate what their function is in most cases. The first thing you should do is search for a build log from another modeler on this forum who built a more detailed version of the Harvey and READ IT HERE. Study the photos carefully The instructions for your model leave a lot out, and you will need to consult another's log to fill in the details, such as how the sails are attached to the yards and staylines, and how to belay (tie) the lines to belaying point like pins or cleats at the deck level.

Before you tackle rigging, you need to get the general order of how the model is rigged first, so lines don't crowd out your fingers and cause obstructions as you go.

These line are your standing rigging and should be rigged first.
1686379858975.png

These are next. They are running rigging which supports the yardarms for the fore-aft sails behind the masts. Make sure the geometry of the yards matches the shapes of the sails. Hold the sails up to the yards to check.
1686379941897.png

These are next. Sails forward of the foremast (1 & 3) are called staysails because the long edges are suspended from the stay lines by rings so they be furled and unfurled.
1686380086662.png

These are next. RIg the staysails and topsails (upper sails). For the lines which run from the corners of the sails, through block, and down to belaying points where they are ties off down at the deck, rig each line STARTING at the deck, running up through blocks, and THEN tie the end to the sail. If you do it the other way, you won't have room with your fingers to easily tie the bottom ends of the lines to the belaying pins or other belaying points.
1686380612538.png

These lines are last. If you make them earlier, you won't have easy access to the masts with your fingers and tools. You'll be doing it the HARD way. These lines support the yards for the square rigged sails (called lifts), and angle the yards for square rigged as required by the direction of the wind (called braces).
1686380958917.png

After studying the build log of a more detailed model of the Harvey, you will want to use scrap wood and more lines to made some additional details on your model by scratch building them, turning a cheap, simple, laser cut, mass produced Chinese model into something you can be proud of for your first model project.

Good luck! :D Thumbsup
 
Last edited:
This is not an easy cquestion to answer quick. I did a lot of research and making a buildl9g to get help during the build. Research I got from books.
Look here

There is a lot to find and read on this forum
Look for more usefull books here
This is not an easy cquestion to answer quick. I did a lot of research and making a buildl9g to get help during the build. Research I got from books.
Look here

There is a lot to find and read on this forum
Look for more usefull books here
Thankyou Steefe, wow, I thought I knew some nautical terms, but there's so much information there. Unfortunately I'm in my seventies and don't think I've enough years left to get through those. Has given me some thought though.
 
Even for a simple model, rigging will require study of each of the lines, and knowing what their function is before putting them on the model. The Beagle is so oversimplified as to be useless. First off, rigging is divided into two groups; standing rigging, usually black in color, is for supporting the masts, and running rigging, usually tan in color, is what positions the yardarms and sails and runs through block to accomplish this. Even the Harvey model you have is so oversimplified such that the lines as rigged on the model will not indicate what their function is in most cases. The first thing you should do is search for a build log from another modeler on this forum who built a more detailed version of the Harvey and READ IT HERE. Study the photos carefully The instructions for your model leave a lot out, and you will need to consult another's log to fill in the details, such as how the sails are attached to the yards and staylines, and how to belay (tie) the lines to belaying point like pins or cleats at the deck level.

Before you tackle rigging, you need to get the general order of how the model is rigged first, so lines don't crowd out your fingers and cause obstructions as you go.

These line are your standing rigging and should be rigged first.
View attachment 378955

These are next. They are running rigging which supports the yardarms for the fore-aft sails behind the masts. Make sure the geometry of the yards matches the shapes of the sails. Hold the sails up to the yards to check.
View attachment 378956

These are next. Sails forward of the foremast (1 & 3) are called staysails because the long edges are suspended from the stay lines by rings so they be furled and unfurled.
View attachment 378957

These are next. RIg the staysails and topsails (upper sails). For the lines which run from the corners of the sails, through block, and down to belaying points where they are ties off down at the deck, rig each line STARTING at the deck, running up through blocks, and THEN tie the end to the sail. If you do it the other way, you won't have room with your fingers to easily tie the bottom ends of the lines to the belaying pins or other belaying points.
View attachment 378958

These lines are last. If you make them earlier, you won't have easy access to the masts with your fingers and tools. You'll be doing it the HARD way. These lines support the yards for the square rigged sails (called lifts), and angle the yards for square rigged as required by the direction of the wind (called braces).
View attachment 378959

After studying the build log of a more detailed model of the Harvey, you will want to use scrap wood and more lines to made some additional details on your model by scratch building them, turning a cheap, simple, laser cut, mass produced Chinese model into something you can be proud of for your first model project.

Good luck! :D Thumbsup
Thanks Kurt for your very detailed reply. This has helped me no end. I have some very small belaying pins, but they fit snuggly into the holes.
I was going to tie the rigging to them first, but I'll take your advice and work the other way round. What should I use to fasten the rigging that goes to the deck?
 
also from my side a warm welcome here on board of our forum
 
Hi there, I have just found this Forum and wondered if anyone could help me understand rigging. I have built one ship and am halfway through second one. First ship was HMS Beagle which had a solid hull. I am now building Harvey, but the instructions for rigging are unclear as the plans do not show detailed attachments to the masts etc. Attached plans are all I have for the rigging. I am unsure what to use for attachments D2 and D4, do I fix some sort of ring to the deck? What attachments go on W8 and W9? and what are the things dangling from W10 and W11. These are just a few of my questions, but any help would be appreciated. I can understand the rope ladders and have bought a loom, only things in kit are round wooden three eyed parts which I shall attempt to use and two eyed rectangular blocks. The professionally built ship on the sellers site shows some sort of pulleys or tackle.
Hallo @Georg1e
we wish you all the BEST and a HAPPY BIRTHDAY
Birthday-Cake
 
Back
Top