Do-It-Yourself Thicknesser

Joined
Aug 21, 2019
Messages
766
Points
403

I have a Proxxon thicknesser which is used almost daily. It is good but has 3 major drawbacks:
Minimum thickness is only 1.3mm and it chews up short or irregular pieces. (Double-sided tape doesn't work for me). Also it can’t “match” an outer curve - very useful when making beams.
I’ve gazed enviously on the Bryne’s offering and recently someone offered (used) something similar. The asking price was very fair, but shipping and tax multiplied cost fourfold or more.
I decided to adapt some previous ideas and underused equipment.
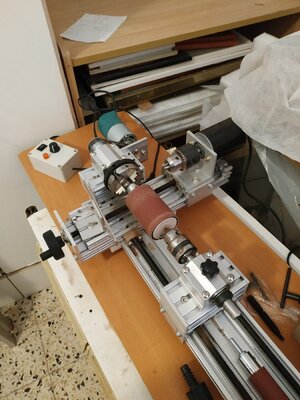
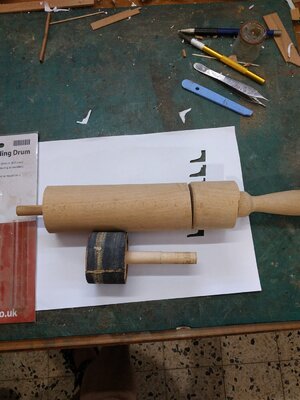
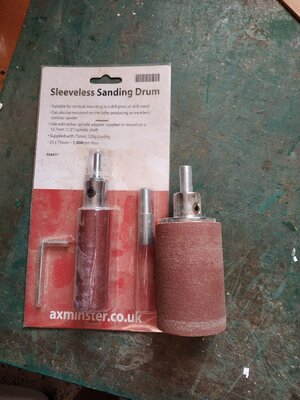
I remembered a sanding drum I’d made from an old rolling pin, and some sleeveless sanding drums that I’d bought for more accurate work.
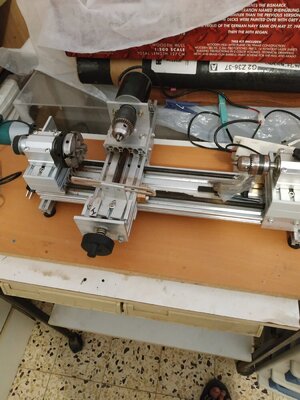
I had bought a sort of lathe system, with 2 motors and chucks and a 3rd non motorised chuck.
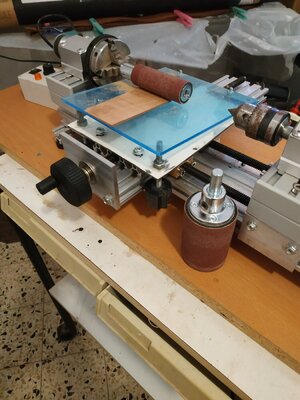
The basic plan was to use this as a base, attach a hinged platform adjusted by a screw system.
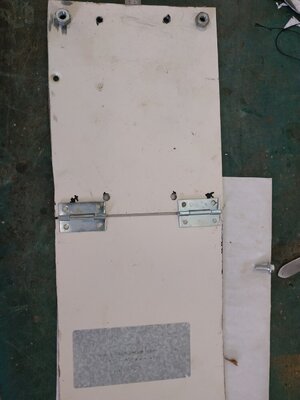
I started with some metal plates 1.75mm thick, which I cut to size and attached the hinges with epoxy-which didn’t hold. I changed to 4mm perspex, breaking a couple of corners when drilling holes for the small nuts and bolts that I used to attach the hinges. So I ended with an upper perspex and lower metal plates.
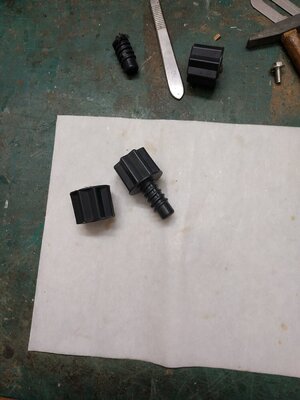
The (metal) elevating screws were set into some handles which were cut off some plastic screws.
I know it looks like Heath Robinson on LSD, but it works !
(I thank my wife for donating the rolling pin)
7822.jpg

8822.jpg

8a822.jpg

9822.jpg

9b822.jpg

10822.jpg

10a822.jpg
 
I have a Proxxon thicknesser which is used almost daily. It is good but has 3 major drawbacks:
Minimum thickness is only 1.3mm and it chews up short or irregular pieces. (Double-sided tape doesn't work for me). Also it can’t “match” an outer curve - very useful when making beams.
I’ve gazed enviously on the Bryne’s offering and recently someone offered (used) something similar. The asking price was very fair, but shipping and tax multiplied cost fourfold or more.
I decided to adapt some previous ideas and underused equipment.
I remembered a sanding drum I’d made from an old rolling pin, and some sleeveless sanding drums that I’d bought for more accurate work.
I had bought a sort of lathe system, with 2 motors and chucks and a 3rd non motorised chuck.
The basic plan was to use this as a base, attach a hinged platform adjusted by a screw system.
Empecé con unas placas de metal de 1,75 mm de grosor, que corté a medida y fijé las bisagras con epoxi, que no aguantó. Cambié a plexiglás de 4 mm, rompiendo un par de esquinas al perforar agujeros para las pequeñas tuercas y tornillos que usé para unir las bisagras. Así que terminé con una parte superior de metacrilato y unas placas inferiores de metal.
Los tornillos de elevación (metálicos) se colocaron en unas manijas de las que se cortaron unos tornillos de plástico.
Sé que se parece a Heath Robinson con LSD, ¡pero funciona!
(Agradezco a mi esposa por donar el rodillo)

View attachment 322927

View attachment 322928

View attachment 322929

View attachment 322930

View attachment 322931

View attachment 322932

View attachment 322933
 
Here's mine. Much the same idea. My rubber core drum wasn't very good so I glued a couple of 2x4 pieces to a 1" dia piece of aluminum and then turned it down until a 3" sanding sleeve would just fit on. Then I epoxied the sleeve on. When it wears out I can just peel off the sandpaper and re-turn the drum until I can get another sleeve on.
It has a vacuum attachment for dust but it was in use somewhere else when I took the picture. It's a necessity. These things make a ton(tonne) of dust.

DSC04598.JPG
 
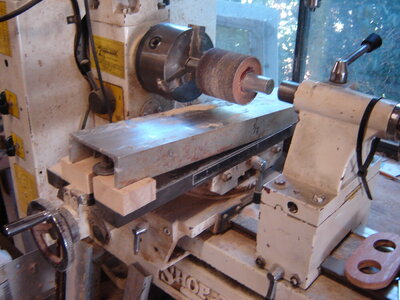
Here's mine. Done to mount on a full size wood lathe. Will sand down to 1/64th of an inch. I only use it to run batches of strips for decking and planking, but what a lifesaver. Glad I spent the time on it.

 
Aquí está el mío. Mucho de la misma idea. Mi tambor con núcleo de goma no era muy bueno, así que pegué un par de piezas de 2x4 a una pieza de aluminio de 1" de diámetro y luego lo rebajé hasta que una manga de lijado de 3" encajaba. Luego puse epoxi en la manga. Cuando se gasta, puedo quitar el papel de lija y volver a girar el tambor hasta que pueda ponerme otra manga.
Tiene un accesorio de aspiradora para el polvo, pero estaba en uso en otro lugar cuando tomé la foto. es una necesidad Estas cosas hacen una tonelada (tonelada) de polvo.
no veo tu foto
 
Here's mine. Much the same idea. My rubber core drum wasn't very good so I glued a couple of 2x4 pieces to a 1" dia piece of aluminum and then turned it down until a 3" sanding sleeve would just fit on. Then I epoxied the sleeve on. When it wears out I can just peel off the sandpaper and re-turn the drum until I can get another sleeve on.
It has a vacuum attachment for dust but it was in use somewhere else when I took the picture. It's a necessity. These things make a ton(tonne) of dust.

View attachment 323351
This one will not bend, that's the idea I mentioned before. Just the y-table too adjust
 
Here's mine. Much the same idea. My rubber core drum wasn't very good so I glued a couple of 2x4 pieces to a 1" dia piece of aluminum and then turned it down until a 3" sanding sleeve would just fit on. Then I epoxied the sleeve on. When it wears out I can just peel off the sandpaper and re-turn the drum until I can get another sleeve on.
It has a vacuum attachment for dust but it was in use somewhere else when I took the picture. It's a necessity. These things make a ton(tonne) of dust.

View attachment 323351
how did you hinge the aluminium base ?
 
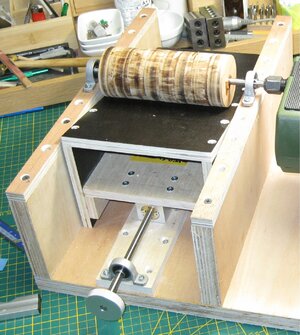
I made the same principle like Don. No hinge on the base, just use the Y-table to move it in or out. That in- or decrease the distance between drum and base. See mine, this gives a more stable base.
IMG_2699a.jpg
(build in progress)
 
Like Stephan said. On mine it works out to about .010" for each turn of the "Y" crank. I hope I've got that letter right. I don't know X from Y from Z :)
 
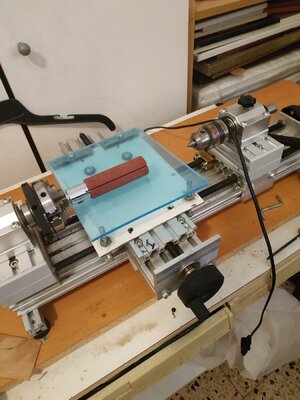
Well, I said I'll try your "Y" table suggestion. I adapted the pervious attempts by simply screwing the lower plate to the base on the "Y" screw, while maintaining the ability to raise the upper plate by screws. The "Y" gives, I think, finer tuning.

IMG_20220823_105739.jpg
 
Back
Top