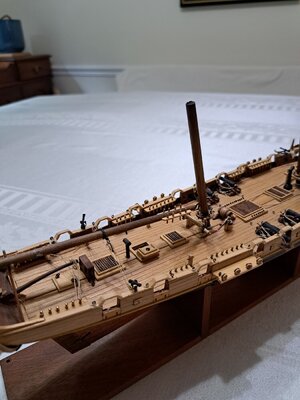
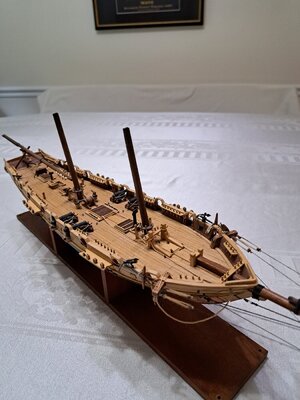
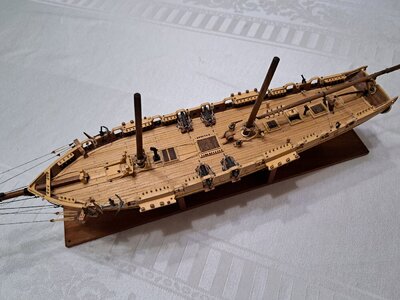
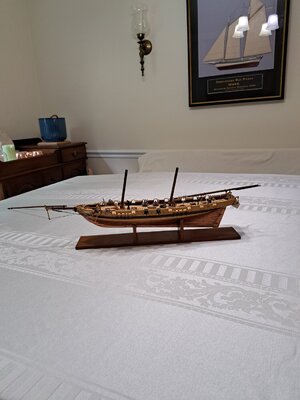
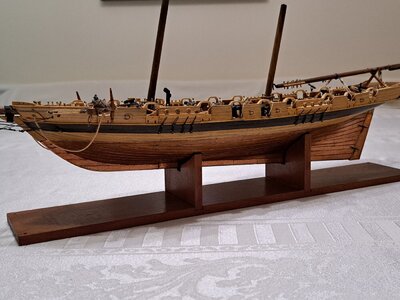
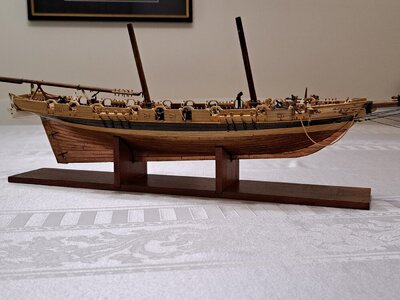
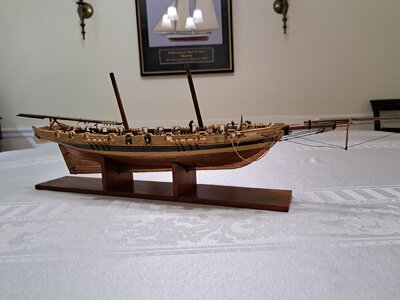
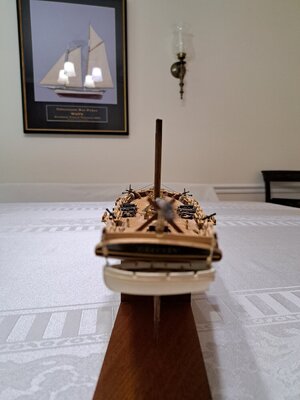
Baltimore Clipper "Grecian" 1812 Based on plans by Howard Chappell, utilizing some components of Model Shipways "Dapper tom and scratch built

Joined
Jun 17, 2021
Messages
1,642
Points
488

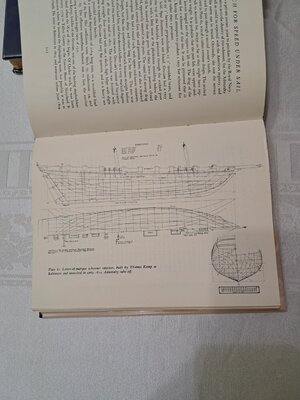
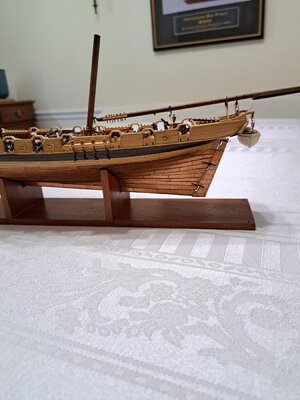
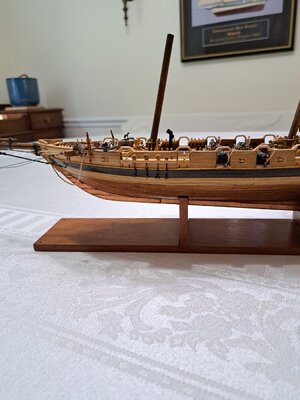
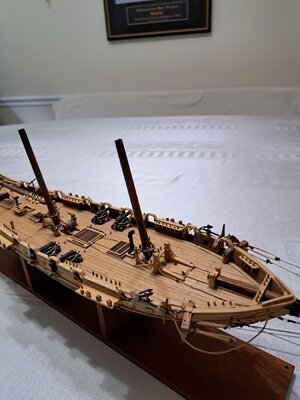
This model I made because of the cool castellated arches over the gun ports. It is made of bass wood (hull), birch, Gabon ebony, boxwood, mahogany, Tanganika strip from Model Shipways, and copper over mahogany strip. It looks the way it looks because no descriptions I found gave any Idea as to colors, and this is how I saw it in my mind's eye. She's depicted as she may have appeared before she was captured by the British, who subsequently altered her Deck scheme and furniture. she would have had no privys as seen in the drawings, and were added later by the Brits. I suppose the Americans just let it all hang out over the side.20230630_140437.jpg20230630_135700.jpg20230630_135739.jpg20230630_134101.jpg20230630_134050.jpg20230630_134030.jpg20230630_133856.jpg20230630_133720.jpg20230630_133438.jpg20230630_133234.jpg20230630_132910.jpg20230630_132731.jpg
 
Last edited:
Dear Peter
Looks beautiful , well done Okay :)
the castellated arches over the gun ports, ended are unique and beautiful
 
Thanks, Shota, I believe She and the Patapsco were both built at Fells Point, Baltimore, by Thomas Kemp (from St. Michael's Md) . I think Grecian was originally designed as a smuggler in 1811 without gunports, which were added later with the intervention of the war in1812 when she was completed, The arches were added to strengthen the bulwarks which were compromised in strength being cut away for the ports. I made mine (and the cap rails) of boxwood for the beautiful color, but above all the density and strength of the wood, as each arch is carved from a single piece.
Captured early in the war by the Brits, she never made it through the blockade and was taken into the Royal Navy, modified, and the lines taken off, which is why we have the lines at all. No preservable line plans were ever created for these boats by the American builders, and it is thanks to the Brits who took off the lines when they captured them, that we have original Baltimore Clipper lines at all.
The Grecian, admired by the British for her speed, had the unique feature that she was broadest abeam amid ships just aft of center. a feature not employed again until 1851 by George Steers in the design of the yacht "America". This feature contributed greatly to the efficient hydrodynamics of the hull. That, and cotton sails, are what gave the "America" her winning edge . The "Dapper Tom" hull that I used did not allow enough material in the roughed out hull to recreate this feature. Something I didn't discover until I was many hours into carving,:oops: so I decided "the heck with it" and moved on.Cautious
I admit that what I was after was a cool looking model. And besides, who else (other than an expert in the history) would know! ( I have no shame.:rolleyes:)

Pete:p
 
Last edited:
This model I made because of the cool castellated arches over the gun ports. It is made of bass wood (hull), birch, Gabon ebony, boxwood, mahogany, Tanganika strip from Model Shipways, and copper over mahogany strip. It looks the way it looks because no descriptions I found gave any Idea as to colors, and this is how I saw it in my mind's eye. She's depicted as she may have appeared before she was captured by the British, who subsequently altered her Deck scheme and furniture. she would have had no privys as seen in the drawings, and were added later by the Brits. I suppose the Americans just let it all hang out over the side.View attachment 382171View attachment 382173View attachment 382170View attachment 382174View attachment 382175View attachment 382176View attachment 382178View attachment 382179View attachment 382180View attachment 382181View attachment 382182View attachment 382183
Very nice model indeed. - Cheers.
 
The coppering of the hull is looking great - how did you make it?
 
I applied the copper stained glass glazier's tape to strips of mahogany veneer and ran a pounce wheel along the edges to simulate copper nail dimples.
I glued a single row of individual plates along the water line (cut into individual pieces to account for the compound curve.) below that I used single strips, tapered at the ends to match the angle where they crossed the gore line, starting from the center middle section of the hull. and worked downward and outward. fore and aft from there, cutting the necessary long tapered ends at an angle where they crossed the gore line with my widest (very sharp) chisel to fit snug up against the gore line. There is just enough give across the width of the strips to accommodate a little cross width bend to a slight curve. I used a chisel the same width as the strips to incise lines to simulate individual plates as I added each strip to keep the offset between the plates regular. As I added strips I was able to use shorter sections of strip so they became less unwieldy in three or four sections each. you will find that you will need to insert stealers the further down the hull you go, both fore and aft. Try to keep these to a minimum. alternate sides of the hull as you add strips to keep them symmetrical and incise the lines for individual plates with each successive strip. The trickiest part is marking and chopping the long angles at the ends of each line of strips where they cross the line above. I used Loctite brand CA gel in the silver container with the blue top. this allows you to run a discreet bead where desired. The glue comes out a little runny at they very first, then becomes more easily controlled. Keep plenty on hand, as you don't want to run out in the middle of a gluing .I run a little copper paint along the lower edge of each strip before adding the next. you don't want light lines between the strips should any gaps occur, which they will, however slight between each successive strip. The bottom of the keel and stem can be covered directly with the copper tape ( in wieldy sections, and the over lapping edges burnished down, with and agate burnishing tool, or hard metal rod tapered on the end. Even a hardwood about 3" long dowel will do , just sand it down to a taper at one end. Burnishing tools have many useful applications.
I trust that my instructions are as clear as mud.:rolleyes: I have a " This oughtta work!" attitude, and used the basic instructions for coppering a hull bottom but wanted to do away with cutting and fussing with little individual pieces of sticky copper tape.Cautious This seemed like an easier solution to me and easier to handle.:) I discovered the tape was exactly the same width as the mahogany strip wood veneer I got from Model Shipways. I use the same method to do the outer layer of planks on a hull. The veneers give a great natural wood look to a finished hull and can be subtly stained and finished to suggest the color of paint and still retain a very nice natural wood impression. On the Patapsco I used a variety all natural woods, and no paint on the hull whatever.

Pete:cool:
 
Last edited:
Back
Top