You are using an out of date browser. It may not display this or other websites correctly.
You should upgrade or use an alternative browser.
You should upgrade or use an alternative browser.
ZHL Royal Caroline Kit, scale 1/30
- Thread starter neptune
- Start date
- Watchers 55
-
- Tags
- royal caroline
Where do you cut the dvd plastic with?
G'day Pat, I cut it on my small Proxxon saw with a .5mm thick blade, I will post a pic tomorrow,
best regards John.
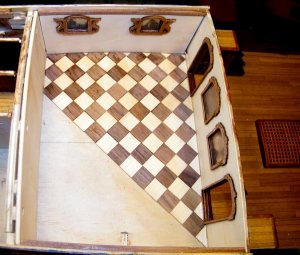
The flooring approx half finished, when I was a quarter of the way through I was using
PVA glue and was having problems with the edges of the tiles turnig up, luckily I
managed to hold them down with some scrap ply nailed along the edges, so when I
continued I started using CA glue and had no problems after that, oh and one other
thing try and keep the grain direction for each colour going one way, if you know
what i mean,
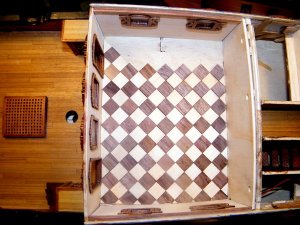
Comming up to the finish,
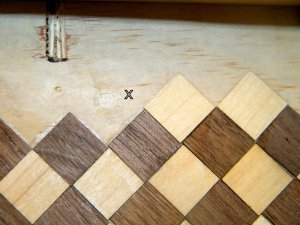
Now if by chance you make a Boo Boo, do not panic and run around like a chicken
with its head cut off, like me,
I had a little bit of what I call Tile creep, see the tile by the letter X,
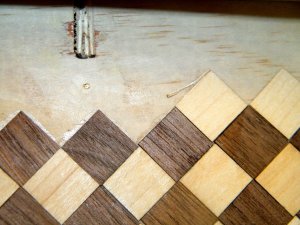
I just used a very sharp small chisel and sliced a sliver off the end of the tile, its easier
than trying to lift the tile if you are using CA glue,
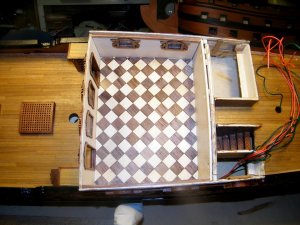
The Parquetry flooring finished, there is a skirting board to go around the bottom yet,
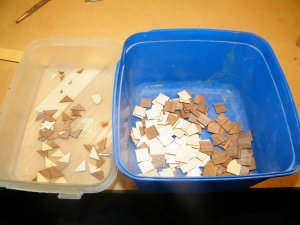
I still had all these half and full tiles left over,
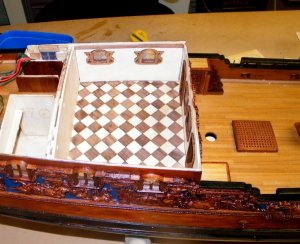
another view,
thanks for looking in,
best regards John.
G'day John
I've said it before and I'll say it again...
I'm so glad that I have one.
Happymodeling
Greg
I've said it before and I'll say it again...
This kit is amazing
with all the incredible touches it has, in it.
I have never seen a kit like this before.with all the incredible touches it has, in it.
I'm so glad that I have one.
Happymodeling
Greg
Hi John looks great again. You passed your parquettery exam. Do show your wife otherwise you have to do the livingroom also.  .
.
Where do you cut the dvd plastic with?
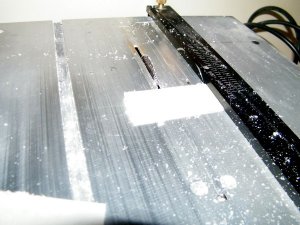
G'day Pat, this is the saw I use, it has a very fine blade and the saw speed can slowed
down, it is the smaller of the two Proxxon saws,
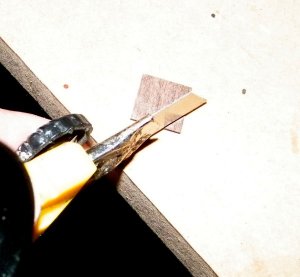
The wood tiles are already cut square full tiles and also half tiles, but you have to trim
them to fit against the cabin walls, I just eyeballed them for the amount to be trimmed
and cut them with a very sharp craft knife,
best regards John.
Hi John,
Nice flooring, like you already mentioned important to keep the grains even of the same coloured tiles.
I just cut them with a sharp pointed hair dressers scissors. Sanded them and put them in parquet mono coat oil.
Nice flooring, like you already mentioned important to keep the grains even of the same coloured tiles.
I just cut them with a sharp pointed hair dressers scissors. Sanded them and put them in parquet mono coat oil.
I have a proxxon table saw but this one in cant slow down. Have also the fretsaw but cant realy trim it good the saw snaps or bents when i am sawing tried a lot but cant get it accurate. The table saw has 3 blades gonna put the small one in.tnx
I think Proxxon discontinued the variable speed saw table,
best regards John/
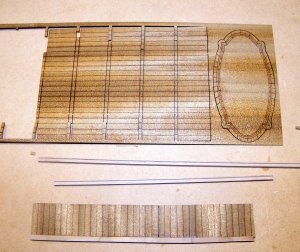
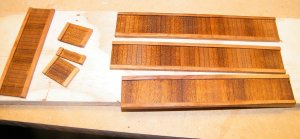
These are the parts you get for the wainscoting, and also the top for the dinning table,
you can see one section already glued in the slotted piece of wood, then you glue the
other slotted piece on the top,
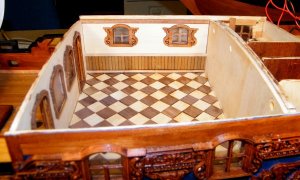
This piece in place, but not yet glued,
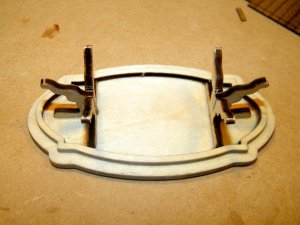
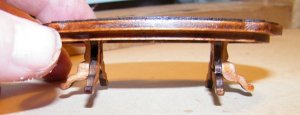
Assembling the table, the legs were very fragile and when removing them from the
piece of wood two of the leg parts broke, so I ended up with a table with two tripod legs,
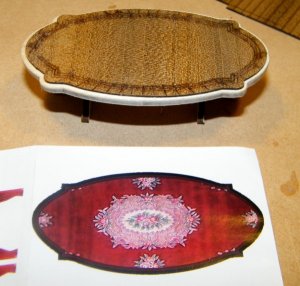
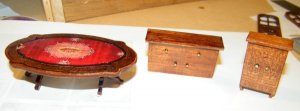
The top of the table with the black Walnut top glued in place, and below it a printed
inlay that is to be glued to the centre of the table, not sure yet if I will do this,
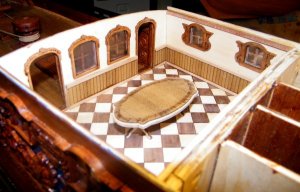
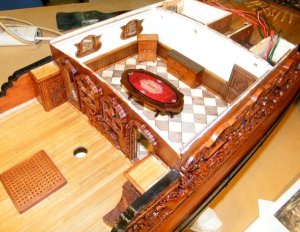
and a view of the cabin with some of the wainscoting temporarily in place and the table,
I now have to decide what colour to paint the cabin walls, I was thinking of a very light
pastel green, I would have to paint before I can attach the wainscoting.
Great details.....it is looking very „Royal“.......
Really nice kit but expensive i saw on Internet. ....
G'day Pat
You could say that this kit cost a lot of money, but it is not expensive if you work out what you will get for your money.
This kit from ZHL compare to Euromodel's Royal William are about the same price. Before I ever saw this ZHL Royal Caroline, I was going to buy the Royal William.
Now let's compare the two. The RC is virtually twice the size of the RW and has everything included in the price. Even tables, chairs and cupboards.
The RW on the other hand has only just enough timber for a basic build. All the extra deck's furniture you have to make from your own supply or you have to buy more timber etc..
The ZHL's RC has all the carvings in boxwood, the best timber for the best carvings. The RW's ornaments has heavy badly cast metal which breaks very easily when you have to bend it. I have seen people breaking many pieces by doing this.
Personally, I was so pleased that i saw the ZHL Royal Caroline kit before I bought the RW.
When one of our fellow SOS member, @janos saw my kit, he was blown away with it's quality and it's carvings. Janos, as you may know is a world leader in model ships carvings, and as he was looking through the carvings, he kept saying incedable or wow.
Taking all of this information into account, I don't believe this kit, ZHL's RC is expensive for what you get.
Hope this has helped you mate. Sorry John, for high jacking your log.
Happymodeling
Greg
Last edited:
- Joined
- Jul 29, 2017
- Messages
- 908
- Points
- 343

Started yesterday with an special bankaccount for this hobby. Hope it Grows faster. Have top finish trinidad and then the wilhelm zu pferde. That is going to become aan long project in think. Can practice lot of scratch building with the wilhelm. Have bought lotsof wood for a little price from a man who switched from boats to trains and a lot of brass.
Started yesterday with an special bankaccount for this hobby. Hope it Grows faster. Have top finish trinidad and then the wilhelm zu pferde. That is going to become aan long project in think. Can practice lot of scratch building with the wilhelm. Have bought lotsof wood for a little price from a man who switched from boats to trains and a lot of brass.
Good luck Pat with your saving!
It will be worth it mate, trust me.
Greg
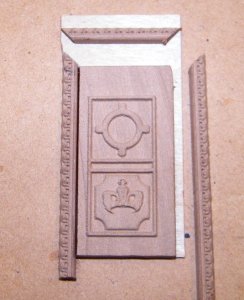
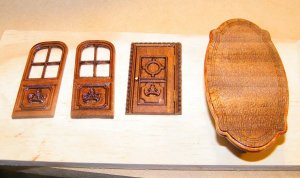
This is the doorthat goes at the back of the cabin, I cut the mitres and the surround to
the right sizes and then glued it all onto a piece of .6mm plywood,
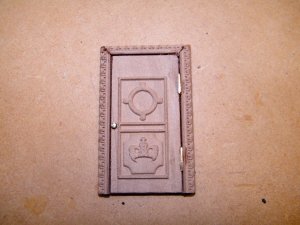
After gluing to the plywood, this made it easier to position for attaching to the back
wall of the cabin,
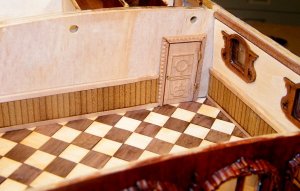
not yet glued just sitting where it will go,
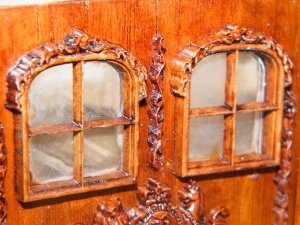
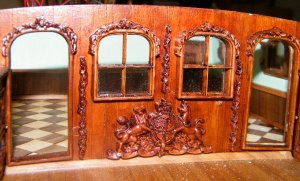
After installing the front windows I noticed that I had got some varnish on them and
when I tried to clean them they clouded up, so I replaced them with new ones,
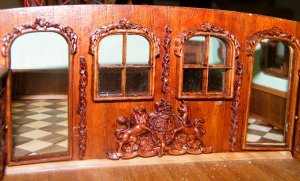
the new ones in place,
G'day John
It's looking great mate. Keep up the great work.
Havagooday and happymodeling
Greg
P.S. the psychedelic colour, I done for you memattie
You keep on doing an informative pictorial log, showing step by step instructions.
Thank you for your vast knowledge.It's looking great mate. Keep up the great work.
Havagooday and happymodeling
Greg
P.S. the psychedelic colour, I done for you memattie
I reckon this Royal Caroline kit would have to be the most detailed kit on the market in the world. Its just a superb model.


