You are using an out of date browser. It may not display this or other websites correctly.
You should upgrade or use an alternative browser.
You should upgrade or use an alternative browser.
ROYAL CAROLINE 1:30 by Zhl my version, by Peglegreg
- Thread starter Peglegreg
- Start date
- Watchers 29
-
- Tags
- royal caroline zhl
G'day MikeGlad to see your back making dust. Neat idea with the planks.
Thanks for visiting my log. The method of gluing the planks works well for me and with my Parkinson's.
This should help 'normal' people as well.
Happymodeling
Greg
Thank you my dear friend. I hoping to see your logs very soon when you are better and able to do some work.Hi Greg
Good to see you back in the shipyard my friend.
Denis.
Take it easy and listen to your dear admiral.
Greg
good to see your back to it. Heres to your continued well being.
Thank you Paul.good to see your back to it. Heres to your continued well being.
I did a little today, but not worth posting yet.
Havagooday mate and happymodeling
Greg
G'day all
Another small update, but this one I'm doing a step by step instructions for the newbies to modeling hobby.

I have also tweaked my method by adding one more step, but this will make it a lot less cluttered when doing the actual planking.
After both sides were dry fitted to the mold using my small Bulldogs clamps
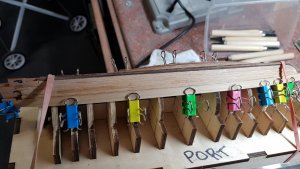
and making both the bow
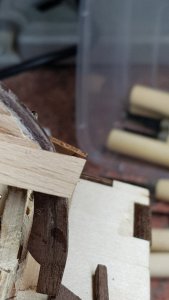
And the stern planks are even and joined flush.
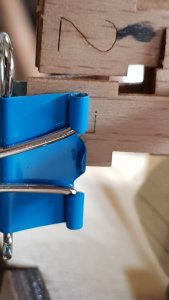
I pinned my admiral's sewing pins into the ply bulkheads of the mold. Don't tell her please.
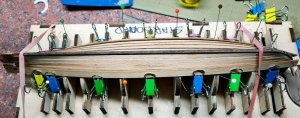
Now it was safe to remove the Bulldogs clamps to make the access to the mold easier.
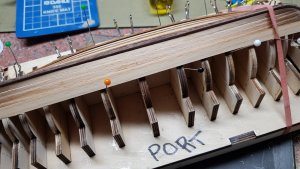
Placing the plank back on the mold, but dry fitting only I found that there was one irregular spacing between the planks.

The blue spot on the new plank doesn't match the red spot on the previous plank. I think it was my fault because I wasn't playing attention before now.
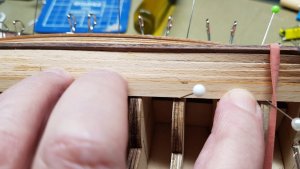
I marked a pencil line on the plank to where this plank should be trimmed to. I also make the start and finishing points and draw a line so I know how much and where to trim the plank.

As you can see there isn't much to trim.
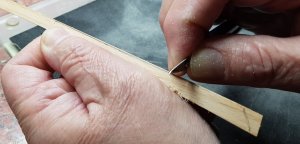
Using a scaple blade as a planner I scrapped away the plank to almost to the line.
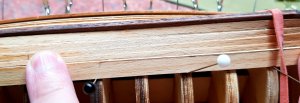 Luckily I did, as the dry fitting shows it was almost perfect.
I then planned and sanded the planks as described before.
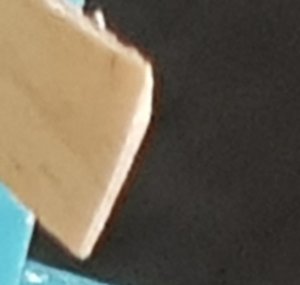
The above photo try to shows how the end of the planks looked like after playing around with it.
This is very important: The transom on this model is not beveled, so I cut a V shaped grove on the inside of the plank,
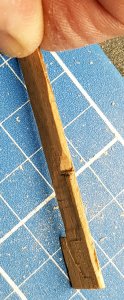
so that there will be more surface area to glue the plank to the transom.
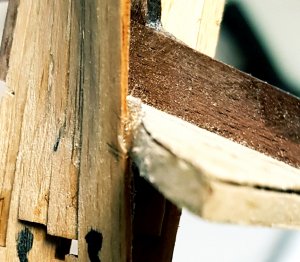
As you can see there is more surface area to glue the plank down.
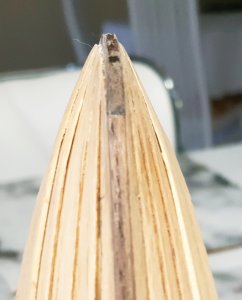
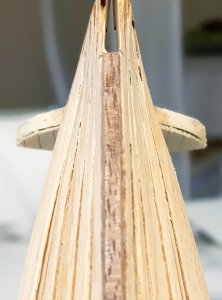
As you can see, the results are semi effective on the bow, but I'm hoping to get better with practice.

Now the 5th plank has been fitted to both starboard and port sides.
I'm a bit embarrassed to say this, but it has taken me 2 hours just to do 2 planks, so at my 'snail rate' I should be finished the planking in another mere 10 hours.
Anyway, I'm having fun and I'm so glad to be back in the shipyard.
Thanks for watching and happymodeling to everyone.
Greg
Another small update, but this one I'm doing a step by step instructions for the newbies to modeling hobby.
I have also tweaked my method by adding one more step, but this will make it a lot less cluttered when doing the actual planking.
After both sides were dry fitted to the mold using my small Bulldogs clamps

and making both the bow

And the stern planks are even and joined flush.

I pinned my admiral's sewing pins into the ply bulkheads of the mold. Don't tell her please.

Now it was safe to remove the Bulldogs clamps to make the access to the mold easier.

Placing the plank back on the mold, but dry fitting only I found that there was one irregular spacing between the planks.

The blue spot on the new plank doesn't match the red spot on the previous plank. I think it was my fault because I wasn't playing attention before now.

I marked a pencil line on the plank to where this plank should be trimmed to. I also make the start and finishing points and draw a line so I know how much and where to trim the plank.
As you can see there isn't much to trim.

Using a scaple blade as a planner I scrapped away the plank to almost to the line.
 Luckily I did, as the dry fitting shows it was almost perfect.
I then planned and sanded the planks as described before.

The above photo try to shows how the end of the planks looked like after playing around with it.
This is very important: The transom on this model is not beveled, so I cut a V shaped grove on the inside of the plank,

so that there will be more surface area to glue the plank to the transom.

As you can see there is more surface area to glue the plank down.


As you can see, the results are semi effective on the bow, but I'm hoping to get better with practice.

Now the 5th plank has been fitted to both starboard and port sides.
I'm a bit embarrassed to say this, but it has taken me 2 hours just to do 2 planks, so at my 'snail rate' I should be finished the planking in another mere 10 hours.

Anyway, I'm having fun and I'm so glad to be back in the shipyard.
Thanks for watching and happymodeling to everyone.
Greg
Thanks PatLooks good! Good your back in the shipyard. Better slow then nothing. Enjoy!
Is great to be back!
Gref
G'day BritoI can see a lot of dedication in those planks, thats the right way, i may even say that´s old school modeling and i love that kind of craftsmanship! waiting for more!
Thanks for your lovely comments. Hopefully one day I can live up to it.
Greg
Good morning Greg, happy to see you back in the shipsyard and enjoy it
greetings from Ostend
Willy
greetings from Ostend
Willy
Great info. Slow is best and more fun. I bet those 2 hours went by in an instant. The saying is 'the getting there is half the fun' is it not.
Thanks Willy and it's great to make saw dust again.Good morning Greg, happy to see you back in the shipsyard and enjoy it
greetings from Ostend
Willy
Havagooday
Greg
G'day JanosHi Greg,
good to see you making some dust! Enjoy the build!
Janos
I'm enjoying make some dust and opening up the cobwebs in my brain again.
Happymodeling
Greg
G'day PaulGreat info. Slow is best and more fun. I bet those 2 hours went by in an instant. The saying is 'the getting there is half the fun' is it not.
Thanks for the complement and I follow the tortuous, not the heare. Slow and steady win the race. That's my mew motto.
Greg
Great to see you back at it again. Yaaahooo. Hey, that pic of the terminator looked like my x-ray from the Chiropractor office --- ROFL 

Looks great, you swipe to many pins the Admeirl is going to turn you into a pin cushion.
It's great to be back with the dust, glue and wood.Great to see you back at it again. Yaaahooo. Hey, that pic of the terminator looked like my x-ray from the Chiropractor office --- ROFL
The Terminator head looks like the nightmare I was having when I wasn't modeling.
Greg
Thanks Mike.Looks great, you swipe to many pins the Admeirl is going to turn you into a pin cushion.
I 'borrowed' the pins from her on cushions in actual fact.
They are a dangerous piece of the dressmaking world, especially when it was left on the lounge. That's right I sat on it and it was stuck to my arrs...bum.
Don't laugh, that really hurts.
Greg


