USS Constitution "Old Ironsides " 1:93 Scale Mamoli

Thanks Mike it will be getting the second layer before to long
 
I decided that whilst I am doing the second planking I should also be making the copper tiles.

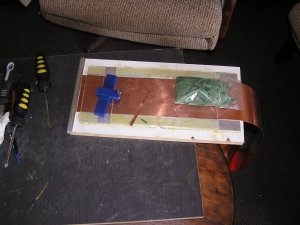
I am in the process of making the jig to hold the copper straight whilst I scribe and hopefully cut the copper into strips

My balsa cutter as well as the #24 blades turned up yesterday.

Next will be to design a stamp in imprint the nail patetern into the strips and then cut the strips into tiles

Cheers
GeoffP1010051D.jpg
 
Hi Geoff,
I read somewhere that you could use one of those dress makers devices. I don't know what they are called but it looks like a miniature pointed pizza cutter.
:music-rockout: :handgestures-salute:
 
Mike

Thanks for visiting my build log. Yes on one of Neptune''s John build logs he made some copper tiles and used a Dressmakers marker tool. This is a bit thicker I think ar 0.2mm

Cheers
Geoff
 
I have finished making the jig to hold the copper to be able to cut it into strips.

The Balsa cutter did not cut as easly as I had hoped although it did scribe the copper fairly well and scribed a straight line. The angle of the #24 blade is to upright and I might need to take a bit out of it so the blade sits a bit more horizontal which will give a longer cutting edge.

I think the strips will have to be pressed with the nail hole pattern and then cut into tiles. All 1500 of them. The green bag is the faux copper tiles.

To get to 1500 tiles I will need to cut 250 stripsP1010053D.jpg
 
If I had used the faux tiles they would not have had rivets.

Do I really need to mark rivets on the tiles?

If I don't mark rivets the an age patina.

I need suggestions and do a bit of reading

https://www.sciencecompany.com/Patina-Formulas-for-Brass-Bronze-and-Copper.aspx

Decisions

Cheers
Geoff
 
G'day Geoff, I have just read through your build log, she is looking good, with all the talk about coppering it all brought back some memories, the little wheel is called a ponce wheel, you can buy them in different sizes and with different amounts of spikes on the wheels, this is what I used on the Investigator, on the HMS Surprise I bought the copper plates already made from I think it was Cornwall model boats, I think they were caldercraft, it took 2,200 plates to cover her, I'm looking forward to the rest of your build,

best regards John.
 
Hi John

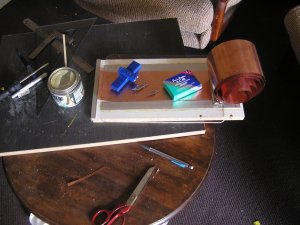
These a few tile to make. I've just tried a #21 blade which is a stainless steel #11

It actually cit through the copper with not running the strip to may times.

The copper sheet is 0.2mm thick. Do you think a pounce wheel would imprint that.

Cheers
Geoff
 
You could give it a go, the stuff I used was just like shim, you can buy the ponce wheels at Spotlight or any Sewing material shop, just take a bit of copper with you and ask them if you can try it, and what you sent me in the email, I leave it up to you I trust you, no worries,

best regards John.
 
I had a sewing one and cannot find it. I thought a stamp block would be more accurate
 
Hello Geoff

Very nice job you have done on your hull planking and preparing it for the second coat and also your copper plates. Golly but you are braver than I am. I have copper plated three ships now, HMS Victory, Cutty Shark and the HMS Bounty. I have always purchased my copper plates from the Model Dock Yard in Cornwall, UK. Will be watching with great interest just how you will approach the marking of the rivets, ENJOY.

Regards Lawrence
 
Hi Lawrence

Thanks for checking in on my build log. Yes the copper plates could be a bit of a challenge. But seen I cannot get them in the right size, I thought well we will make them. It has been done before. The Pounce wheel, I don't know whether it will do the job. The copper is thicker than tape but is the same thickness as what I used on the Norfolk Sloop. I can build a block for nothing with dugouts for it to stamp into. Sandwich the copper between. That might work and so might a Pounce wheel. The Pounce wheel is more for Tape I think.
I don't really know what will work with this. Just have to experiment

Cheers
Geoff
 
G'day Geoff
Bloody fantastic job mate. I like every thing that you have done.
Also your log is very informative.
Havagooday
Greg
 
Greg

Thanks for visiting my build log. I find with a build log I like to see how some of the construction is done and get ideas. It might help some other builder and that is what a forum is all about.

Hope to see you starting a build log soon

Cheers
Geoff
 
G'day Geoff
I'm thinking very seriously of buying the same kit as John (Neptune). It's an amazing kit, the best kit I've seen.
I'll will be trying to match John's excellent work.
There is another project that I might do, just weighing up which is the best for me.
Havagooday mate
Greg
 
Greg,
you can be reassured by buying the Royal Caroline kit from ZHL models directly as I have purchased many times from them with paypal and he is a very reputable trader.

Sorry Geoff for hijacking your build log.
 
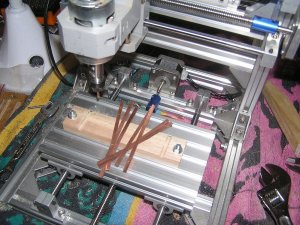
Well things were going well today and I just about finished milling out a block to hold the copper stripes and well the router decided to chuck a wobbly. Yes the linear screw decided to part company with the stepper motor.

Well time to find another piece of scrap. Tighten up a few grub screws and start again.P1010057D.jpg
 
Take 3. The issue of the Y axis failing was the colette holder having dropped a bit and jamming when the Y axis was running. I found that out in take 2 when the Colette holder completely dropped. An ice simple job this should be. :angry-banghead: :angry-banghead: :angry-banghead:

These stepper motors are pretty strong an in conjunction with the screw dragged the coupling off the stepper motor

At least the file is written for the CNC and it is just a matter of slicking send on the computer.
 
Hi Geoff, that is a damn nice looking CNC. If the shaft does not have a flat side on it I would suggest that you make a flat side, not more than 25% of the diameter! This way if the grub screw does work loose a little there will be an angle that will wedge itself against the grub screw. The shafts are made of mild steel and will file easily with a hand file, depending on the length of the shaft flatten from 6 - 10mm length. If you clamp the shaft in a vise don't use too much pressure as you may distort the shaft.

If your PC has a spare PCI slot you can purchase a parallel port card.

Regards
Eric
 
Hi Eric

Plenty of room for a PCI. card. The one I saw earlier plugged into the motherboard and not the PCI.

The CNC machine is solid as but a cheapy and is currently being enlarged so I can mill up to 180 * 280 mm.

Once they are running normally all you gave to do it turn the vacuum on every now and again.

If I new what I know now about them I would make one. All the parts are on eBay.

Cheers
Geoff
 
Back
Top