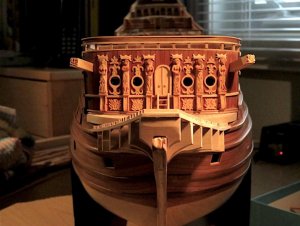
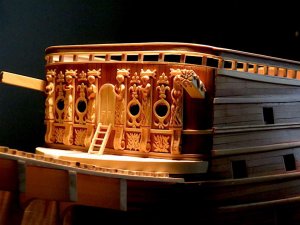
Sovereign of The Seas 1637 - Heavily modified Mantua kit

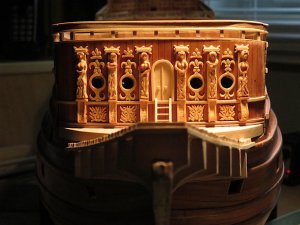
The remaining two cat head carvings are now in place below the gun ports and it is time to move on to the ports at either side of the bulkhead along with the catheads and supporting sculptures.
57C0B49F-8C10-4D48-9885-3BFA8784157F.jpeg

As a result of a recent discussion with some other modellers, I have chosen to believe that the additional two ports shown at port and starboard location on the bulkhead in the Van de Velde sketch were possibly observation ports as there is a lot of anchor rigging directly in front of the ports from the catheads and it would seem that gunfire from a canon in these ports would not be possible. I intend to construct the catheads and surround these two ports with decorative carvings. I have marked the centre of the observation port openings in pencil.

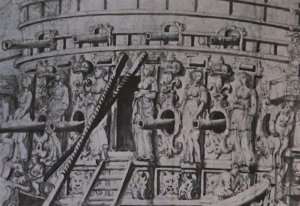
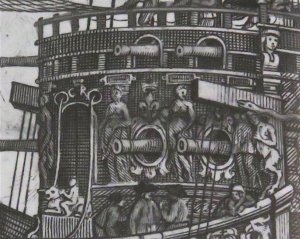
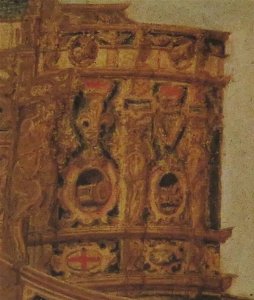
I will include three contemporary reference photos which show this area.

First, the Van de Velde sketch which clearly shows the port in question below the cathead. You will note that the ornamentation surrounding the port is not the same as the other ports due to the space taken by the cathead mounting and the Satyr carving below it.
62AA2B28-D949-4BA8-AA7A-67058383D942.jpeg


Next is the Payne engraving which does not show this extra port.
F95724B4-636A-4B05-A3F5-75AA8D981BDA.jpeg

And finally, I have included the painting from the Museum of Fine Arts Boston showing the starboard view of this area which is in keeping with the Payne engraving.
4D00667D-7E58-4B80-B596-3F918EEA3E70.jpeg

There lies the issue. The answer is not clear. The Payne engraving shows rigging lines in place from the cathead while the other two do not include the rigging.

More to follow..........
 
Last edited:
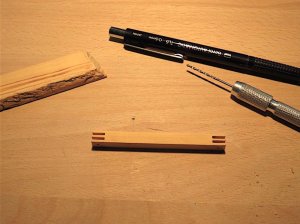
The cathead construction is underway with the slots being cut for the sheaves to fit in.

50C61BCC-6230-4593-808E-6B6A4E12BBB8.jpeg

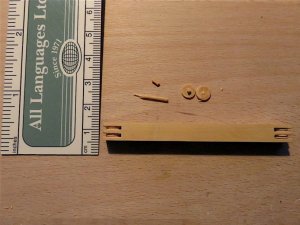
This photo shows the catheads with the 0.75 mm wide sheaves in place with boxwood axles produced with a draw plate. The sheaves were turned on a Unimat lathe. it remains to separate the two catheads and devise the mounting method. Then the actual cat heads must be carved and glued in place on the ends.

D9F75A7E-D308-4B68-A649-96719F0324DD.jpeg

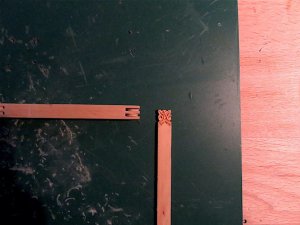
The first of two cat heads to cap the end over the sheaves.

F6FF7A2F-64EE-4744-BC3B-BEDBF776A9FC.jpeg

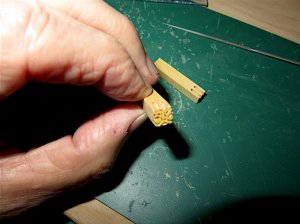
The cat head is carved and mounted against the slots for the sheaves.

4C6C89E7-028C-444F-89D2-0BFEF53A75A1.jpeg

More to follow...........
 
Last edited:
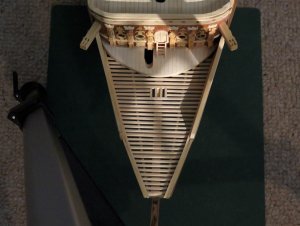
After some considerable thought about this area and a frank discussion with an experienced modeller and trusted friend, I have decided not to include the extra two ports. Looking at the three presentations of this area, The Payne engraving, the Van de Velde sketch, and the Boston Museum painting, two out of three do not show the port. Only Van de Velde indicates that a port may have been there. As I have completed fabricating the catheads and can now see their size when held in position, I note that with the addition of a Satyr carving below them, there would be no room for a port. As well, we discussed the angle of the catheads relative to the centreline of the ship and determined that they might be at 15 degrees outward angle in order to clear the sides of the beak and allow anchor movement. With this placement, a port would be impossible as the Satyr would be in that area. I can only surmise that Van de Velde may have added it as extra detail. The good news is that as there is no original draught of the ship from that time, it is anyone's guess as to what it really looked like. Having to rely on contemporary paintings and drawings leaves me in a position to choose my own path.

More to follow.............
 
The catheads are loosely fitted to the bulkhead showing the space below that will house the Satyrs that hold them up.

56F7E8CD-41AE-44E2-A2C3-1CF51C39FB01.jpeg

There is some additional detail to be added to the sides of the catheads before final mounting.

567B33A7-2568-4DFB-B77A-E0CFFE7107ED.jpeg

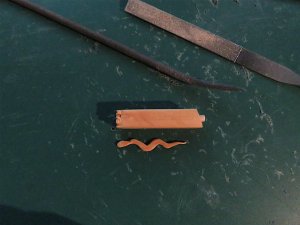
This photo shows a serpent that will be mounted on the aft side of the cathead.

EED598F2-029E-4D06-9C77-D92BCFA5FE19.jpeg

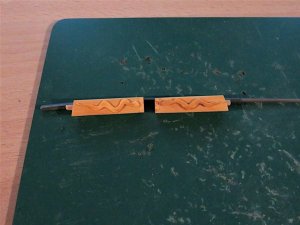
The two serpents mounted on the aft sides of the catheads.

DA173817-4D57-45B3-932E-89E31C9CBE11.jpeg

The catheads are mounted and next is to carve two Satyrs to be fitted underneath them.


More to follow...........
 
Last edited:
Hi Bill,
Well at last, I was able to view your Build Log after a while of being out of the loop with so many other things going on.

MY OH MY !!!

This is just too much that my limited vocabulary can express. Your documentation is superb !! The carvings are purely remarkable and something that I could only do in my dreams. I have never tried carving, but I can pretty much predict that I would not be good at it.

The historical account that you have given is stunning. I never noticed the calipers until you mentioned this in your post.

Your craftsmanship is far beyond my abilities I can assure you and I hope that you receive my compliments well.

Thank you so much for taking the time to post all of your work to this small, yet humble forum.

Donnie
 
Thanks for your comments Donnie. They are really appreciated. It is my pleasure to be a member of this forum and share experiences with other modellers. And yes, I like the smaller more intimate size of this forum.

Regards,
Bill
 
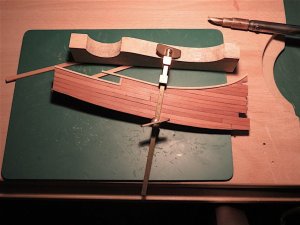
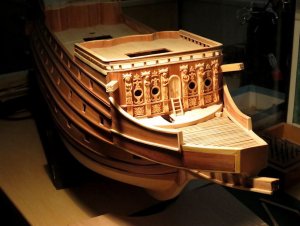
In order to gauge the size of the Satyr carvings, I decided to prepare the side panels of the beak including capping the sides with a boxwood rail. This required bending the cap to the curve of the side with a brass tip on a soldering gun. Soaking the strip and repeatedly coaxing the wood to shape on the form shown at the top of the picture did the trick It is now glued in place and clamped.

6313C8DB-6227-4897-83A0-9B0C111C88D5.jpeg

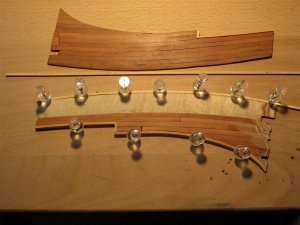
This photo shows a boxwood trim piece being glued to the bottom edge of the port beak head side panel. The starboard panel and trim piece is shown above it.

623DFEC6-B135-43AF-AFFF-D1F73E2636EE.jpeg

After a few days of adjusting and fitting the bulwarks of the beak head, they are now assembled on the ship. The following photos show this progress. Now I have a clear idea of the size the Satyrs must be in order to support the catheads and rest hooves on the rail of the bulwarks.


There is additional work to be done with added bits and pieces at the front of the beak.

0E982A5D-68D9-4C4F-9A43-A58E174AA6B1.jpeg

5675EB8E-F456-4ABC-A6F7-90C3EDF0B609.jpeg

More to follow.......
 
Last edited:
Well, this build log has now pretty much caught up with where I am in the construction of my Sovereign and thought I should tell you a little bit about how I am building her. It started as a kit as mentioned before, and after the bones of the hull were put together, I modified the stern to allow for scratch building the Sir Peter Lely version of her. I recut all the hull parts out of plywood that I had used in the hull construction and put them back in the kit box and sold her to another modeller. I was now on my own with contemporary paintings and reference material to forge ahead and complete the ship model.

This build is a "visual" build for me as I do not take any measurements of the parts used in her construction with the exception of the deck and hull planking widths and lengths which are historically to scale. By that I mean that I use my minds eye to determine how big each part will be so that it looks in perspective and relates to the paintings and engravings of the ship. It is very much an artistic presentation that reflects the way "I see it". I suppose some people could take me to task for this approach, but as there are no surviving contemporary plans for this ship it is anybody's guess as to what she actually looked like. Was Van de Velde right with his sketch, or was Payne correct with his engraving or was Sir Peter Lely correct in his portrayal of the stern? They were artists without the benefit of digital cameras to record the ship for posterity. Therefore I feel comfortable with my interpretation of her and no matter what anyone thinks of this approach, it cannot be criticized to any great degree other than my workmanship which can be taken to task.

So, now you know what goes through my mind as I add various sculptures or structural components to the model and why I am doing the things I am.

Your comments and suggestions are most welcome and I will be glad to share any of my experiences in building her with anyone who is interested.

Regards,
Bill

More to follow.............
 
The way you see it is the way most of us would like to be able to do it! I look forward to your posts, fantastic work and please keep them coming. Cheers.
 
eric61 said:
Bill, have done some calculating and I reckon that you will have the Sovereign finished by 1645 (not sure what day tho')
Eric

Given your calculations Eric, would you be so kind as to run interference for me with King Charles as it looks like he won't be pleased with the completion date. ;-)

Bill
 
Well, looks like life has got in the way of working in the shop. Kitchen renos and garden work have taken over. It is a little hot in the shop as it is on the second story and it has been quite hot weather lately. I hope to get back to it in a week or so.

Regards,
Bill
 
I know exactly what you mean, Bill. I got a little time in on my build over the last couple of days, but urgent jobs now loom as directed by She Who Must Be Obeyed. At least it's nice to be in demand. Regards.
 
This just blows my mind every time I take a peek at this build. Really beautiful workmanship.

Donnie
 
Thanks for the kind comments Donnie. I really appreciate that.

The heat is subsiding and I am soon able to return to the shop and resume work. I did spend a week building a pirate ship kit with my nine year old granddaughter. It turned out just great and she built it all by herself with my direction.


Regards,
Bill
 
I must say Bill, you are a true artisan. This is without a doubt in my brain, some of the most strikingly, beautiful work I have seen. A truly remarkable gift from any viewpoint, surpassed only by the humbleness found, within your posts.

Dave
Seattle
 
Thank you Dave and Gary for your very nice comments. Sometimes I look at the carvings I have done and can't quite believe that I carved them. It is a right brain activity to create something like this and I was helped greatly by the book " Drawing On The Right Side Of The Brain" which explains how to engage the right side of your brain to be creative. I recommend this book for anyone who wants to learn how to carve.

Regards,
Bull
 
Back
Top