Nice looking work Dave.
You are using an out of date browser. It may not display this or other websites correctly.
You should upgrade or use an alternative browser.
You should upgrade or use an alternative browser.
Royal Navy Ship of the Line Cross Section by DocBlake - (Mamoli's "Constitution") - 1:93 scale [COMPLETED BUILD]
Every project you are doing is so finely detailed and wood choices are just great. You have some mad skills my friend.
Mike
Mike
Thanks, guys!
Havta agree with Mike. You got it right mate. Glue it.That's a piece of cake for you Doc!!! Start gluing...
This part of the build isn't good for people with Parkinson's disease!Yes.....the situation will not change (but I know very well the situation) -> make it, the steps are looking good.
But keep in mind - only a small dip of glue and no shaking fingers and and and.........
Happymodeling
Greg
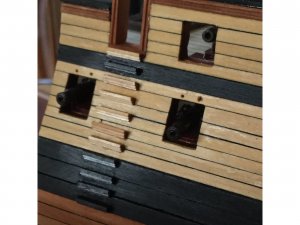
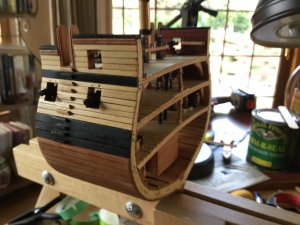
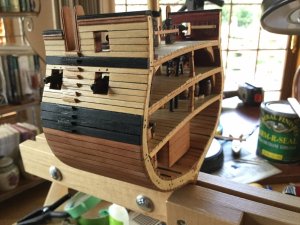
I finally got around to gluing the boarding steps to the hull. The first step was to draw a vertical line lightly in pencil as a guide so the steps line up one below the next. I laid out the pattern of the steps so that the spacing between steps is correct, using double sided tape. See the photo in my post above. I then started gluing the steps to match this layout on the opposite side. To glue I used two small drops of WeldBond and three tiny drops of gel CA. It worked well. In the photos you can also a fife rail with belaying pins an the bulwark, and the aft bit at the level of the main mast. The holes above the gun ports are to mount the lids with pins and glue. The channels and deadeyes are next.
I do have one dilemma! Most (but not all) British naval vessels had hammock netting attached to stanchions on the main rail. The stanchions are included in the kit , as is some white gauzy fabric to make the netting. I think it will look like crap. I'm thinking of mounting the stanchions and their ropes without adding the netting. What do you think?
BTW: The keel clamp the model is sitting in is one I designed and build myself. I used fancy plastic star knobs for all the carriage bolts, but if you use plain old thumb screws, you could build the whole thing for about $5 if you have some scrap hardwood laying around!


Last edited:
looking good Dave.
She's a beauty Dave. Well done mematie.
Happymodeling
Greg
Happymodeling
Greg
It looks really good Dave. With the Hammock netting, here in the UK some fruit and veg comes in a netting type bag and I have seen someone using it to make Hammock netting. Not sure if the scale would be correct but it might be worth checking a local fruit and veg store.
Cheers Andy
Cheers Andy
Canoe21
Lawrence
Hello Dave
I wish to congratulate you on such a fine job that you have did on yourMamoli Constitution cross section, you sure have put in a lot of skills to come up with such a great looking model. Just love your post # 73 with the sun shining through, very nice indeed. Super job you have did on your steps, did you cut 3 separated pieces of wood or mill these out on your little table saw? Well Done, ENJOY.
Regards Lawrence
If the net is not in scale, it is looking terrible (in my opinion)......I would not install them on this small scale section
Thanks, guys!
I had a nice 3/4" thick walnut cutoff in the shop. I cut it to an elongated octagon shape and routed a profile on the edges. I wiped on several coats of wiping poly. To mount the model a took a two pieces of brass rod, 1/16" diameter and epoxied them into two holes I drilled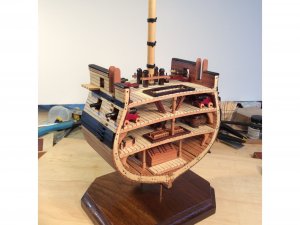
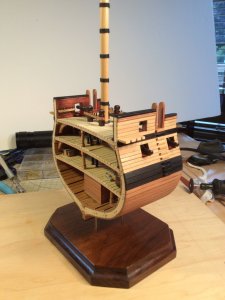
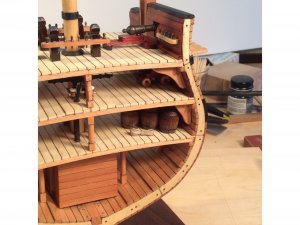
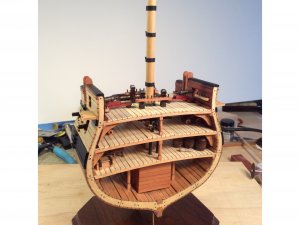 into the keel from the bottom. I the took 2 pieces of 1/16" I.D. brass tubing and mounted them in holes I drilled in the wood base. The brass rod fits inside the tubing and supports the model.
I added the two channels and belaying pin racks and started putting the final coats of poly on.
Remaining jobs:
-finish the poly.
-mount the deadeyes and chain plates.
-install the main mast bitts and glue the mast in place.
-install the brass stanchions for the guard rails on the ladder hatch.
-glue the carronades in place.
-mount the hammock netting stanchions.
-add gun port lids.
I had a nice 3/4" thick walnut cutoff in the shop. I cut it to an elongated octagon shape and routed a profile on the edges. I wiped on several coats of wiping poly. To mount the model a took a two pieces of brass rod, 1/16" diameter and epoxied them into two holes I drilled


 into the keel from the bottom. I the took 2 pieces of 1/16" I.D. brass tubing and mounted them in holes I drilled in the wood base. The brass rod fits inside the tubing and supports the model.
I added the two channels and belaying pin racks and started putting the final coats of poly on.
Remaining jobs:
-finish the poly.
-mount the deadeyes and chain plates.
-install the main mast bitts and glue the mast in place.
-install the brass stanchions for the guard rails on the ladder hatch.
-glue the carronades in place.
-mount the hammock netting stanchions.
-add gun port lids.
Hi Dave,
Combine this section with your battle station and you are nearly to a complete vessel.
She is becomming a real beauty by now.
Combine this section with your battle station and you are nearly to a complete vessel.
She is becomming a real beauty by now.
Thanks, guys!
looks Awesome I love the dark color between the planking
You made realy the best out of this kit - very clean and accurate work
Almost done! I'm in the home stretch now. I finished the poly, installed the main mast bitts and glued the mast in place,
installed the brass stanchions for the guard rails on the ladder hatch and rigged the safety lines, and glued the carronades in place.
All that's left:
-mount the hammock netting stanchions.
-mount the gun port lids.
-Mount the deadeyes and chain plates and finish the channels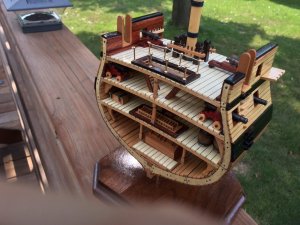
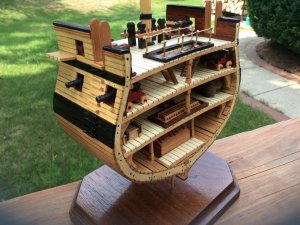
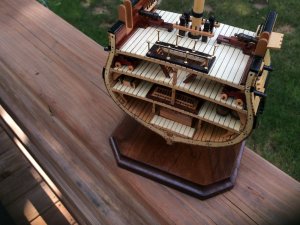
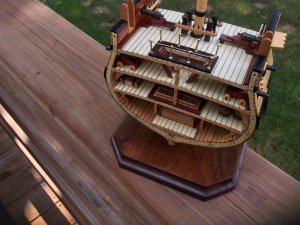
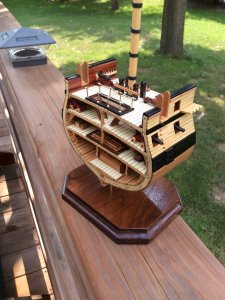
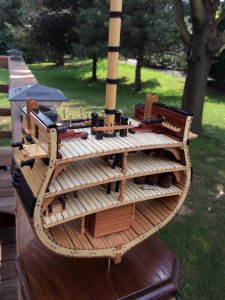
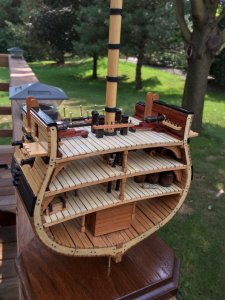
installed the brass stanchions for the guard rails on the ladder hatch and rigged the safety lines, and glued the carronades in place.
All that's left:
-mount the hammock netting stanchions.
-mount the gun port lids.
-Mount the deadeyes and chain plates and finish the channels


Dave, your choice of woods have really made this model look fantastic!! Looking forward to seeing more.


