Panart: San Felipe 1:75 Scale Build Log [COMPLETED BUILD]

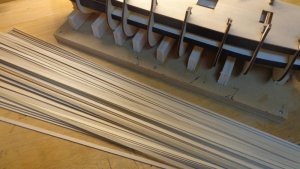
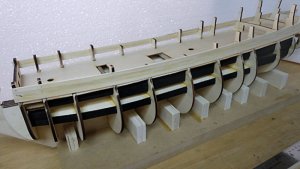
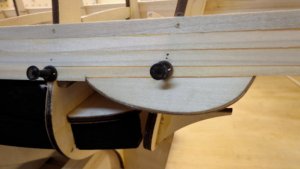
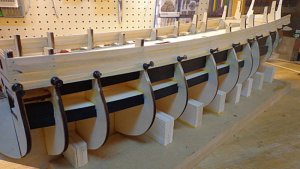
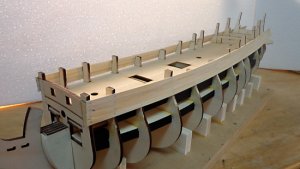
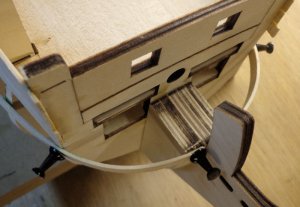
Gluing up the False Deck and preparing to start the upper initial Planking. Lime Strips 1.5 x 7 x 800 mm are given for this. From the tips of the Bulwarks sticking up to about the wales is the stopping point, then the Decking and upper decking will be added later.

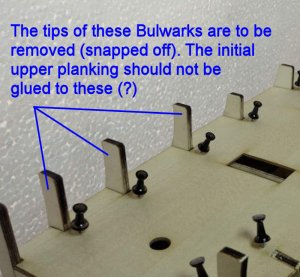
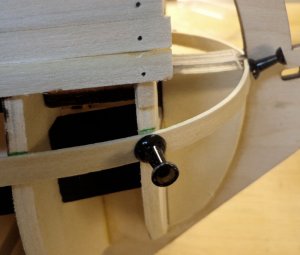
There is one part that I am not too sure about. (See the second image)
The planking that runs from the wales up to the tips of the Bulwarks obviously will be glued up, however, will there be any glue on the sides of the tips of Bulkwarks since these parts are going to be removed anyway. This is something I am going to have to figure out. Seems logical that there would be *no* glue here as then it
would be nearly impossible to break free the tips.

.frame34.jpg

frame35.jpg
 
Last edited:
Did you check gun port position on this black beam ?
Earlier sets that were vertical cannon support have problem whith property position. When do you cut gun port they dont coreponding whit this cannon support. If you have template whit side of gunport hole check it now. If you search the internet other relation with the construction of SF then you will understand what I mean. I see that you have a fixed set so maybe this error does not occur anymore. Now i have two building of SF . One in scale 1:40 and one 1:50 :)

You must glue the plank to the top. After gluing double plank you can undercut at the height of the highest decks and remove this detail. Then you can plank inside. Ofcourse before that you can end the planking of thedeck.
 
Thank you JScolum for your input. I was unaware of the lower gun ports not lining up. I have read about the deck guns not lining up as well with the ports. I am trying to prepare for this in advance so I will not have a problem. The Cannons carriages also look a little too tall in height which also adds to the problem of the Cannons pointing downward instead of pointing straight out.

I noticed on this model that the balsa (that I painted black) in between bulkheads is completely different design from the individual blocks.

Donnie
 
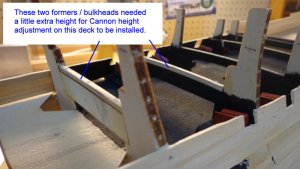
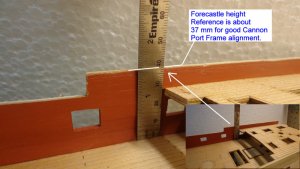
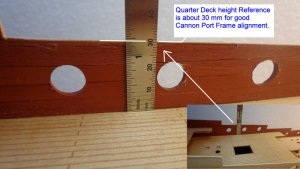
This part is a difficult situation. I have researched and found that a lot of the San Felipe kits from Panart (older kits) have a problem with Cannon Carriage - Cannon alignment as the Cannons are pointing or facing the port frames. The deck has been noted to be too high and the Port Frames too low which in that combination results in poor alignment of the Cannons pointing outward. If going by the instructions, the Cannon's would be facing very much downward.

In this situation, I mocked up a Cannon and placed it on False Deck with a shim of same thickness as the real deck. The Cannon Carriage is not shown as it was
only temporary to adjust the height of the outer facing preformed lazer cut piece. The preformed lazer cut piece already has the Cannon port openings cut out. I adjusted the preformed piece as close as I could so that proper alignment can be achieved. If later, the alignment height is off, then I can make adjustments to the Carriages height. The Carriages seem to be a little too tall anyway.

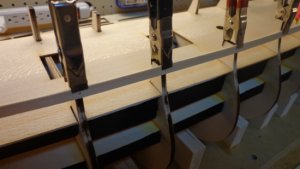
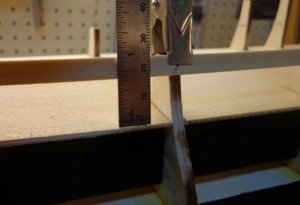
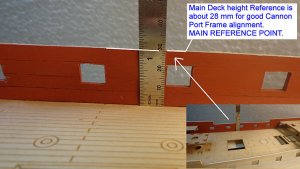
The ruler was used to make sure that the Lime Strip was about the same height from fore to aft ship.

Take note of the orange clip. This position has a Bulkhead former. On this particular former, you are supposed to align the first plank to the top of this bulkhead former tip. This is a guide as the lazer cut upper outside bulkhead strip that has the cannon port openings will be glued to this. If the first plank is not set right, then the result would be the Cannon's would be offset incorrectly.

The point is that after studying the situation, I can not go by the instructions which says to make the first plank flush to the top of this former, but I raised the first plank about 3mm so that the end result that the lazer cut upper 'outside' bulwark will be in the correct position for the cannon port lids.

I noticed that even looking in the pictorial manual, that the main deck, the cannons are pointing very much downward.

frame36.jpgframe37.jpgframe38.jpg
 
The Planking begins....

23476
 
Last edited:
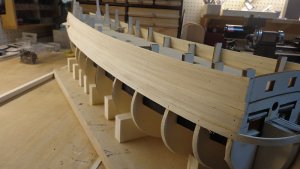
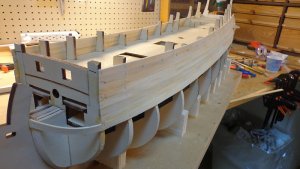
The main Planking continues. This process I use is simple there are no major curves in this section:
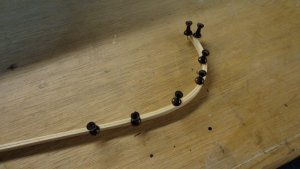
  1. I run hot water over the plank for about 20 to 30 seconds.
  2. while it is wet, I put wood glue along the edge of plank
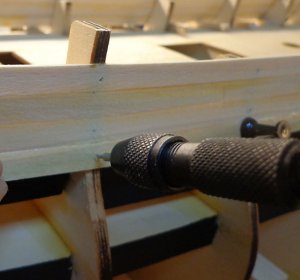
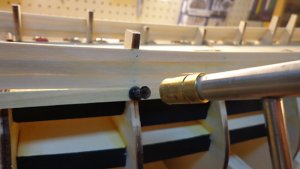
  3. using a pinvise and holding the plank up against the preceeding plank, I make a hole
  4. nail a tack into the plank all the way down.
  5. Let dry completely.

2347723478234792348023481
 
Last edited:
Looks like she is comming along nicely Donnie

I found your planking descrption interesting

Cheers
Geoff
 
I use little short nails that I put into the sides with a Amati nail driver. these tiny nails are then pulled out after the plank is dry. this makes only a very tiny hole and Modelexpo sells bags of 100 very cheap. The small nail holes do not weaken the plywood frames and no predrilling is required.
 
Hello Gary,
Can you post a photo of the "Amati nail driver", I not know what is it.
Thank you,

Donnie,
Your work is very nice to see.

Daniel.
 
By the way, this layer of planking is just a base. It will be covered up with a lazer cut upper bulwark (with cannon cut-outs) and inside walnut strips.
 
Well, I know this will make everybody cringe, but I do not have any plank bending tools. Just soaking in hot water and pinning down on bench top. It is what it is....

23482

Donnie
 
Last edited:
Hi Donnie very nice work, congratulations. By the way, I use the same method to bend strips too.
 
Your wife's hair dryer will help set the wood right once it is bent the way you do this. Heat while it is wet allows the wood molecules to shift and set right so there is more of a permanent bend. Also cuts down your waiting time.
 
correct Gary, yes, I do that. I had it pinned down I guess so that the wood would not relax back a little, but mainly to keep its shape until I use it. I am ordering the Mantua Plank bender soon and will try it out when I get it.

Donnie
 
Great Photos, Nice work
If you pre bend as you have then you can use the map pins so that just the edge holds the plank in place with the pin underneath instread of through to support it while the glue dries . Then there is no hole. The front can be held agaist the stem with a small block of wood clamped.

For bending I use an old hair curing iron/wand. Damp wood bends and holds it shape as the curler dries it, I put it in a dremel vice and run the wood across it. Just don't let the missus catch you. They can be had a lot cheaper than a electronic bender.
 
Thanks guys for the tips, expecially the map pins making holes. The holes are going to be covered up by a lazer cut piece that spans the entire ship and downward pretty far to the Wales, however, YES, I need to remind myself to STOP using the pins in this fashion up to that point. Thank you for bringing this to my attention. However, now that I am thinking about it, (and if I remember, I think the entire hull below the Wales is going to be planked again in Walnut veneer strips),,so if this is the case, it would not be a problem in any case. Wrapping the Strips around something like a can like you have it is also a good idea and I have done that before too.

Actually, what I had in mind doing was "over bending" the strip a little so it would be easier in a way to form it to its last shape.

Donnie
 
Lots of good techniques for planking being discussed here and I guess it comes down to what people are comfortable with. For me, I soak the planks in a tall vase, bend with a heated bender and then fix them in place; unfortunately, having the patience to wait for things to dry is not one of my strong points! Looking nice so far, Donnie.
 
Thanks Graham.

Well, to be specific if I may and not sound like I am repeating myself, this is exactly what I do. Turn on hot water in sink and let it run very hot while moving the plank back and forth under the running water for about 15 or so seconds. Water here is not that expensive and it is not like it is running for a long time. Then I take the wet soaked plank, run a bead of Tite Bond II glue along edge of plank and then attach it to the hull [preceding plank] using tacks (either right into the plank or right underneath).
Then repeat. I have found that I am not worried about how fast the plank drying as I have already attached the plank and I will be moving on to the next plank anyway. You may think the wet wood would dilute the glue, but it is not enough to worry about as the joints I have found very robust. Then after laying about two planks, I then do the same thing for the other side of ship. I had read somewhere to alternate like this to keep the keel from warping with too much pressure from building up planking only ONE side of ship. I have about 7 planks now laid and I removed the ship from its building board and the keel so far is very straight with no warping I can tell. BTW- laying down about 4 planks (two on each side) is about my limit anyway due to the lack of clamps I have for now. After about two hours, those planks and glue has dried enough that I can remove the clamps and move on to another set of 4. This is the fastest way I have found that works for me. Now, if I am doing a tight bend, that is different. I will use a hair dryer and pin down the wet plank and form it.

Donnie
 
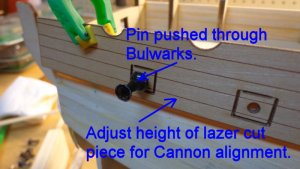
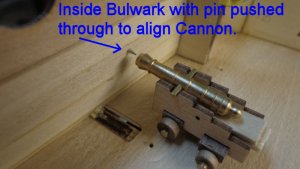
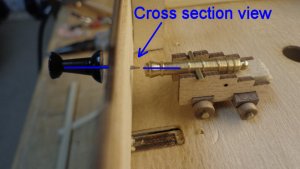
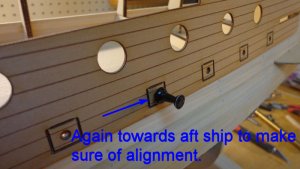
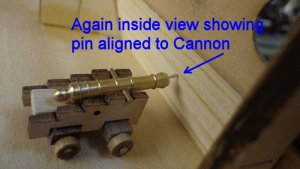
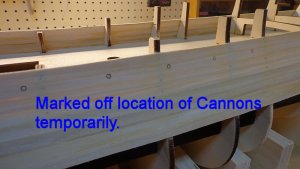
In the following images, I am making an alignment of the Cannons for proper aiming. I do not want the Cannons to point downward or too much upward, but rather straight out. In order to do this, I had to get the lazer cut bulwark piece and shift it up or down. I used a pin through the Bulwark to come out on other side to make my alignment with Cannon Barrels.
NOTE: The Cannon Carriages are temporarily put together and not glued. I know they are crooked - this is only temp for alignment purposes. I am not in favor too much of the carriages as they seem a little too tall. They might be ok after I work on them, or I might make my own. The kits carriages are nice and I am surprised they went through a lot of effort as the many pieces milled out to make this. I can appreciate this myself.
THIS STEP IS VERY IMPORTANT AND REALLY NEEDS TO BE MENTIONED AT BEGINNING OF BUILD. In order for the Cannons to have proper alignment in the Port Frame openings, please observe the height measurements taken at Deck level to upper edge of Bulwark. Three different measurements have been made. At the Forecastle, Main Deck, and Quarter Deck.
2348523486234872348823489234902349123492234932349423495
 
Last edited:
Back
Top