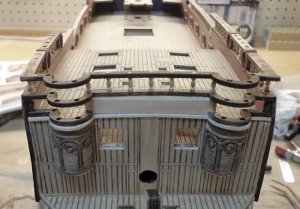
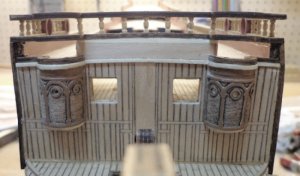
Looks great Donnie!
You are using an out of date browser. It may not display this or other websites correctly.
You should upgrade or use an alternative browser.
You should upgrade or use an alternative browser.
Panart: San Felipe 1:75 Scale Build Log [COMPLETED BUILD]
- Thread starter Donnie
- Start date
- Watchers 62
-
- Tags
- completed build
Another error on Mantua's part, I see. I wish they would go back to allowing us to plank the decks. They look better that way I think. But it is still a ggod looking kit and makes a nice model. Nice progress.
A
Aussie048
Guest
Donnie
Deck planking looks excellent and the tree nailing idea of how to set them in is a great idea.
Cheers
Geoff
Deck planking looks excellent and the tree nailing idea of how to set them in is a great idea.
Cheers
Geoff
Thanks Geoff.
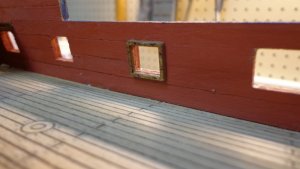
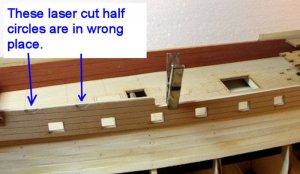
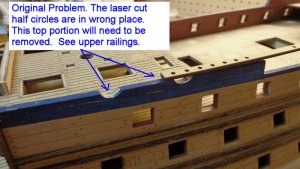
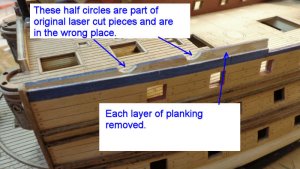
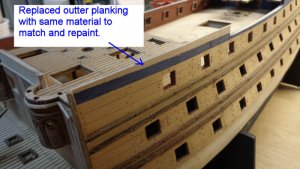
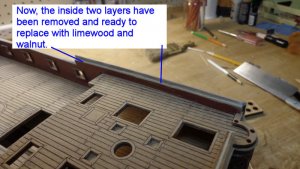
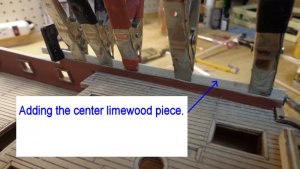
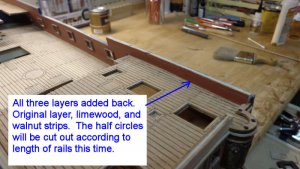
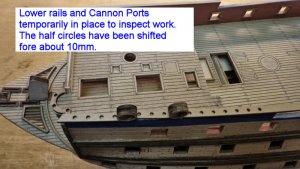
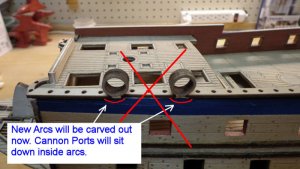
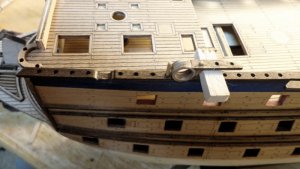
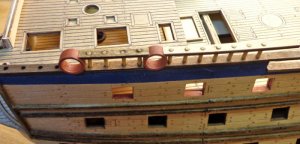
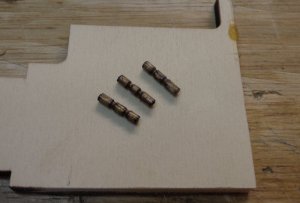
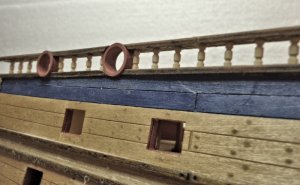
Ok, here's a fairly big problem. This first image is from an earlier image that I grabbed to make an illustration. The point is that the half circles that are already laser cut into the planking are in the wrong place. They will have to be moved fore about 10mm each. This next image shows the rail in place and as you can see it overlaps a lot over the half circles. The half circles are where the round Cannon Ports will go. The following images show the basic step by step of removing the layers of original planking, limewood, and walnut strips. This will be redone and new half circles will be cut out in the proper location. The last two images shows the cutouts are WRONG. I realized later that they are not in alignment with how Cannon Carriages will sit on deck. If left this way, the Carriages would be sitting on the Grattings. The carriages need to sit inbetween the Grattings and therefore these cutouts will be spaced farther apart !!! The Center Railing that has three post will be removed and a longer piece added (made from scratch) -- images at next post will show the final correction.
Ok, here's a fairly big problem. This first image is from an earlier image that I grabbed to make an illustration. The point is that the half circles that are already laser cut into the planking are in the wrong place. They will have to be moved fore about 10mm each. This next image shows the rail in place and as you can see it overlaps a lot over the half circles. The half circles are where the round Cannon Ports will go. The following images show the basic step by step of removing the layers of original planking, limewood, and walnut strips. This will be redone and new half circles will be cut out in the proper location. The last two images shows the cutouts are WRONG. I realized later that they are not in alignment with how Cannon Carriages will sit on deck. If left this way, the Carriages would be sitting on the Grattings. The carriages need to sit inbetween the Grattings and therefore these cutouts will be spaced farther apart !!! The Center Railing that has three post will be removed and a longer piece added (made from scratch) -- images at next post will show the final correction.
Last edited:
great build log Donnie, and very informative with the added tutorials.
Thank you Brian.
Now on to installing the Railings. I also included a quick video on it as well. The Rail is stained again using "Provincial color stain".
[youtube]O4aRQ_DPbxQ[/youtube]
Now on to installing the Railings. I also included a quick video on it as well. The Rail is stained again using "Provincial color stain".
[youtube]O4aRQ_DPbxQ[/youtube]
Nice video. It is great that it become full screen when you click on it so that it is real clear what you have done.
Thank you Gary,
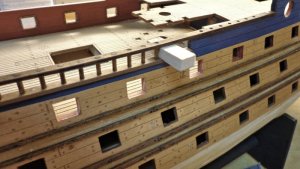
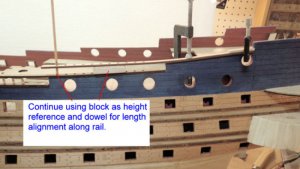
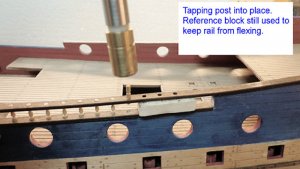
Well, I can't believe it - after all that work was done, (on replacing the upper inside an outside planking, as it turns out, the Round Cannon Ports are in the wrong position - Arggg ! Dang ! Ok, so after looking at situation, (and again, reading far into the manual) and a little observing..........you really have to be watchful for A LOT of things besides what you are focused on. This time, the Cannon Carriages would have been sitting right on top of the Grattings on the Forecastle. I realized this and did a little maneuvering of where the Round Cannon Ports "should be" located. Using that as the reference, I proceeded with mounting the Railings.
On another note, I actually had to scratch make the Railing that is situated between the two Round Cannon Ports. I had to make the railing a little longer and actually had to ADD one more stanction to make it come out right and to look right.
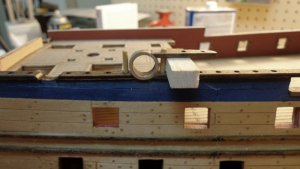
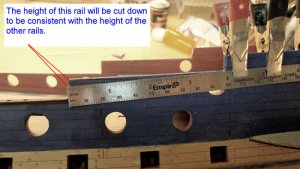
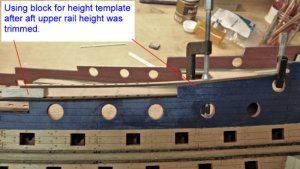
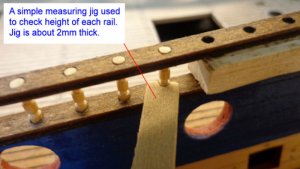
Then as you can see from the image that I used a spacer from the railings that was done and used it as a height gauge for the upper railing next to the Cannon Port. All in all, this part has been THE most frustrating and THE most time consuming part of the whole build. I have worked probably about 6 hours total on trying to get this one section to work out correctly.
Last edited:
A
Aussie048
Guest
Donnie
Great idea of the stanchion jig. The Video gave clear instructions on how to go about making and fitting.
Excellent video
Cheers
Geoff
Great idea of the stanchion jig. The Video gave clear instructions on how to go about making and fitting.
Excellent video
Cheers
Geoff
Thank you Geoff.
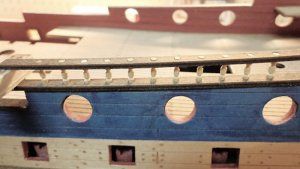
Well, this is it for the evening. This is CRAZY tedious trying to get these curves / angles / and what all to line up good. There will be a half round to cover up the dowel openings. Some trimming and staining, etc. will make this a little better. No parts have been glued down yet. The two center pieces that has the four dowels were scratch built. The original piece calls for three dowels and is too short.
Well, this is it for the evening. This is CRAZY tedious trying to get these curves / angles / and what all to line up good. There will be a half round to cover up the dowel openings. Some trimming and staining, etc. will make this a little better. No parts have been glued down yet. The two center pieces that has the four dowels were scratch built. The original piece calls for three dowels and is too short.
Last edited:
Donnie,Denis suggested to use decorative tooth pick like I did onmy Santa Maria railings.
Whew.
Well at least its keeping you on your toes. Nothing like a bit of spirit building to get the old blood flowing.
Great recovery. Think of all the scratch experience your getting from this kit.
In all seriousness , an awesome job.
Well at least its keeping you on your toes. Nothing like a bit of spirit building to get the old blood flowing.
Great recovery. Think of all the scratch experience your getting from this kit.
In all seriousness , an awesome job.
Ok, so I talked myself into it (including you all too !!!). However, I have to make a decision to I want to commit to this. It takes about 5 min to make one stanction dressing them out.
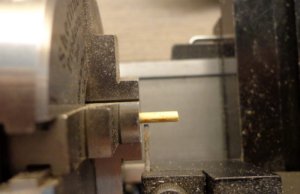
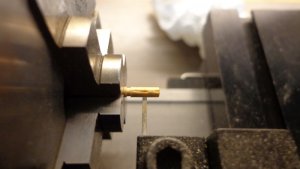
WARNING: Unless you have a lot of experience, please do not do this or try this until you have done a lot of turning. The small arches are done while holding a FILE !! it gets really close to the chuck. So again, you MUST have a steady hand or the file will slip and fly into you. Also, the file is oriented in such a way that while the lathe is turning, it would bounce downward. I can't take any responsibility for any carelessness. The RPM is about 500 which is not that fast. The only risk that you take is holding the round file by hand to make the arches. The file is just barely kissing the indentations to make the arches. Ok, so here are the pics. This first image you will see a tiny orange dot - I am using a parting tool which is 1mm in width. I am making a cut .25mm deep. This next image, the cross slide is moved to the right about 3.4mm and another cut is made at .25mm deep. I follow up both notches with a tiny round file. Final post with stain. At this size, it is very difficult to get them exact. It take a lot of patience and not get in a hurry. At some point, I might try and produce a video on this.
WARNING: Unless you have a lot of experience, please do not do this or try this until you have done a lot of turning. The small arches are done while holding a FILE !! it gets really close to the chuck. So again, you MUST have a steady hand or the file will slip and fly into you. Also, the file is oriented in such a way that while the lathe is turning, it would bounce downward. I can't take any responsibility for any carelessness. The RPM is about 500 which is not that fast. The only risk that you take is holding the round file by hand to make the arches. The file is just barely kissing the indentations to make the arches. Ok, so here are the pics. This first image you will see a tiny orange dot - I am using a parting tool which is 1mm in width. I am making a cut .25mm deep. This next image, the cross slide is moved to the right about 3.4mm and another cut is made at .25mm deep. I follow up both notches with a tiny round file. Final post with stain. At this size, it is very difficult to get them exact. It take a lot of patience and not get in a hurry. At some point, I might try and produce a video on this.
Last edited:
Donnie, I know all too well what you are saying. Iwas turning some aluminium and instead of taking the cutter away from the spinning metal I took it towards the metal, the cutter dug in and snapped off, was thrown down, hit the guide rail and bounced up and buried itself in my face guard, which for some strange reason I had decided to wear that. If I did not have the guard it would have shattered my glasses and I would be blind in my left eye.
Forgive the digression, a simple and effective shaper for your stantions would be to shape a piece of hacksaw blade (a little laborious initially to make) and then press it against the dowel and presto. The cutter can be made with a fine grinding wheel.
Regards
Eric
Forgive the digression, a simple and effective shaper for your stantions would be to shape a piece of hacksaw blade (a little laborious initially to make) and then press it against the dowel and presto. The cutter can be made with a fine grinding wheel.
Regards
Eric
Thanks Eric for the tip. I will have to try that when I have a hack saw blade handy. I went ahead and so far have made enough post for the rails. Here is a pic of how the look so far. The only thing is that I am not sure to leave them natural or paint them black (I had tested black and looked pretty good). Once I got a system worked out wit the lathe, they went pretty fast. These are NOT glued in yet. Trial run.
Last edited:
Last edited:
Very nice work as usual Donnie.
A
Aussie048
Guest
Donnie
I am enjoying your build log/Tutorial with the excellent workmanship,
Cheers
Geoff
I am enjoying your build log/Tutorial with the excellent workmanship,
Cheers
Geoff
Looks awesome, Donnie!


