Panart: San Felipe 1:75 Scale Build Log [COMPLETED BUILD]

Wow Donnie "The Beast" is starting to come to life.
Planking looks great, thanks to you and all the guys for the help I have been reading in the forums. planked 2 ships now and I might be "sick in the head" but I loved doing it.
 
Thanks Daniel, and others,

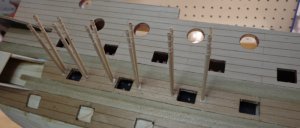
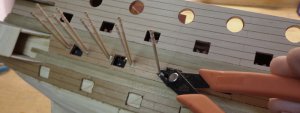
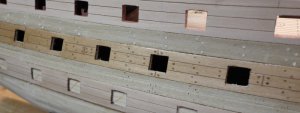
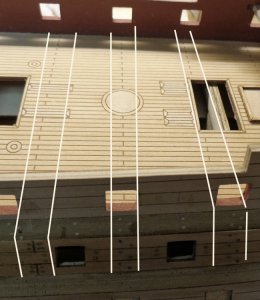
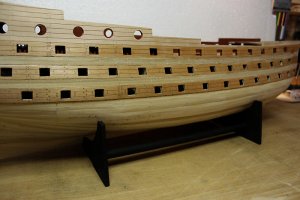
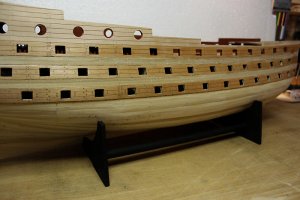
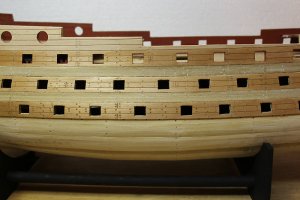
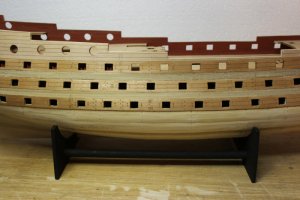
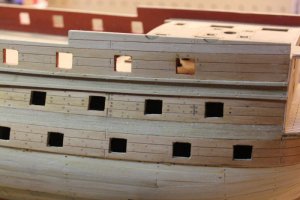
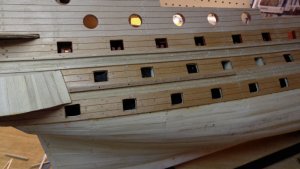
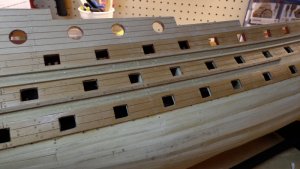
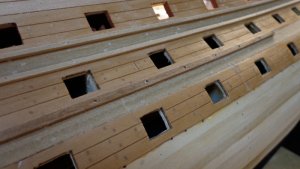
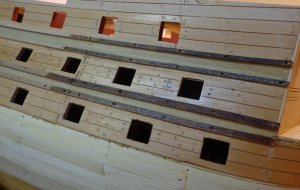
Well, the good, the bad, and the ugly - mostly ugly. Some of it looks fair, but then the planking butts will not line up with the butts on the deck. See the forth image. This is obviously going to look quite stupid. Hence, what I am trying to duplicate with the treenails is the illusion of this being a POF. I am thinking the butts of the hull planking should be matching up (vertically) in line with the butts on deck. Oh well, too late to do anything about it now. This can not be seen or noticed right now as the butts of the hull have not gone all the way up to the top of the hull sides. Just another day in goof - up - land !!! However, the only thing I can say is about the time the rest of it (like chain plates, channels, etc) is added, some of this will not even be seen much or even noticed. I am learning to hate laser cut pieces due to mostly, they are made out of ply. When you start to sand on this stuff, it does NOT take long to sand through the first layer. The wood is darkened a little with the application of Satin Polyurethane. See the last/fifth image. So, I went back and looked over the situation again - some line up and some do not - oh well. I highlighted the white line to show what I am talking about. I did not even think about the treenails needing to line up with the decking butts. Actually, I am not even sure if they are supposed to, but it would look more pleasing to the eyes.

planking140.jpgplanking141.jpgplanking142.jpgplanking143.jpgplanking144.jpg
 
Donnie, the averge admirer(non modeller, that is) will not notice that inconsistency, only super observant people like us will. With regards a mistake, look at it from the point of view of a layperson, will it be seen/noticed, if it is the proverbial boil, then it must be fixed. As with the decks, there is usually a lot of clutter therefore only a small proportion of the deck nails will be seen, so don't feel you've goofed on the alignment, look at it through different eyes.
Granted people will only notice it if the hull is at a certain angle, display it at 70 degrees and less.

Regards to your admiral from all of us,
Eric
 
Well, to those - this is a warning: NOT do as I just did.......

Well, thanks Eric for the encouragement. However, this proves to me "again" to leave well enough alone. I should have progressed with the building of the ship instead of fiddling with the flippin' treenails. Now, I am stuck with going on ahead with the rest of installing treenails. Here's what happened: I knew I got started off in the wrong direction when I used Annealed Steel Wire (guage .03 mm) to use as "Iron nails" for the treenailing. I found out the hard way.
Even though the steel treenails were flush with the hull planking...DO NOT sand the side of the hull that has steel wire as the "dust" from the steel wire will EMBED itself into the hull planking and will give you a nasty blackend gray look of which I almost did not get out completely. This mistake is only at the bow covering an area of about 20 nails (40 mm of length at bow on one strip).
Then I realized that it looked awful, then I punched those out and started again. Well, by that time - trying to cover up for mistakes got out of control. I should have experimented on spare pieces instead of diving into it. But, I guess the thrill of taking a risk came back to bite me. But, then again, the wooden treenails made of simple toothpicks look pretty good, UNTIL I realized the misalignments. Oh well, another lesson learned to carry over to the next project.
I guess it goes without saying that I do not yet have the experience under my belt to handle all these situations. On the Trinidad, it never occurred to me to even put treenails on the side of the hull. However, I did on the deck because the deck was individual strips, but this San Felipe kit has so much laser cut pieces, you do not have any latitude to experiment and if you do, then watch out because the parts and pieces do not lend themselves to be tampered with too much.
I also do not like the tones or color vaiations of the wood chosen for this kit. The laser cut planking parts are of some type of ply that is ugly that do not match well with the other walnut. The walnut strips are also a variety of tones and do not match well. I feel like just chunking this thing and starting over.
 
A simple but perhaps not too costly option, is to re-plank.
A lot of the 'second planking' strips are very thin and would not bulk out the hull or decks, if you have a wall with a blemish on it you would paint over or repaint the wall, n'est-ce pas?

Regards
Eric
 
I personally really diappointed of the Mantua kits,major errors on the Santa Maria kit too,I replaced almost all the kit supplied wood and many modification on the kit itself.
 
Here's what happened: I knew I got started off in the wrong direction when I used Annealed Steel Wire (guage .03 mm) to use as "Iron nails" for the treenailing. I found out the hard way. Even though the steel treenails were flush with the hull planking...DO NOT sand the side of the hull that has steel wire as the "dust" from the steel wire will EMBED itself into the hull planking and will give you a nasty blackend gray look of which I almost did not get out completely. This mistake is only at the bow covering an area of about 20 nails (40 mm of length at bow on one strip).

Hi Donnie, got to thinking(BTW don't do it, it's dangerous!) with regards the above, I feel brass wire or copper would have been better than steel. Regarding sanding, that is a no no. You can use a fine file, that will not leave a darkened "splash" of grey in the wood, finish off with a very fine file that will polish the metal and not remove any wood in the process. One realizes that in the real world the nails were countersunk and a timber plug hammered in after, to simulate that on your model the plugs would have to be about 0.5mm or smaller in diameter, which is the very tip of a toothpick.
My preference - brass or copper wire.
Regards
Eric
 
Hello Donnie

Sorry to hear of your troubles, but this is model ship building and this sort of thing is to be expected. You are the Captain of your ship and if you are not happy, redo it but if you are at all pleased with its looks than move along to the next stage, the choice is yours, ENJOY.
 
Thanks to all. I appreciate it. Well, I worked through it and got one side done. Here are some pics. I have not installed the extra Wales parts. I also do not know what color to paint the Wales. The box has them natural, BUT the box art is from other picture. The Box art is not using the laser cut pieces, so it must be an old box art. So, I am not sure if to paint the Wales a dark brown or flat black followed with satin poly. Does anyone have any suggestions ?

planking144.jpgplanking145.jpgplanking146.jpgplanking147.jpg
 
Hi Donnie, have a look at this link, it may give you an idea regards color,

http://www.modelships.de/San_Felipe_1690_authenticity/San_Felipe_1690_authenticity.htm

also some interesting history there!
Regards
Eric
PS. Also this, you may have looked here B4,
https://www.google.com.au/search?q=spanish+ship+san+felipe&tbm=isch&tbo=u&source=univ&sa=X&ved=0ahUKEwiQlqjeu4rUAhVGopQKHT5aDGgQsAQIPA&biw=1344&bih=708&dpr=1.25

Eric
 
Looks great, Donnie!
I don't treenail my SoS but I did it on my Royal Caroline, and made it somewhat simpler with a trick. Holes are drilled but no trenail is inserted, just a mixture of sawdust & carpenter glue (plus some drops of acrylic to make it darker) will be smoothened into the surface and the rest is wiped off with a wet rug. Cheating I know but takes portion of the time (treenails do not have to be manufactured). Some people use timber filler for this.
Another thing to the hull sanding after steel treenails: it is dangerous, not only because of the decoloration but mostly because the iron dust which can't be fully removed, will rust later and it will make a nasty looking hull.
Janos
 
Hi Janos, you are 100% correct in all accounts. Eric and others, thanks for the support. I think I am suffering from Artistry Remorse ! It is what it is and I am going to make the best of it. A lot of brass ornamentation will be covering up a lot of this and I am not worried about it too much.
The treenail idea of fillers is good and I should have went that route. But I guess I call myself trying to reach better heights of modeling. Oh well, I just look at it as experience.
Every SF I have looked at are all different - and as most articles point out, there is a serious lack of documentation. The tones and colors of the natural wood are horrible. All the Walnut strips are different shades and grains. When I was reading "The Anatomy of Admiral Style Ships" the author wrote about his frustrations on plans that were lacking detail and being so incomplete that I think he had to find another ship to build.

I don't want to come across negative, I am just putting this out there to help folks think about how to "avoid" my pitfalls.
 
I have moved on to installing the Wales. I am keeping them natural for now as I experimented w different colors and could not be content with any.
Yep, as you can probably tell, I am treenailing the Wales too. In this situation, there is no way I could think of to hold down the Wales strips while the small amount of glue set up. So, the treenails really come in handy as I could fasten the Wales to the hull immediately.

planking148.jpg
 
Looks great Donnie. You can can always stain the wood in varying shades. In that way you still have the natural wood grain.
I like the the tree nailing.

Keep up the awesome work. BTW don't kid your self, the mods you are making IS Kit bashing !!!
 
Eric, I use a drum sander and the toothpick held at an angle. Then I rotate the toothpick with my finger. I will have to get the Admiral to help me with a Video. Paul - thanks. I never thought that what I was doing was even close to kit bashing.

Here are the latest. The upper wales are 2 x 2mm the lower are 2 x 3 mm and as you can see the tones are different. I am using a very small dab of walnut paint that came with box to paint the tips of the toothpicks (for the lower wales only). It takes about 30 min or less to do one section. Not too bad. I have a dremel tool with an extension that I drill the holes. Oh, I am also countersinking the treenails just a tad on the Wales - don't ask me why. Just decided to do it to give some visual contrast. They are spaced at 25mm each which means that in real life, that comes out to be about 6 feet spacing. Again, I just chose at random. This does not coincide at all with the Admiralty "Room and Space" rule for the frames, but hey, it is what it is. Too many holes at this size ??? Reason is that my smaller bits got broke. This captain is broke.

Thanks to all for your visits.

planking151.jpgplanking152.jpgplanking153.jpg
 
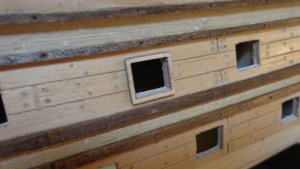
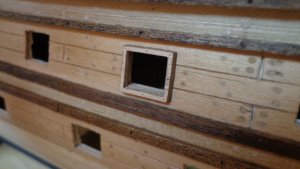
Here's the latest. I decided to stain the Wales with Minwax "Provincial" stain. Once I started, I realized I could not turn back. Then I experimented adding one External Gun Port Frame.

planking154.jpgplanking155.jpgplanking156.jpg
 
Donnie,
WOW, you are setting the standard in this scale range for me. I am debating the treenailing on mine, whether to do the deck or the hull.
Great job
Doug
 
Back
Top