Santisima Trinidad - Occre Build Log [COMPLETED BUILD]

Re: OcCre Santisima Trinidad Build Log

<t>Update on Santisima Trinidad coming very soon.<br/>
Foremast will have all Running Rigging done.<br/>
(Leech, Bunt, sheets, halyards, lifts, Belaying Pin Layouts, etc..)<br/>
Pictures, documentation coming<br/>
Projected date is on or before 4-25-2013 !!</t>
 
Re: OcCre Santisima Trinidad Build Log

<r>Please see this topic for relocating all the Foremast Halyards. <br/>
<URL url="http://shipsofscale.com/phpBB3/viewtopic.php?f=52&t=47&start=690"><LINK_TEXT text="http://shipsofscale.com/phpBB3/viewtopi ... &start=690">http://shipsofscale.com/phpBB3/viewtopic.php?f=52&t=47&start=690</LINK_TEXT></URL><br/>
<br/>
I have to repeat: again, as the last post, I know this is a lot of images. But, I figure that if anybody is working on the Trinidad. they will need them (something). However, let me say that I say this with great humility - I am not an expert. I am just showing what I have done. Since earlier I said that the Rigging plan for this part is simply defies logic, I decided to go with my own plan. Basically, what I did was I allowed the Running Rigging (Leech Lines, Bunt Lines, Clue Lines, Sheets to follow a natural path FROM the Yardarm - sails to the Belaying Pin Layout. On the fore of the ship, you have on each side 3 pair of Pin Racks. I found that the natural path provided the best results. I also grouped ALL the lines that were part of each sail to tie off within there own little group. <br/>
At some point, I will try and provide a CAD drawing labeling the Belaying Pinouts. For instance, the first set of Pin Racks, I used the first 4 Belaying Points. I grouped the Leech, Bunt, Clue, and Sheet in order. All the Yardarm LIFTS go to the base of the Foremast. I followed this same sequence for the Main yard, Lower Yard, Upper Top gallant, and Lower Top Gallant. However, the groups "themselves" at the Pin Racks where not necessarily in a Pin Rack #1, #2, or #3 order. Again, I followed the natural path that these lines wanted to go in.<br/>
I hope that perhaps one of these many images might be able to tell the story better. Some of the tips of the sails at the Yardarm ends are freyed and a little torn from so much handling that they do not look good. I will be trimming those later. Again, thank you for tuning in and I really appreciate all the kind words. I really do.</r>
 

Attachments

  • foremastrunningfinal01.jpg
    foremastrunningfinal01.jpg
    95.2 KB · Views: 108
  • foremastrunningfinal02.jpg
    foremastrunningfinal02.jpg
    94.3 KB · Views: 106
  • foremastrunningfinal03.jpg
    foremastrunningfinal03.jpg
    104.6 KB · Views: 101
  • foremastrunningfinal04.jpg
    foremastrunningfinal04.jpg
    93.3 KB · Views: 103
  • foremastrunningfinal05.jpg
    foremastrunningfinal05.jpg
    91.2 KB · Views: 109
  • foremastrunningfinal06.jpg
    foremastrunningfinal06.jpg
    95.9 KB · Views: 106
  • foremastrunningfinal07.jpg
    foremastrunningfinal07.jpg
    98.8 KB · Views: 104
  • foremastrunningfinal08.jpg
    foremastrunningfinal08.jpg
    97.1 KB · Views: 101
  • foremastrunningfinal09.jpg
    foremastrunningfinal09.jpg
    88.8 KB · Views: 102
  • foremastrunningfinal10.jpg
    foremastrunningfinal10.jpg
    93.4 KB · Views: 103
  • foremastrunningfinal11.jpg
    foremastrunningfinal11.jpg
    96.4 KB · Views: 101
  • foremastrunningfinal12.jpg
    foremastrunningfinal12.jpg
    92.8 KB · Views: 101
  • foremastrunningfinal13.jpg
    foremastrunningfinal13.jpg
    188.2 KB · Views: 105
  • foremastrunningfinal14.jpg
    foremastrunningfinal14.jpg
    229.4 KB · Views: 104
  • foremastrunningfinal15.jpg
    foremastrunningfinal15.jpg
    117.9 KB · Views: 105
  • foremastrunningfinal16.jpg
    foremastrunningfinal16.jpg
    129.7 KB · Views: 99
  • foremastrunningfinal17.jpg
    foremastrunningfinal17.jpg
    98.5 KB · Views: 97
  • foremastrunningfinal18.jpg
    foremastrunningfinal18.jpg
    90.2 KB · Views: 95
  • foremastrunningfinal19.jpg
    foremastrunningfinal19.jpg
    98.9 KB · Views: 97
  • foremastrunningfinal20.jpg
    foremastrunningfinal20.jpg
    97.7 KB · Views: 96
  • foremastrunningfinal21.jpg
    foremastrunningfinal21.jpg
    108.4 KB · Views: 98
  • foremastrunningfinal22.jpg
    foremastrunningfinal22.jpg
    94.1 KB · Views: 101
  • foremastrunningfinal23.jpg
    foremastrunningfinal23.jpg
    96.2 KB · Views: 96
  • foremastrunningfinal24.jpg
    foremastrunningfinal24.jpg
    130.9 KB · Views: 96
  • foremastrunningfinal25.jpg
    foremastrunningfinal25.jpg
    136.1 KB · Views: 93
  • foremastrunningfinal26.jpg
    foremastrunningfinal26.jpg
    101.2 KB · Views: 93
  • foremastrunningfinal27.jpg
    foremastrunningfinal27.jpg
    117.9 KB · Views: 94
  • foremastrunningfinal28.jpg
    foremastrunningfinal28.jpg
    140.3 KB · Views: 91
  • foremastrunningfinal29.jpg
    foremastrunningfinal29.jpg
    126.3 KB · Views: 92
  • foremastrunningfinal30.jpg
    foremastrunningfinal30.jpg
    119.5 KB · Views: 96
  • foremastrunningfinal31.jpg
    foremastrunningfinal31.jpg
    129.8 KB · Views: 93
  • foremastrunningfinal32.jpg
    foremastrunningfinal32.jpg
    112 KB · Views: 96
  • foremastrunningfinal33.jpg
    foremastrunningfinal33.jpg
    128.2 KB · Views: 95
  • foremastrunningfinal34.jpg
    foremastrunningfinal34.jpg
    94.5 KB · Views: 93
  • foremastrunningfinal35.jpg
    foremastrunningfinal35.jpg
    96.1 KB · Views: 91
  • foremastrunningfinal36.jpg
    foremastrunningfinal36.jpg
    120 KB · Views: 96
  • foremastrunningfinal37.jpg
    foremastrunningfinal37.jpg
    133.1 KB · Views: 100
  • foremastrunningfinal38.jpg
    foremastrunningfinal38.jpg
    95.6 KB · Views: 100
Re: OcCre Santisima Trinidad Build Log

<t>A perfectly executed job. Congratulations.<br/>
Tadeusz<br/>
Let's power of glue to be with you.<br/>
Current project:<br/>
Polacca XVII cent.</t>
 
Re: OcCre Santisima Trinidad Build Log

<t>Amazing work, Donnie. Are you sure this isn't a 1:1 ship? Beautiful job!</t>
 
Re: OcCre Santisima Trinidad Build Log

<t>Donnie I notice that on all of your belaying pins you have the extra line wrapped and laying over the pin as should be. For all I try I just can not get them as yours. Do you use a jig and if so can you post the jig or photos on how you do it. <br/>
Thanks<br/>
Joe</t>
 
Re: OcCre Santisima Trinidad Build Log

<r>Please let me say to all:<br/>
Gary, Joe, Tadeusz, Kent, carlosys, Wayne<br/>
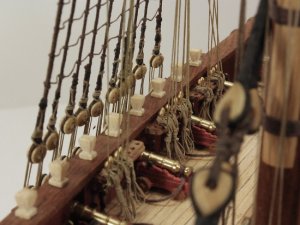
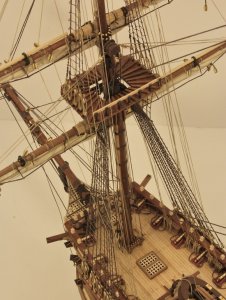
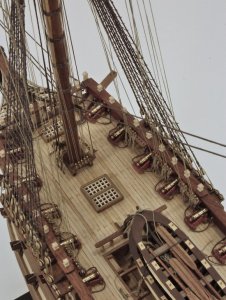
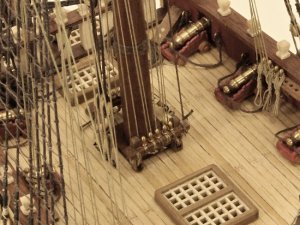
Thank you very much for the compliments. A lot of frustration went into this - and probably the end result is some problems. But, I must move on. In the process of tidying up some lines, I managed to pull or snap completely loose and free the aft belaying pin rack as it went flying in the air back down on the other rigging. Actually had all the lines and belaying pins attached. Glued it back ! Enough of this. Time to move on.<br/>
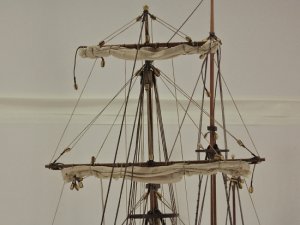
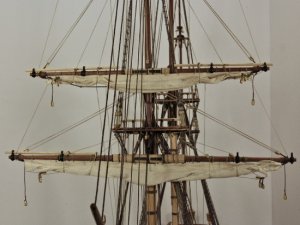
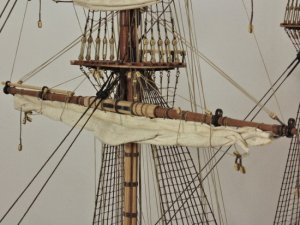
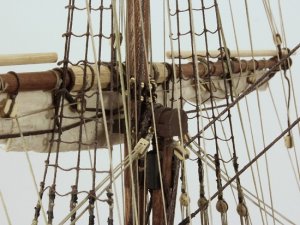
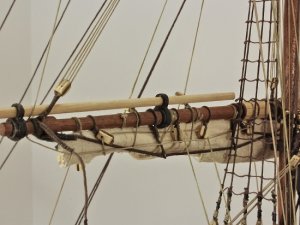
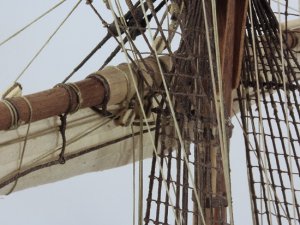
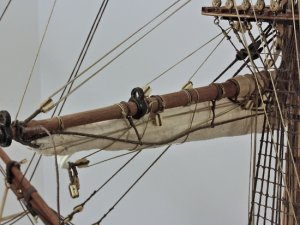
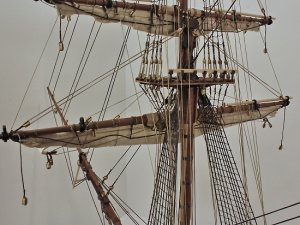
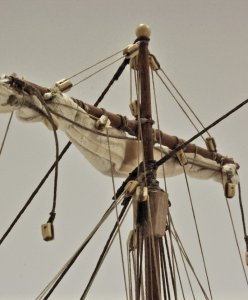
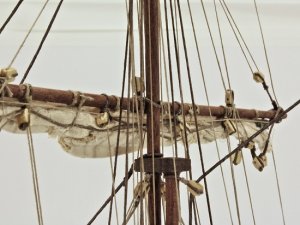
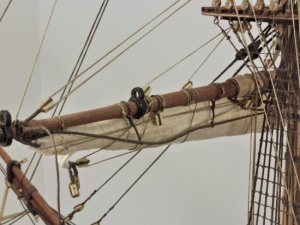
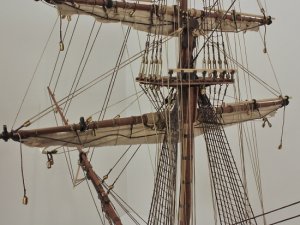
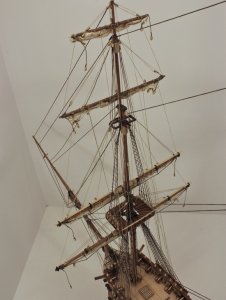
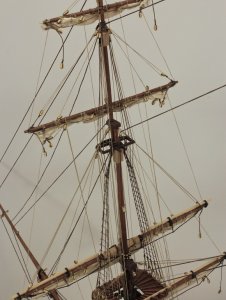
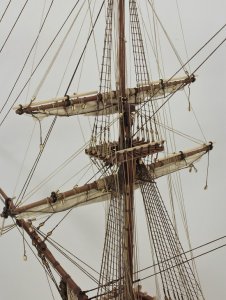
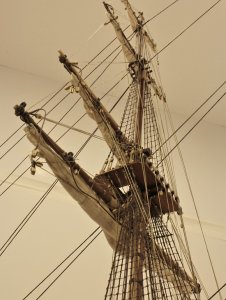
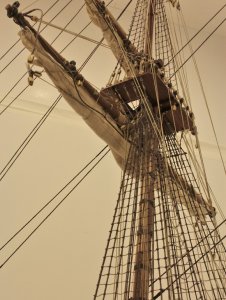
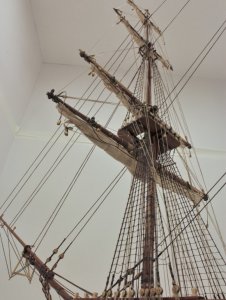
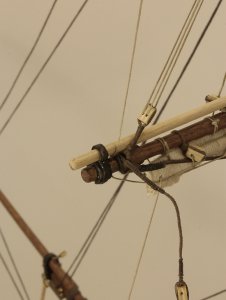
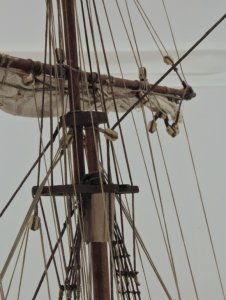
What is next is that I do not have any Main Mast Yardarms done at all. 4 of these will have to be build along with associated rigging. I would say that for me, the most easy is to rig the running rigging onto the Yards with Sails as much as you can and let the lines hang down or curl them up or whatever to keep them in order. <br/>
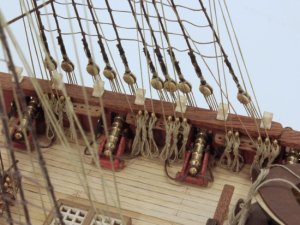
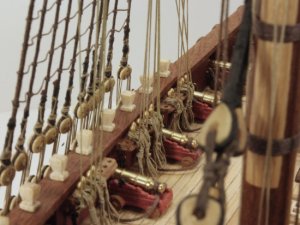
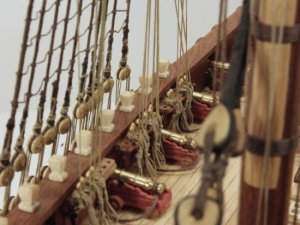
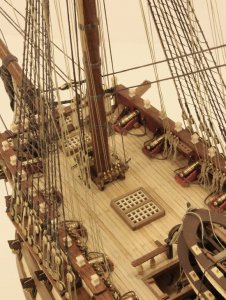
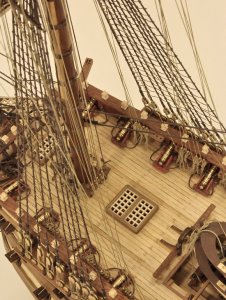
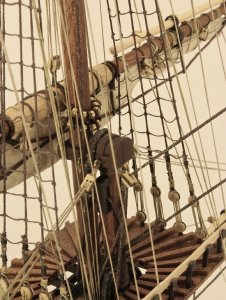
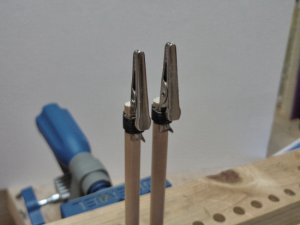
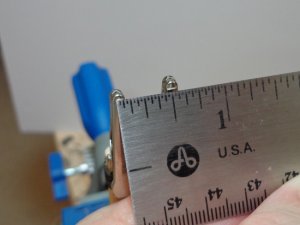
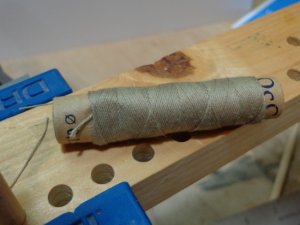
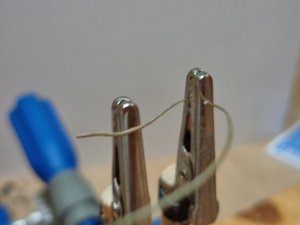
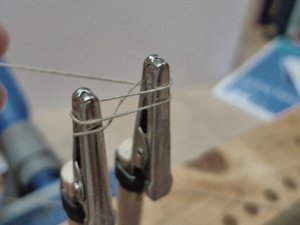
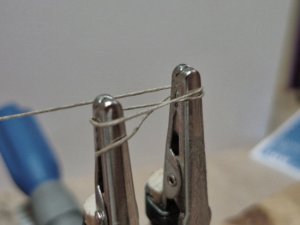
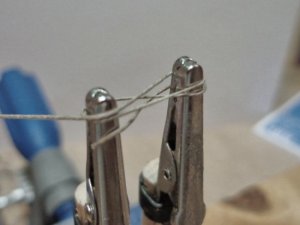
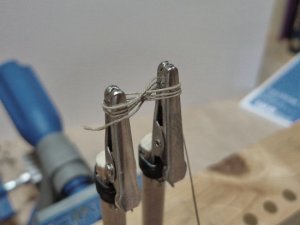
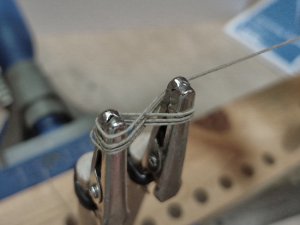
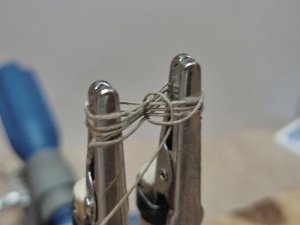
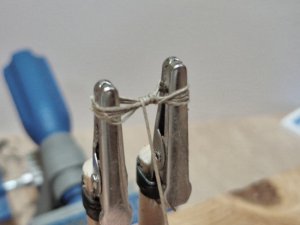
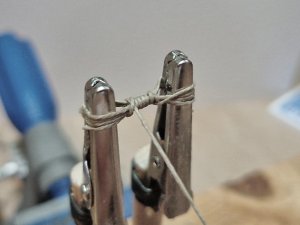
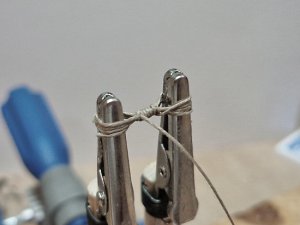
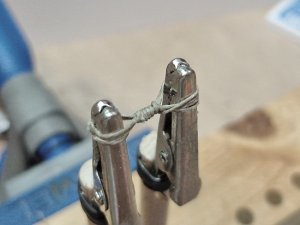
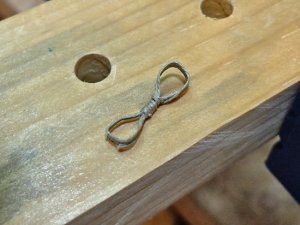
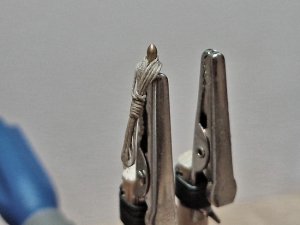
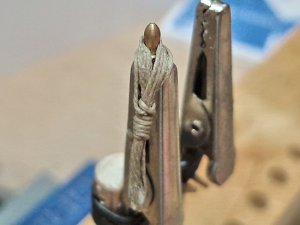
Joe, here are the steps involved in the Rope hanging around the Belaying Pins. <B><s>
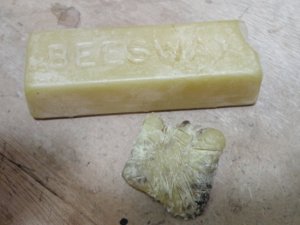
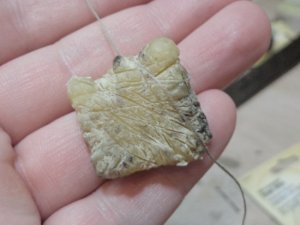
</s>Use Plenty of beeswax<e></e></B>. Not all beeswax is the same and some places cheat by selling you "candle wax".<br/>
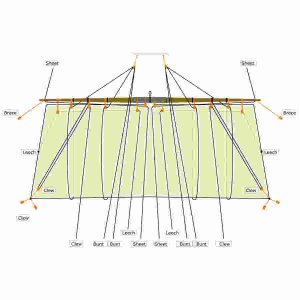
EDIT: Please see the post that I made (several down) on Mon Apr 29, 2013 9:13 am about this diagram.<br/>
EDIT AGAIN:please see this topic on relocating all the foremast Halyards. The bitts layout is NOT correct.<br/>
<URL url="http://shipsofscale.com/phpBB3/viewtopic.php?f=52&t=47&start=690"><LINK_TEXT text="http://shipsofscale.com/phpBB3/viewtopi ... &start=690">http://shipsofscale.com/phpBB3/viewtopic.php?f=52&t=47&start=690</LINK_TEXT></URL></r>
 

Attachments

  • belayingrope01.jpg
    belayingrope01.jpg
    61.4 KB · Views: 79
  • belayingrope02.jpg
    belayingrope02.jpg
    49.9 KB · Views: 79
  • belayingrope03.jpg
    belayingrope03.jpg
    58.3 KB · Views: 77
  • belayingrope04.jpg
    belayingrope04.jpg
    62.3 KB · Views: 79
  • belayingrope05.jpg
    belayingrope05.jpg
    55.3 KB · Views: 80
  • belayingrope06.jpg
    belayingrope06.jpg
    43.4 KB · Views: 80
  • belayingrope07.jpg
    belayingrope07.jpg
    47.8 KB · Views: 78
  • belayingrope08.jpg
    belayingrope08.jpg
    45.6 KB · Views: 77
  • belayingrope09.jpg
    belayingrope09.jpg
    48.9 KB · Views: 77
  • belayingrope10.jpg
    belayingrope10.jpg
    48.9 KB · Views: 78
  • belayingrope11.jpg
    belayingrope11.jpg
    50.4 KB · Views: 79
  • belayingrope12.jpg
    belayingrope12.jpg
    49.8 KB · Views: 78
  • belayingrope13.jpg
    belayingrope13.jpg
    49.6 KB · Views: 79
  • belayingrope14.jpg
    belayingrope14.jpg
    53 KB · Views: 81
  • belayingrope15.jpg
    belayingrope15.jpg
    52.6 KB · Views: 80
  • belayingrope16.jpg
    belayingrope16.jpg
    54.4 KB · Views: 80
  • belayingrope17.jpg
    belayingrope17.jpg
    63.6 KB · Views: 79
  • belayingrope18.jpg
    belayingrope18.jpg
    50 KB · Views: 79
  • belayingrope19.jpg
    belayingrope19.jpg
    49 KB · Views: 79
Re: OcCre Santisima Trinidad Build Log

<t>Hey Donnie, thanks for the info, I'm going to use it too. What size scale is your ship and what size is that rope?</t>
 
Re: OcCre Santisima Trinidad Build Log

<t>Definitely VERY useful, I have been trying to be consistent when I do those pinrail details and you showed me how to do it right. Way to go, I love that many images BTW.</t>
 
Re: OcCre Santisima Trinidad Build Log

<t>Thanks Donnie, that is a sure cry easier then the way I was doing it. I had the same idea only I ws notusing alagator clips, but rather tooth pocks on a piece of fiber board. When you say use pleanty of bee's wax, you mean let it really penetrate right, that is how I took that. And also are you using ..50. .75. or 1.0 mm line? I know that I will be giving that a try real soon. Thanks again.<br/>
<br/>
Joe</t>
 
Re: OcCre Santisima Trinidad Build Log

<t>Kent,<br/>
the Trini is 1/90 scale. Those Belaying Pins were bought from Billing Boats USA and is a part # 04-BF-0054 (8mm). The supplied Pins were horrible. It was not an easy task trying to find the kind I liked and worked with the scale. I think I had ordered several from different places and just tried. It is hard to tell from a picture, since most suppliers do not go into detail about the measurements. The 8mm refers to the "total length" of the pin. <br/>
A person might think that this is spitting hairs, but really not. You can instantly tell if the Pins are not the right size in this case. <br/>
The line is .15 mm as is of the OcCre brand. For anyone really wanting the know the part number of this, it is OC-17031.</t>
 
Re: OcCre Santisima Trinidad Build Log

<t>By the way, I want to make a point about the order of running rigging that you see on a post that has the image of the belaying pin layout. In some research I found, I finally found some info that states clearly (and I am sure that most of you already know this) - But I didn't , is this:<br/>
<br/>
The Sail management lines such as Leech, Bunts, Clews, Sheets (for each side) for EACH YARD, is supposed to follow a pattern. What I mean is for example, the Fore Course Yard lines will go to the FORE PIN RAILS. Going up, the Fore Yard will follow behind, then the lower Top Gallant will most likely occupy the NEXT set of Pin Rails, then the Upper Fore Top Gallant will go to the 3rd set or aft for the Fore mast set. However, I tried and just about "had" to use the natural flow how the lines fell to make sure that none were inter tangled. I think mine are still not 100% as I would like them, but they are secured in place now. However, I still have the Main set and the Mizzen rigging to go. When I was installing those Pin Rails, I wished that I had moved those (all three sets) further back about 10 mm. This would have been just perfect for the lines to come down in the fashion that they are supposed to go. When I get around to the Main Mast Yard Arm rigging, I am not sure if I am going to break off those Pin Rails on each side to move them down 10mm. I could see this taking all day long. (the manner of which they are glued in). <br/>
<br/>
All of this is the reason why some of those lines jump around on the diagram. If you are building this ship, then by all means, just keep in touch with any questions, --- I am trying to give all a heads up so you will not have the hardships that I faced.</t>
 
Re: OcCre Santisima Trinidad Build Log

<t>Thanks for you message Donnie, I could not find how to reply to it so I will paste what I wrote here.<br/>
Thanks for all the information Donnie. I watched your video on deadeye rigging, do you use that same method an al the dead eyes? Even the smaller ones on the upper level of the masts? I tried your method on the small 3mm deadeyes and needed a catchers mitt as they started to fly across the garage. And we all know if you dont keep your eye on the deadeye, once it hits the floor its history. Your method for tieing the figure 8's around the belaying pins is spot on pal. I used to soak the line in diluted elemers glue and that just didnt work at all, but thanks for the tips. <br/>
Joe</t>
 
Re: OcCre Santisima Trinidad Build Log

<r>Joe,<br/>
if you go to<br/>
<URL url="http://www.shipsofscale.com/Trinidad/STBL11.html"><s></s>http://www.shipsofscale.com/Trinidad/STBL11.html<e></e></URL> (scroll down to <B><s></s>February 21, 2011<e></e></B>)<br/>
<URL url="http://www.shipsofscale.com/Trinidad/STBL12.html"><s></s>http://www.shipsofscale.com/Trinidad/STBL12.html<e></e></URL> <br/>
<URL url="http://www.shipsofscale.com/Trinidad/STBL13.html"><s></s>http://www.shipsofscale.com/Trinidad/STBL13.html<e></e></URL> (scroll down to <B><s></s>July 25, 2011<e></e></B> for more example of rigging blocks).<br/>
<br/>
You will see on my Log step by step. to give you a heads up, I used if I remember like a .5 mm steel anealed wire I bought from Model Expo. I have plenty, if you need some, I can send you some if you email me your postal address. I have plenty of the black in several sizes and some brass. I can roll you off some and mail it to you. <br/>
I had a tiny wooden plywood jig with a small hole about 2mm opening. I made a "U" shape with the wire (about 3" long) and fed the both ends of the "U" shape into the hole. The "loop" of the "U" was there so that I can slip in my deadeye. On the other side of the "ends" I took a pair of needle nose or similar and pulled on both ends of the wire basically as tight as I could get it. If I remember, I took the assembly out and proceeded to wrap the wire around itself and later fed that through the hole on the Tree Top and then made the loop for the Futtocks to fit in. This is off the top of my head and this is reason I gave you the links to my official log on SOS main. there is more info there on seizing, lashing, serving etc. It is a lot easier to do this on a larger scale ship. <br/>
I hope this helps.</r>
 
Re: OcCre Santisima Trinidad Build Log

<t>Today, I thought I would try and draw out from memory the "Basics of the Square Rig" This is somewhat typical. Anybody find any errors, let me know. <br/>
I thought it would be helpful to some. I wish that I had this when I was doing this. (not that I am bragging, I am just saying that I never found anything "like this" on the internet. But, now that I have just enough knowledge to be dangerous - well here it is:<br/>
ps. If anyone needs a PDF of this or a larger view, I can do that as well. Also, pdf viewable here:</t>
 

Attachments

  • Running-Rigging-Schematic.PDF
    130.1 KB · Views: 50
  • Running-Rigging-Schematic.jpg
    Running-Rigging-Schematic.jpg
    47.6 KB · Views: 99
Re: OcCre Santisima Trinidad Build Log

<t>Hi Donnie<br/>
I've been continuing to review your progress and continue to be impressed with the progress of the Santisima.<br/>
Keep up the good work.<br/>
Jim</t>
 
Back
Top