My own Rope Walk Build

Donnie

Administrator
Staff member
Administrator
Forum Moderator
Joined
Aug 21, 2011
Messages
5,114
Points
738

Location
Madison, MS
Well,
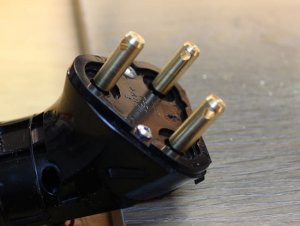
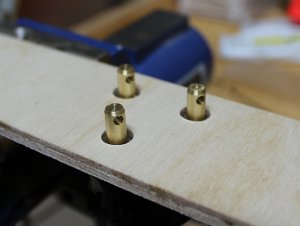
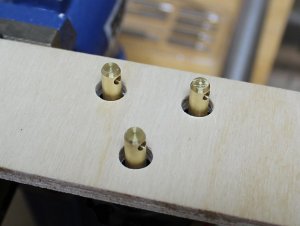
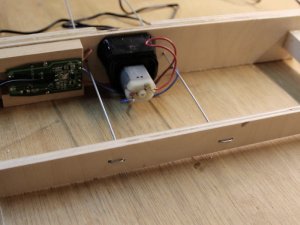
The previous thread I was reading about the motor / Rope Walk encouraged me to at least try and build one. I found a pretty good electric shaver and dismantled it some. Just enough to get to the bare post. I was able to machine using a lathe and a mill to make adapters for the shavers post. The holes were of very close tolerances that I will be able to just use Red Locktite to bond them into place. Below are a few pics so far. I hope that I can keep this up to come up with a finished product that works. I plan to wire up a remote switch so I do not have to reach up to turn it on. Mine will be about 8 foot to the Ceiling.
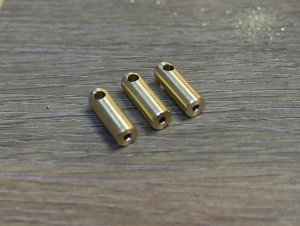
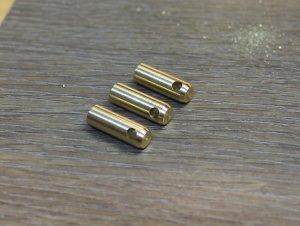
adapterpart_01.jpgadapterpart_02.jpgadapterpart_03.jpg
 
C'est tres cool! Use what you have. I have some gears and a 50 RPM motor coming in to make a "prosak" type machine. I'll post pix once it is built.
 
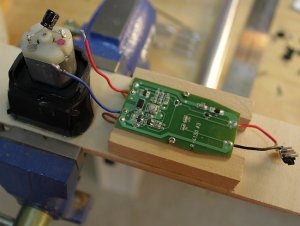
I sawed off the upper shell of the shaver unit as it is mostly ugly and in the way. It is expoxed in place. I wanted to use screws in case I needed to get back into it or remove it, but what the heck, the show must go on.
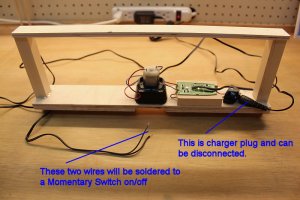
I also took out the circuit board and mounted it. The Capacitor is probably not needed in this situation. The Capacitor is a polarized Electrolytic and you do not want to reverse voltage on that. I will need to be able to reverse the motor drive to turn CCW. Also, remote switches will be mounted else where.
The part that I do not like about building things like this, is that I finish it and it does not work, then I regret having put so much time into it. !!! :roll:
I am also thinking about adding a stationary hook in the middle for a "core" line.
adapterpart_04.jpgadapterpart_05.jpgadapterpart_06.jpg
 
Last edited by a moderator:
Dnnie,
great work. One of my bad habits is to do something quickly, thinking that I will make it more sophisticated later - and I never do it. They remain in my famous CBW state (Crude But Working). Yours is much more sophisticated than mine.
Two comments. Those brass connector pieces are great, and I was thinking doing something like this once, but I left the hooks rather - it is much easier to handle the threads with a hook rather with a hole. The other is that you can make the reversal rotation quite easily - you just have to change polarity between the wires coming out of the battery, that's all. My solution for this is using 2 crocodile clips but I already have the reversing switch, it just has to be installed.
Janos
 
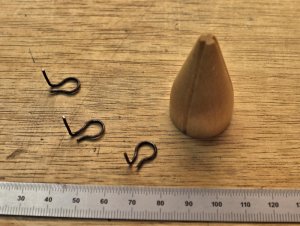
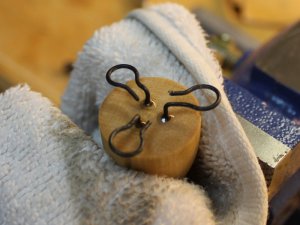
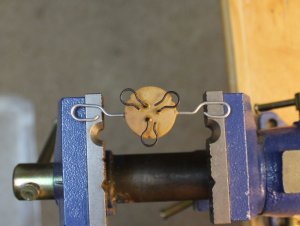
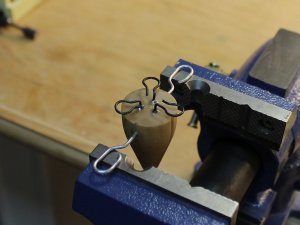
Working on the Bobbin. I sure hope this thing works :? I am using 2 part Epoxy (Harbor Freight brand that is)1.0mm 19 Gauge Steel Wire

bobbin-01.jpgbobbin-02.jpgbobbin-03.jpg
 
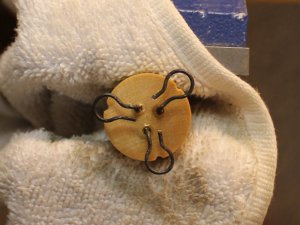
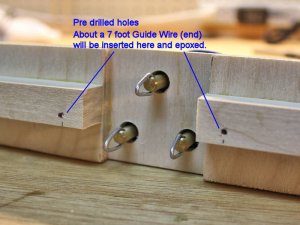
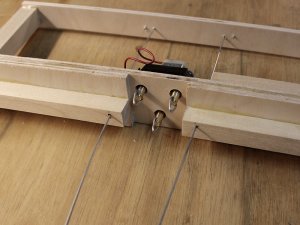
In the previous post, the loops are for the lines of course and now the loops for the Guide Wires. The Guide Wires will run from floor to ceiling.

16 Gauge Steel Wire. I will use the same 16 Gauge for the Guide Wires.

bobbin-04.jpgbobbin-05.jpg
 
.
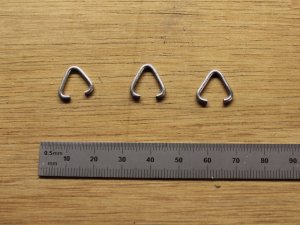
These are jump rings that will be inserted into the brass post. I had found out in a test way early on that the brass post "holes" had such sharp edges that it would almost instantly cut finer threads / lines. Just not thinking ahead on this.

A remedy that I think might work is making these triangle rings that will fit on the brass post. Another image will be forth coming that shows the final result.
Same 16 Gauge wire. Yes, quite difficult to make at this size.

jumprings-01.jpg
 
.
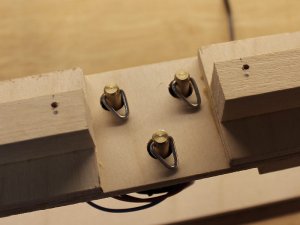
Jump Rings in place. The lines will twist smoother response. This is a little more work than I had originally planned for.
jumprings-02.jpgjumprings-03.jpg
..
 
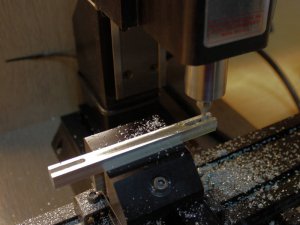
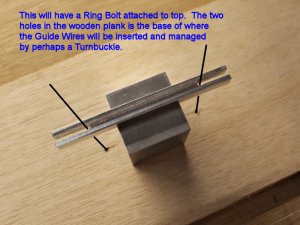
This is the Guide Bar and the Weight. I am going for about 200 to 250 grams. It is almost time to bring all this together and make it work.

guidebar-01.jpgguidebar-02.jpg
 
Two Guide Wires about 9 feet long each. Ready to mount to ceiling next. Will use toggle bolts to do that. I am thinking about using Turnbuckles to keep the Guide Wires tight.
guidewires-01.jpgguidewires-02.jpg
 
Janos --- Help !!!

Well, it looks great, but does not work :sad:

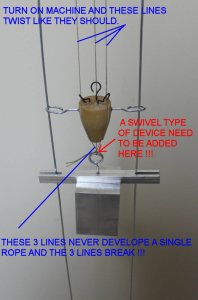
As I turn on machine, the three individual lines start to twist like it should, but at the end of the Bobbin, the three lines never "merge" to form a rope and my three lines break off.

Before that, my thread was jumping out of the grooves track, so I think I fixed that.

what am I doing wrong? The weight is about 200 Grams

I noticed that my milled bar was about to come off (of which it did) -- so I have to either use screws or a heavy epoxy to glue that Guide Bar in place.

final-01.jpg
 
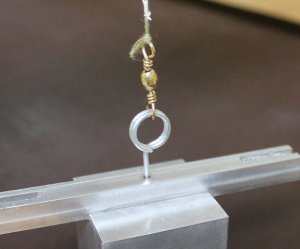
I have read other info and I see that I need to add a joint at the base of the Guide Bar that will allow the thread to turn. I need to add a SWIVEL type of device perhaps what they use for fishing. The problem is that at the base of the guide bar is "fixed" and can not turn to form the rope which then under stress it breaks. So, I need to add some type of swivel device.

On some other more advanced units than mine, some people are using an additional motor that turns the final rope really slow to facilitate the making of the rope.

My ignorance !!!

Donnie
 
Donnie
Sorry for the late answer, I just came back from a short holiday.
Your rope climb is really a piece of art!
Yes, a swivel is needed just above the weight to allow the threads going their way. I used the simple anglers' swivel, bought it from an angler's shop. Cost about $3 for 10.
As the rotor starts, there is a bit a distance needed underneath the bobbin. First of all with thin thread the bobbin needs to be lifted up a bit by hand to allow the threads starting. Thicker lines will take care of this themselves.
Janos
 
Janos,
I got a swivel from fishing department. But, as you say, I had to help the bobbin along the way before it would work. The swivel never turned at all. I think the weight is binding the swivel so it will not turn. BUT, I was able to get about a 3 foot length made regardless. I am wondering If I have too much weight is reason why swivel will not turn. I am still not 100 % happy with the fact that the swivel will not turn and with me having to manually hold the bobbin until it gets almost to the top. What do you think?
rope-01.jpgrope-02.jpgswivel.jpg
 
Donnie,
The swivel has to turn and on mine in turns like hell. You probably have to have a look at yours and try how easily it turns by hand. Mine looks quite sophisticated (have a look at picture 20 in my previous post) and turns seemingly without any resistance. This could be the key! At the other hand I think your aluminium weight setup is very nicely done, but being too heavy can be a problem with thin lines. It would not matter with thicker lines, you just have to calculate its mass into the total mass of the weight.
If it still does not work you probably have to experiment with a bobbin of slightly different shape, ie. more bluntly shaped. If it is too streamlined then it can't generate enough lifting force. It also has to be made of a lightweight timber (though heavier than balsa).
At the beginning of the procedure if I am working with thin lines I have to help the bobbin by lifting it up to about 2" but not suddenly, only gradually, virtually simulating as it would be even lighter. As the bobbin reaches this position, from this point it should run by itself, provided of course that the swivel is working.
Hope this helps.
Janos
 
Back
Top