LA SALAMANDRE, bomb ketch - POF - (CAF-models, 1/48)

Hi Uwe,

Will the planking be painted or left as is?

Do you mean the inside planking?
In principle I do not know until now, how I treat the timber - Until now I used for my ships often an oil for the wood surface.
I am usually not use a paint, due to the fact, that I like the appearance of wood to much, especially here with the Salamandre kit, with a very good wood-quality.

So it is good place and time to ask the members (and lurkers):

Any suggestions for the the treatment of the timber of the model?
Any tips for material?
and method?
 
I would not paint such a work, usually I am using only one coat of flat matt poly, I found that more coats just makes the wood too shiny , sort of furniture looking finish, One coat will seal the wood and not much shinyness.
 
Today I received my ordered nails and wire to make the necessary nails and bolts on my La Salamandre.
I received copper, steel and brass nails in thicknesses of 0,6 to 0,9mm, also some brass wire with 0,3 to 0,5mm.
After some trials I will decide which one I will use for the different elements of the ship.

View attachment 49442 View attachment 49441

View attachment 49439 View attachment 49440
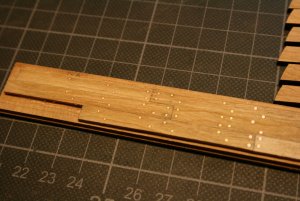
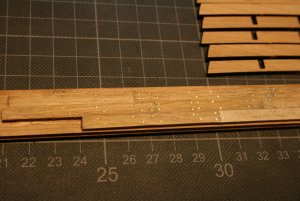
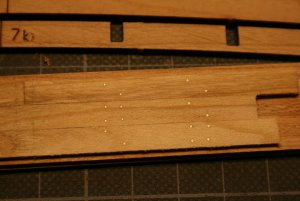
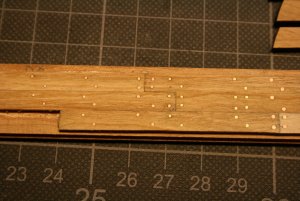
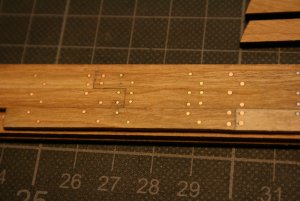
Last week I got several types of nails and wire, so yesterday I made a small piece of "planking" in order to check the appearance when they are installed.
I realized, that the iron nails are 1) very hard to sand down to the timber after cutting the heads and that the sanding dust is finer than from the other metals and therefore polluting the surface of the wooden planks -> They will be not used for the planking

Here you can see the results of the copper and brass nails (from left to right: c-c-c-b-b-c) in different thicknesses 0,6mm to 0,9mm
IMG_4429.JPG

on the right hand you can see two rows with iron nails
IMG_4430.JPG

two times brass wire with 0,4mm and 0,5mm
IMG_4431.JPG

IMG_4432.JPG IMG_4433.JPG

I tried to make photos from different angles, so to see the colour

What do you think?
 
G'day Uwe
It's up to you,
but if there's a vote, I like the 0.6 copper. It's not too different from the timber colour, but the results are great. The brass to me is too 'bling like'.
The steel nails are my second choose.
Happymodeling
Greg
 
I just had a brain wave or a fart. Its up to you to decide.;)
Why not try to insert a short length of soldering lead into a hole. I'm sure you can get 0.6mm somewhere.
Happymodeling
Greg
 
Hi Uwe,

Why not using wooden dowels for the regular planking connections and brass or copper for the placed where knees etc were fitted to simulate bolts.

From the brass or copper what will be the result while ageing. You can put your test planks outside in the Austrian weather to see what the best result gives. At the moment I prefer the copper one.
 
Many thanks for the comments and hints - highly appreciated!

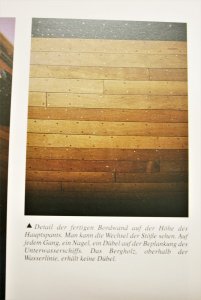
To bring you now the status of my knowledge I found a very interesting (and by myself forgotten) fact, which is written in the Book
The Art of Shipmodeling by Bernard Frölich (I made a book review - click on title)

IMG_44381.jpg

Frölich, a well known modeler and specialist of french ships working very close with Hubert Berti and Jean Boudriot, is writting somethink like:

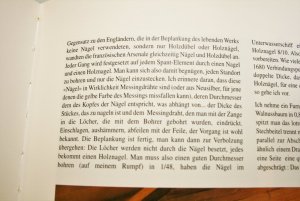
Contrary to the english shipwrights, who used for the underwater hull planking ("lebendes Werk") completely wooden dowels / treenails, the french installed either wooden treenails and in the same number nails out of metal......
.....means that the french used on one connection point with the frame one treenail and one metal nail.....
=> the french ship hulls should have both: WOODEN and METAL Nails
The whale-planks have everytime metal bolts

Frölich is using for his models in scale 1:48 (the same like my La Salamandre) brass wire of 0,5mm and wooden treenails of 0,8mm.
He is also suggesting "German silver" - wires or nails instead of the brass (The german term is "Neusilber"), also called Alpaka / Alpacca

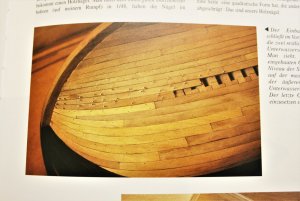
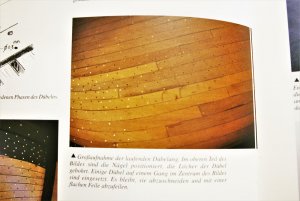
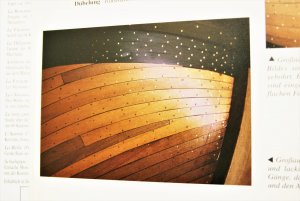
He made some photos of the related parts in his book showing how it is looking like:

First he is drilling and installing only the brass wire in 0,5mm wholes
IMG_44371.jpg

Afterwards he is drilling and installing the wooden treenails
IMG_44391.jpg

This is the result for a french hull
IMG_44411.jpg

IMG_44421.jpg
 
I have the Frolich book also and noted the alternating wood and metal nails used on French ships. Might experiment myself when I return from China. Not sure which metal to use. I might go to a jewelry supply shop and see if I can find some silver wire.
 
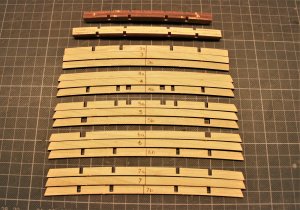
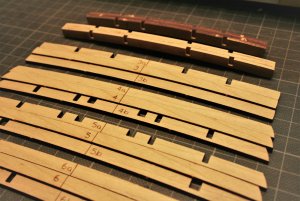
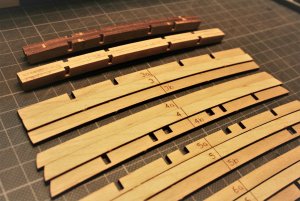
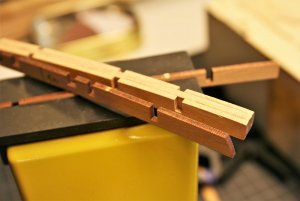
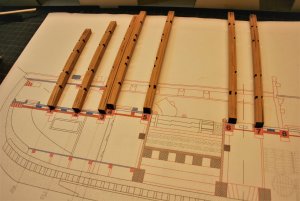
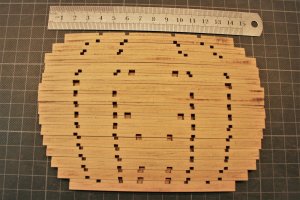
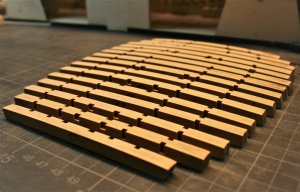
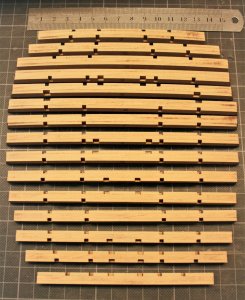
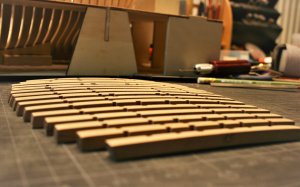
In order to make a small break with working on the inner planking I prepared the necessary 15 beams of the La Salamandre .

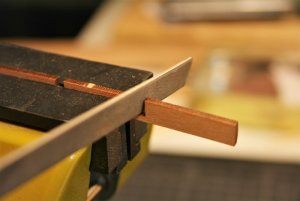
Every beam are built by three elements, a center part and two elements for each side, with already prepared notches for the carlings, everything laser cutted
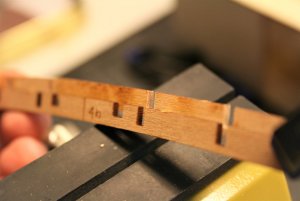
The second beam from the top is already pre-sanded, so removed most of the char, the top one only glued together, but not sanded, under these two beams you can see each time 3 elements of four beams, btw: all elements are numbered on the visible sides, so i glued the elements together, that the laser-number is covered and not visible any more - I do not want to see laser numbers on my finished model
IMG_44211.jpg IMG_44221.jpg IMG_44231.jpg

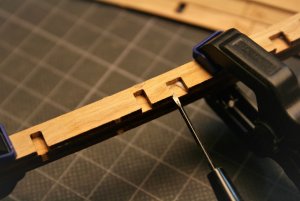
Due to the fact, that the elements are laser-cutted, the sides of the notches are covered with char, so before glueing the beams to the sandwich, I sanded the insides of the notches to get rid of most of the char......later it is much more complicate to clean them - on the photo at the right you can see the difference very good
IMG_44241.jpg IMG_44261.jpg IMG_44271.jpg

After putting the three elements together with glue, I removed immediately the wood-glue with a small chisel - after hardening also much more complicate to remove
IMG_44281.jpg

The first 7 beams finished and layed on the CAF drawing, that you can see where they are located later on
IMG_44341.jpg

all 15 beams finished and pre-sanded - you can see very good the locations of the notches for the carlings
IMG_44431.jpg

I like this photo.....
IMG_44441.jpg

IMG_44461.jpg IMG_44451.jpg

Many thanks for your interest on my building log ...... to be continued ......
 
G'day Uwe
The further you go into the kit as you progress, the more I'm amazed at the ingenuity this kit's presentation of it's parts.
The knotches in the beams, are another example of why ZHL and other Chinese kits, are leading the way. The other European and American manufacturers should copy from the Chinese in this regard.
Happymodeling
Greg
 
G'day Uwe
It's harden enough to do a great job like you have done here on the outside, but on the inside it must be a lot more difficult. Brilliant mate.
Are the planks pre shaped at the stern and bow or you have you trim them?
Happymodeling
Greg
 
Not at all Pre-Shaped...... there are 1,5mm to 5mm stripes which have to be adjusted for the situation.....as usual. I think, that Laser Cutted planks would never work with a POF model, due to the fact, that every modeler is sanding the frames slightly different....so they would not fit
 
I think, that Laser Cutted planks would never work with a POF model, due to the fact, that every modeler is sanding the frames slightly different....so they would not fit
That's a very good point. Never thought of that.
Greg
 
Back
Top