When you describe and show, it sounds so easy.......good result for the first try....I have learned something, the day is not lost ;-)
You are using an out of date browser. It may not display this or other websites correctly.
You should upgrade or use an alternative browser.
You should upgrade or use an alternative browser.
HMS Royal Caroline kit ZHL 1/30
- Thread starter Maarten
- Start date
- Watchers 111
-
- Tags
- royal caroline zhl
As etching was fun I directly started a second etsch project, I create a George III monegram for the vessels doors.
In this case I google it and then sized and printed. Again very small in size and very delicate.
See the size below
View attachment 37402
I still have to fine tune the process, but these results are not possible with an other methode then etsching.
See you next time and happy modelling.
Maybe this is also a possibility for the monograms etc. which are often on gun-barrels.....thanks for sharing
G'day Maarten
You have given me some great ideas to play with.
Thanks s MILLION mate
Happymodeling
Greg
You have given me some great ideas to play with.
Absolutely brilliant my friend.
If you don't mind I've using this method as well. The scope is endless. You could make desk lanterns. Brass signage etc eg. Kings and queen's signs for the toilets's doors. Gold inlay, using polished brass, on the king's bed, gold inlays in the wall panels, gold cutterlies, gold bowls, candle sticks etc....my mind is going 1000kph at the moment thinking what this method can leads to.Thanks s MILLION mate
Happymodeling
Greg
Hi gents,
Many thx for your comments. The possibilities are endless. lots of fun with it.
Many thx for your comments. The possibilities are endless. lots of fun with it.
Just scanning through your build and it is really amazing what you are doing. the Treenailing is fabulous indeed.
Hi Donnie,
Many thx, there are several thousends of basswood cocktail pins in, it was some weeks of work. I stll have a view hundred for the decks. .
.
Regs Maarten
Many thx, there are several thousends of basswood cocktail pins in, it was some weeks of work. I stll have a view hundred for the decks.
Regs Maarten
After looking in to the process of etsching I have created a second batch of George 3rd monograms and I am starting to get hold on the process creating better quality results.
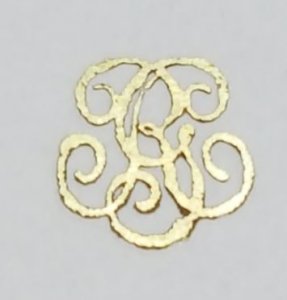
For all the doors the monograms have now been etsched.
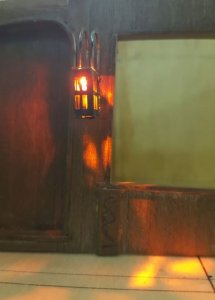
The etsched lanterns is now fitted to the bedroom bulkhead, of which two will be fitted on each side of the bedroom 1.
The last etsching at the moment is for the horseshoe plate and butterfly plates for the keel construction. These are not part of the kit therefore I made them myself for increased detailing.
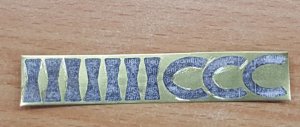
This is the printed brass plate before etsching, 3 horseshoe plates (1 spare) and 7 butterfly plates. For the butterfly plates I have to determine the correct spots to mount them.
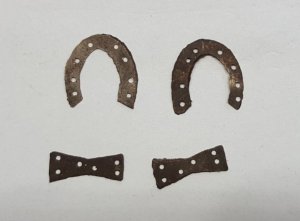
These are the finished plates, etsched and burnished black.
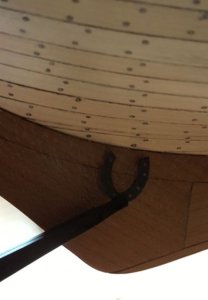
The spot for the horseshoe plate which will be nailed with burnished nails.

For all the doors the monograms have now been etsched.
The etsched lanterns is now fitted to the bedroom bulkhead, of which two will be fitted on each side of the bedroom 1.

The last etsching at the moment is for the horseshoe plate and butterfly plates for the keel construction. These are not part of the kit therefore I made them myself for increased detailing.

This is the printed brass plate before etsching, 3 horseshoe plates (1 spare) and 7 butterfly plates. For the butterfly plates I have to determine the correct spots to mount them.

These are the finished plates, etsched and burnished black.

The spot for the horseshoe plate which will be nailed with burnished nails.
Great appearance..... you are learning fast and we can see the growing experience.
If I need horseshoes I know whom I could ask....
If I need horseshoes I know whom I could ask....
During the Eastern weekend we have been touring with our motorhome so I could only take some small parts with me. Then you already end up quickly with some carvings. In this case the mermaids to be installed on the side of the stern and the two knightshead to be installed next to the bowsprit.
The knightshead consist of two halves which should be glued together. As all the carvings are bnot fully 3d cnc carved the face of these is somewhat flat without expression.
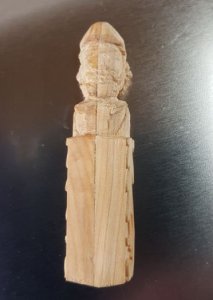
So to deal with this I decided to carved the faces myself. At the advice of Janos (thx) I used a diamond bit for this which worked great.
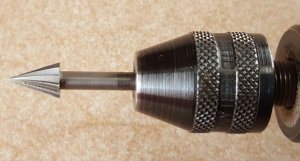
Be fearless I started carving and this is the result
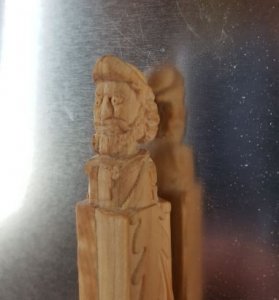
I have also modified the leaves on the side of the knightshead, creating vanes in the leaves.
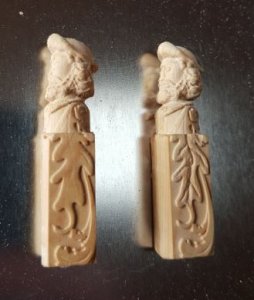
with vanes on the right and without on the left.
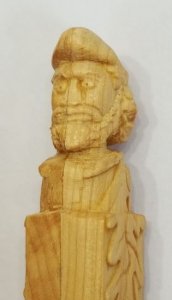
And the final result, ready for waxing and polishing.
I also finished the mermaids and carved the rearside of these as they will be visible when I install them on the vessel.
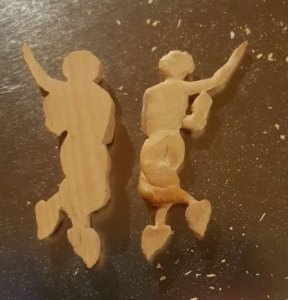
This is still work in progress, the carving takes a lot of time but it is great fun.
See you next time.
The knightshead consist of two halves which should be glued together. As all the carvings are bnot fully 3d cnc carved the face of these is somewhat flat without expression.

So to deal with this I decided to carved the faces myself. At the advice of Janos (thx) I used a diamond bit for this which worked great.

Be fearless

I have also modified the leaves on the side of the knightshead, creating vanes in the leaves.

with vanes on the right and without on the left.

And the final result, ready for waxing and polishing.
I also finished the mermaids and carved the rearside of these as they will be visible when I install them on the vessel.

This is still work in progress, the carving takes a lot of time but it is great fun.
See you next time.
Hi Uwe,
No problem send me the size you need and I mail them to you.
Regs Maarten
No problem send me the size you need and I mail them to you.
Regs Maarten
Hi Uwe,
No problem send me the size you need and I mail them to you.
Regs Maarten
Me two?
Thanks mate in advance.
What can I say Maarten?
Absolutely brilliant work!
You have put the bench mark even higher, soon I'll nead a space suit to even get close to your standard.You have shown me, what can be done and I thank you to the bottom of my heart.
Hope that you don't mind, I'll be stealing your ideas on my build my friend.
Havagooday and happymodeling
Greg
Hi Maarten,
Thanks for the offer with the horseshoes, you never know.....
Is this the first attempt to carve? When I see the result I am pretty sure, that you have already experience.
As I was reading faces are the most complicate area, you have to copy half face, so the face is not looking like a zombie... looks very good.
BTW: I ordered from Russia a big set of carving chisels, which will hopefully arrive during spring.
I want to learn this art, so I thought with good equipment is getting a little bit easier. The time will show....
Hi Greg,
No problem, just send me your details.
Regs Maarten
No problem, just send me your details.
Regs Maarten
Uwe,
I have done some minor carving in the past for my Friesland model and on a scratch model from a Dutch ship prins willem on which I worked some 30 years ago. These carvings I just reworked them so the basis was there. Learn to properly carve is also on my list, lije a lot of other things also .
.
Hope to see your carvings in your blog.
Regs Maarten
I have done some minor carving in the past for my Friesland model and on a scratch model from a Dutch ship prins willem on which I worked some 30 years ago. These carvings I just reworked them so the basis was there. Learn to properly carve is also on my list, lije a lot of other things also
Hope to see your carvings in your blog.
Regs Maarten
Hallo Maarten,
I got knowledge of a link to original drawings in higher quality.
All together 7 scans of the Chapman drawings. Maybe you did not know them until now
https://digitaltmuseum.se/011024827516/ritning/media?slide=1
Use the arrows on the right top to go to next drawing
I got knowledge of a link to original drawings in higher quality.
All together 7 scans of the Chapman drawings. Maybe you did not know them until now
https://digitaltmuseum.se/011024827516/ritning/media?slide=1
Use the arrows on the right top to go to next drawing
Hi Uwe,
Many thx for these. I knew them already via Greg. He made a comparison of these drawings with the Chineese ones and it seems some of the data for the model was taken from these drawings mixed with data from the AotS drawings which is creating an error in the length of the carvings compared to the length of the hull.
Regs Maarten
Finally the working people onboard get toilet. There has been some discussion previously about the installation of the toilets according the drawings of the AotS. I am installing the toilets on PS and SB side according to these drawings, this means the toilets follow the lines of the stern and are mounted under an angle backwards and inwards. As the vessel while sailing will also be under an angle these angles will be far less when at sea and the King can choose from the PS or SB toilet which is more convenient while under sail.
I started with bbuilding a bench around the inner stern to which the toilet is build. All is build with multiplex which will be covered with wallnut afterwards.
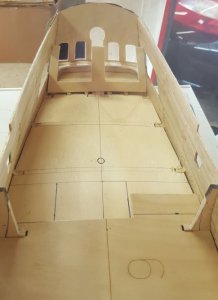
Rear bench and toilet frame.
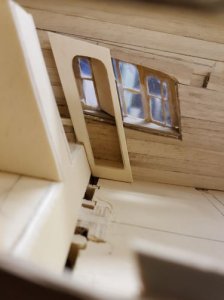
The toilet has a raised floor also to make it possible to open the door under an angle without getting stuck to the deck.
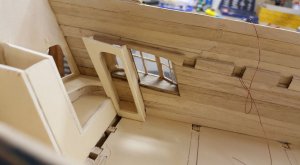
The inside of the gallery I have covered with wallnut, the side panel of the toilet will folow in a later stage.
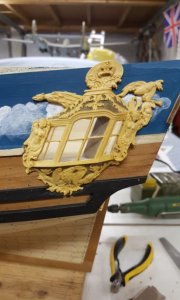
Looking from the outside you see the division wall of the toilet and you clearly see that the toilet is following the same angle as the gallery itself. The stern window is the toilet, the three in the front the cabin.
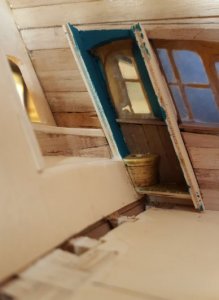
The inside of the toilet is painted in turquoise blue, the rear side covered with wallnut. The toilet self is just a wooden box with a hole and a pipe fitted through the stern. We don't have to be jealouse at a royal toilet in those days. . Finall finishing still to be done.
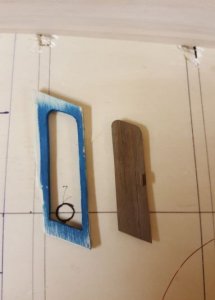
The door and door frame of the toilet with the door frame painted and sanded for the first time.
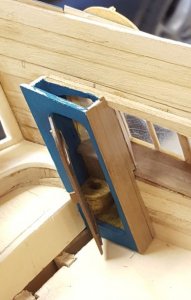
The door frame fitted and the fwd side covered with wallnut. The door is hinged with door hinges created as shown in one of the previous pages.
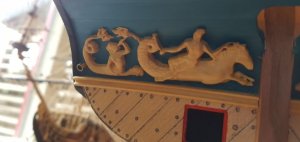
Every toilet needs an outlet, here fitted in the lower stern.
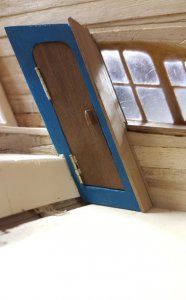
As you see the toilet is already occupied with the door closed. Now it is time for another toilet on the SB side and finish the rear bench.
I started with bbuilding a bench around the inner stern to which the toilet is build. All is build with multiplex which will be covered with wallnut afterwards.

Rear bench and toilet frame.

The toilet has a raised floor also to make it possible to open the door under an angle without getting stuck to the deck.

The inside of the gallery I have covered with wallnut, the side panel of the toilet will folow in a later stage.

Looking from the outside you see the division wall of the toilet and you clearly see that the toilet is following the same angle as the gallery itself. The stern window is the toilet, the three in the front the cabin.

The inside of the toilet is painted in turquoise blue, the rear side covered with wallnut. The toilet self is just a wooden box with a hole and a pipe fitted through the stern. We don't have to be jealouse at a royal toilet in those days.

The door and door frame of the toilet with the door frame painted and sanded for the first time.

The door frame fitted and the fwd side covered with wallnut. The door is hinged with door hinges created as shown in one of the previous pages.

Every toilet needs an outlet, here fitted in the lower stern.

As you see the toilet is already occupied with the door closed. Now it is time for another toilet on the SB side and finish the rear bench.
You solved it in a very good way.......well done!
And the rest of the crew have to use the seat of ease at the gallion....... also at stormy weather.....poor guys
And the rest of the crew have to use the seat of ease at the gallion....... also at stormy weather.....poor guys
You solved it in a very good way.......well done!
And the rest of the crew have to use the seat of ease at the gallion....... also at stormy weather.....poor guys
G'day Uwe
I think you mean poop deck not gallion. I might be wrong.
Greg
G'day Maarten
Brilliant idea on the way you done this area.
I liked the poop pipe, but where the brown stain on the sides?
Happymodeling
Greg
Brilliant idea on the way you done this area.
I liked the poop pipe, but where the brown stain on the sides?
Happymodeling
Greg


