Constructo 1799 Enterprise help

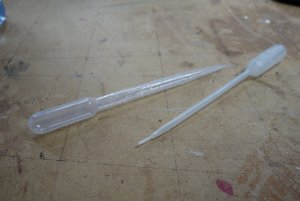
I've been using BSI glue for everything I build for years they have some great accessories for precision glue application. No matter what you use though some constraint on the amount you pick up or squeeze out is always paramount. I use these with BSI glue they may work for other brands also
https://www.ebay.com/itm/BSI-Bob-Sm...e=STRK:MEBIDX:IT&_trksid=p2060353.m2749.l2649
https://www.ebay.com/itm/BSI-Bob-Sm...m=272118632193&_trksid=p2047675.c100005.m1851

You will love the Thread tools they make life so much easier
 
@epicdoom
I had to look up BSI glues. I was not familiar with the product. I’ve been using Stick Fast CA Thin and CA Thick. I found those at my local Hardware store.

I tried the needle thread tool this morning. I was surprised at how well it worked. I had managed to thread a couple blocks without that tool. It was wax, twist, wax and twist the ends and poke the thread into blocks hole. That process took some time and after looking at the rigging plan, mentally counting all the blocks and tackles it was a “oh boy, how am going to do this” moment. So thank you for suggesting that tool.
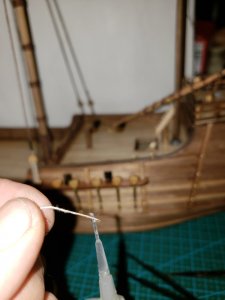
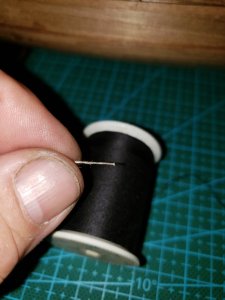
Your Welcome Brother they sure make life easier with rigging these tiny things. I only use the extra fine ones so even pulling .5 mm doubled over it will go through the block holes. I don't use that large a line for blocks, but I could with the extra fine threaders. BSI makes some excellent glue, I tried Zap and others and always went back to BSI. they make glue for everything from plastic to wood to rubber you name it even a foam safe glue for fixing foam planes and stuff. Its not the cheapest glue, but IMHO it is the best. I've stuck planking to the keel at the Bow and bent them around the bow into place and they always stay stuck even on wood I don't soak to soften, its just amazing glue and the accelerator they make for it is fast even on extra thick glue it hardens it in a nano second. a good trick for rigging line through the blocks is the put a drop of CA on the very end of the line to harden it I twist it through my fingers to bring the end to a very sharp point that end will go through the blocks with ease here is a picture of what I mean. I do this from 1/8" to 1/4" at the end.20180828_193119.jpg20180828_193146.jpg
 
Some times it does and sometimes it don’t.

DB575A0E-2877-46A5-AEEB-4E6F68644217.jpeg

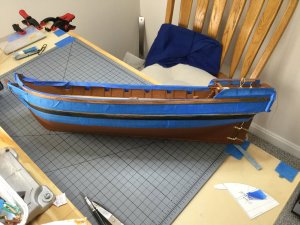
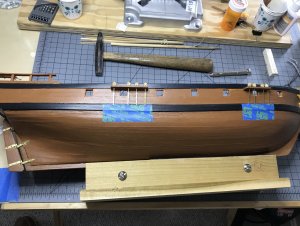
Back to the blue tape investment.
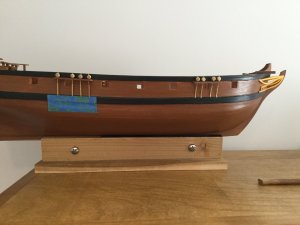
First paint attempt.
I tried mixing colors to get the yellow-brown ochre color for the gunport area. Several attempts resulted in a blotchy streaked look. The only solution was to strip the paint off and start over. First thing thing to repaint are the Wales and deck rails.
Second attempt.
The ochre paint I ordered on line was terrible. It would not mix, and left a trail of mini lumps. I tried thinning, stirring and swirling. After Painting pieces of scrap planking I scrapped that idea.

I think for now the blue tape will stay over the gunport area while I explore other possibilities.
 
I'm not much help when it comes to paints as I usually stain wood items. I paint on canvas using the wet on wet technique using oil based paints have you tried any of that base of paint. there are some better then others but the best I have found are from Bob Ross and Windsor Newton the Yellow Ochre color has varied shades depending on manufacturer. As far as acrylic paint the best I have found so far is from Tamiya, but I don't think they make an Ochre color they are a very smooth paint when applied and dry. the ultimate in smooth though will come from air brushing however not all folks have the equipment or the ability to use it right out of the box. there is a bit involved from consistency of paint amount of paint to air and then proper use of the airbrush in fanning and tapering off the spray so your not getting a puddle at the beginning and end of the paint stroke. This was the hardest thing for me to grasp and get rite, but I had to figure it out to paint fish I catch for taxidermy work.

I hope you get it sorted, but you know I like that blue tape it looks sexy right now just as it is lol
 
“I hope you get it sorted, but you know I like that blue tape it looks sexy right now just as it is lol”

https://www.amazon.com/stores/page/...KIKX0DER/82df9d3585572c054936f2862ed72887.jpg

Tape could be the answer to a lot of build problems, especially painting. There are lots of color tapes to choose from and when one gets tired of the current color scheme, a new model can be “taped” in a couple of hours.
 
“I hope you get it sorted, but you know I like that blue tape it looks sexy right now just as it is lol”

https://www.amazon.com/stores/page/3D983741-2243-4E22-B342-FBDB8CBB9858?store_ref=HSA_AC3DNP703BM0TSO&hsa_cr_id=9117979230201&lp_slot=desktop-hsa-3psl&lp_asins=B01AC9KF1C,B074SCBKG4,B0749H1G5P&lp_mat_key=tape colors&lp_query=3m color tape&sb-ci-n=brandLogo&sb-ci-v=images/S/gladiator-image-upload-prod/e/ATVPDKIKX0DER/82df9d3585572c054936f2862ed72887.jpg

Tape could be the answer to a lot of build problems, especially painting. There are lots of color tapes to choose from and when one gets tired of the current color scheme, a new model can be “taped” in a couple of hours.
Truth right there
 
7AE6C8D8-6155-41AD-90AA-554343D3FCD0.jpeg

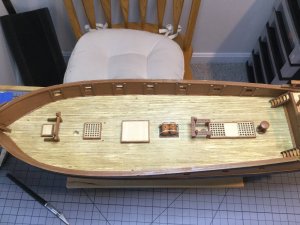
Interesting painting experiment. I thought the deck looked a little to “shiny”. So I used a “weathering” method from my other hobby to make the deck look a little used. (A broad brush dipped in rubbing alcohol with a minute drop of black paint added.)
 
A little bit of shipbuilding activity today.

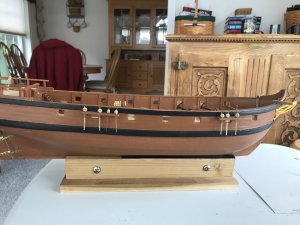
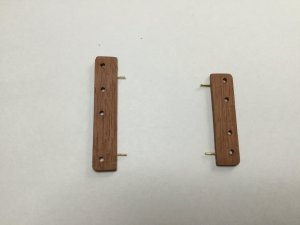
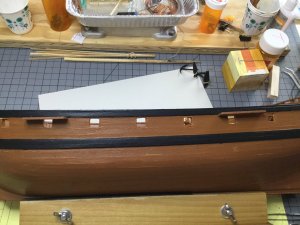
Added the channels to the Port side. I drilled some guide holes in the edge of the channels and tapped in a 12mm nail. I pressed the channels agains the hull to mark the location of the guides and drilled holes in the hull to accommodate them. After applying glue I tapped the channels in place. A quick adjustment and the job was done.

784D72BC-1257-4167-96C2-15BA01929E28.jpeg

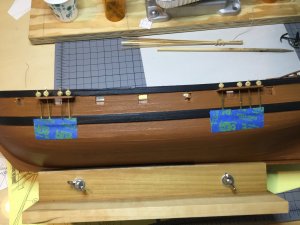
Another how to do it moment. The dead eyes needed to be lined up and temporarily held in place. So the infamous blue tape provided the answer.

C75ADFE4-B449-4239-A28D-DB90C7FC542B.jpeg

The tape was placed with the top edge just barely holding chain plates. That provided enough stability to allow me to use the plates as a guide to drill the holes to fasten them to the hull.

EBA5CFAF-9F5F-4DC4-856B-EDCABC52C13D.jpeg

Oh boy, alas, darn. Found a problem. The lower Wales are too low. The nails penetrated the hull just a midgen higher than the bulkhead waterway.

Another novice builder error.

Two things done wrong. 1) The Wales should be about a 1 to 2mm higher on the hull and 2) the chain plates should have been .5 to 1mm longer.
 
Starboard Channels:

5C1A2817-4A9A-42DC-9F72-EEA8A5BF6B59.jpeg

Channels with guide pins mounted.

E6E12FDF-032A-4F38-AC6A-0270ACF2146A.jpeg

Channels mounted and glued.


64824BF7-896E-4E84-87E4-724DC1FF0594.jpeg

The blue tape once again holds everything in place while the holes are drilled to mount the chain plates.

This side was pretty close to the build specifics of the plans. I’ve not figured out how the errors occurred on the Port side.
 
Looking Good I like that you Pin the Channels. I do that on every build, I do it to everything on the deck and rails that will have line ran to them. nothing worst then pulling a line to a pin rack only to have the rack detach, or shrouds to the channels and having those break away and it usually happened on the last shroud line for me.
 
Working on the little stuff:

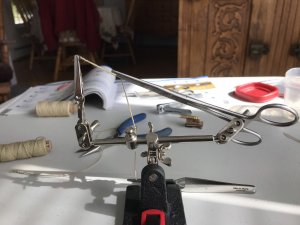
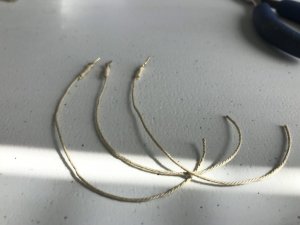
Had to invent a whatzit machine. Fingers weren’t nimble enough and eyesight was problematic to “serve” the ropes that restrain the cannons.

1C92059B-DAAB-4007-9D8F-97E0A2C1AB47.jpeg

F2B06E84-7B49-4567-82C0-FADE53BFC9AA.jpeg

The finished product.

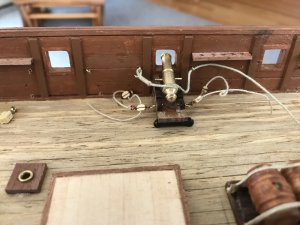
88D6E42C-A9B2-43AA-89B8-3958BD48284B.jpeg

I think these look good for my first try.
 
Carronades:

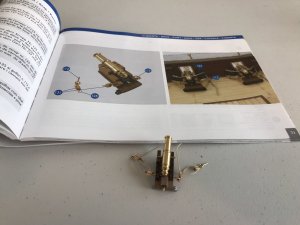
Looking at the instructions for the block and tackle I think the assembly shown is backwards. The end of the rope appears to be facing toward the bulkhead not toward the middle of the deck.

89863D7E-D933-4919-9EC6-48E99267DF2E.jpeg

I’ve assembled one carronade and it looks odd?

F1EDA2DF-805C-4CDA-AF00-5C3CDB1E4FB7.jpeg

Am I wrong?
 
Back
Top