Constructo 1799 Enterprise help

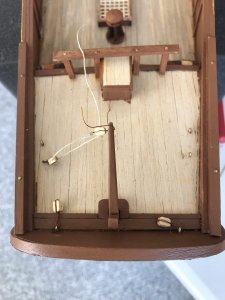
I think I’ve found a part of the build that requires patience, manual dexterity and and better than 20/20 vision. It would seem that at my age I lack two if not three of those attributes. I spent the better part of my afternoon twisting, re-twisting wires on blocks. Perseverance and stubbornness finally won. I think I’ve got a good start on this part.
B21AF5D9-4D81-436D-A6DE-03B6B13C6A3A.jpeg

Not perfect but “OK” for my first effort.
 
Last edited:
Looking good. Rigging takes a great deal of Patience and Dexterity the 20/20 we can fix with a magnifying device. Patience I got from always waiting on the wife and the Kids. Dexterity well I had that really good most of my life. now I am loosing it due to old age lol I play guitar and have all my life so my Dexterity was always really good. I learned to tie knots with one hand in the Marine Corp and could do it even in the dark, now the fingers cramp up, lock up and just do whatever they see fit regardless of what I'm trying to get them to do. lol Take your time you will find your groove and what works best for you. I find now days I do better tying short lines and such with 2 pair of tweezers as apposed to my fingers.
 
9D10DCE5-1E95-4D8F-9DC8-A5936ED41C58.jpeg

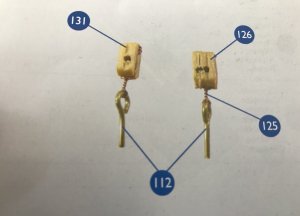
Looking at the instructions for rigging the single blocks and the blocks and tackle I thought that it would be a fairly simple operation. After many attempts I decided there had to be a better way. The strap or wire supplied with the kit just didn’t look right. Forming loops to attach the eye bolts also proved to be elusive. Many tries and just as many rejects made me look for an alternative.

CD853FD5-2F1B-4B52-8728-74AD23C9C2CF.jpeg

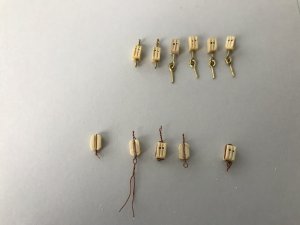
My solution is in the top row, the failed attempts are in the bottom row.

I drilled holes in the tops of the blocks and in the block and tackle. I trimmed off a bit of shanks of the eye bolts and used A dab of CA to fasten the eye bolts in place.

The “fix” takes a bit of time but I think it looks much better.
 
I remember those from my kit, They were fragile I had to wind them up very carefully. I said a lot of foul words learning just how delicate they were. Your method looks good and achieves the same end result, just make sure you don't run out of eyebolts. If you don't already have them check these out here is a good rigging kit I have and use https://www.amazon.com/BIGTEDDY-Jew...pID=51-wDjubJDL&preST=_SY300_QL70_&dpSrc=srch
and here are some great threading devices that are worth way more then they cost for rigging ships https://www.amazon.com/gp/product/B01KIXR2SQ/ref=oh_aui_detailpage_o01_s00?ie=UTF8&psc=1
 
As I know it is historical correct, due to the fact that the ships of the US navy with USS had all the yellow painted band(s) at the level of their gunports.
So it would be like your examples of your photos 1 to 3. photo 4 is showing a different color scheme with some lighter wooden color and yellow stripes, is it also a navy ship?
Uwek isn’t the gun port strip on the USS Constitution white?
 
View attachment 50789

Looking at the instructions for rigging the single blocks and the blocks and tackle I thought that it would be a fairly simple operation. After many attempts I decided there had to be a better way. The strap or wire supplied with the kit just didn’t look right. Forming loops to attach the eye bolts also proved to be elusive. Many tries and just as many rejects made me look for an alternative.

View attachment 50790

My solution is in the top row, the failed attempts are in the bottom row.

I drilled holes in the tops of the blocks and in the block and tackle. I trimmed off a bit of shanks of the eye bolts and used A dab of CA to fasten the eye bolts in place.

The “fix” takes a bit of time but I think it looks much better.
Looks good, well done Sir
 
Another head scratcher.

I set the hull to the side after the deck planking and thought I would start working on some of the other steps of construction.

The masts and bowsprit looked like a good place to start.

“Cut and taper the bowsprit and jib boom according to the measurements of the drawing” is what the instructions indicated. Look in the “how to books”, look at “You Tube”?

Decided that I could do a good job with this setup and different grit sandpaper.

View attachment 34302

I added an extra 3/4 of an inch added to the dowel length to allow clamping the dowel in the drill chuck. Using a set of heavy duty work gloves and sandpaper I was able taper the dowels in a few minutes. Once the dowel dimension fit the plan I cut of the extra bit of dowel damaged by the drill chuck.


View attachment 34303View attachment 34304View attachment 34305
 
Uwek isn’t the gun port strip on the USS Constitution white?
She has now white strip, but when you look at contemporary paintings from her time a fighting ship, you can find also yellow ones.....I am not specialist for the American navy, but I am pretty sure we can find more information about the painting scheme over the time. And it depends which time period the model should represent, contemporary or museum.....
 
She has now white strip, but when you look at contemporary paintings from her time a fighting ship, you can find also yellow ones.....I am not specialist for the American navy, but I am pretty sure we can find more information about the painting scheme over the time. And it depends which time period the model should represent, contemporary or museum.....

3CC64263-4047-4389-BC52-25248A116CA9.jpeg8F44325A-9A8E-4AA5-8CD5-09FFCABCFD89.jpeg

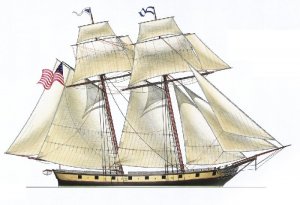
These are some of the prints of the USN ENTERPRISE that I found on line.
 
76FC1D07-C28F-4DB3-8758-43C87A855052.jpeg

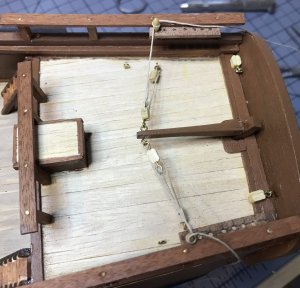
I’m pleased with my method of doing the blocks and tackle.

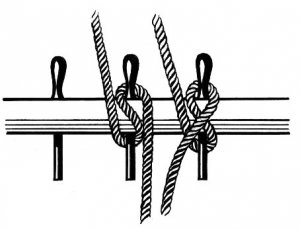
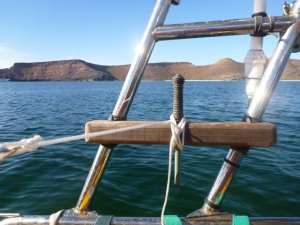
The question is now the belaying pin. Does the rope fasten right over left or left over right.
 
Last edited:
I think you have to take into account from where the forces will come via the rope, means in which direction the rope is leaving the belaying pin.
In your situation it is horizontal, so the first sling around the pin should be on top of the rail.

In principle like this one here
Pinrail aft.jpg

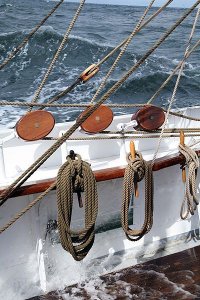
or take a look at this photo
https://de.depositphotos.com/187780920/stock-photo-steel-belaying-pins-with-ropes.html

or this one where you can see different directions towards the rope is going, so sometimes the first sling is on top and sometimes under
400px-Sørlandet_pulleys_and_belaying_pin_rail.jpg

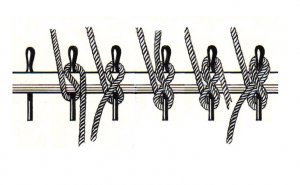
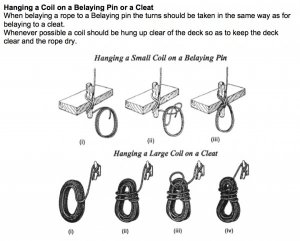
BTW: Your sketch is not complete and there is another one which can help for the end of the rope with a coil
Belaying_sequence.jpg hanging-a-coil-600x481.jpg

Hope this is helping
 
I remember those from my kit, They were fragile I had to wind them up very carefully. I said a lot of foul words learning just how delicate they were. Your method looks good and achieves the same end result, just make sure you don't run out of eyebolts. If you don't already have them check these out here is a good rigging kit I have and use https://www.amazon.com/BIGTEDDY-Jew...pID=51-wDjubJDL&preST=_SY300_QL70_&dpSrc=srch
and here are some great threading devices that are worth way more then they cost for rigging ships https://www.amazon.com/gp/product/B01KIXR2SQ/ref=oh_aui_detailpage_o01_s00?ie=UTF8&psc=1

Thank you for the website links.

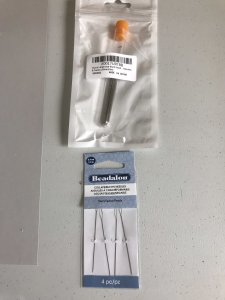
These came today.

1722903C-1E6F-4B7D-BD13-463BEA84BDB8.jpeg

The needles will be modified to become CA dispensers and the eye needles will be tried on the next block and tackle rigging.
 
Back
Top