You are using an out of date browser. It may not display this or other websites correctly.
You should upgrade or use an alternative browser.
You should upgrade or use an alternative browser.
Constructo 1799 Enterprise help
- Thread starter Pathfinder65
- Start date
- Watchers 30
More of the little item stuff.
Pinrails:
I’ve enjoyed looking at all the great work on the Forum. A lot of it is complex and done with remarkable skill. That having been said, I find it comical that it took me the better part of a day to figure out how to drill a series of holes in a straight line given the tools I have available.
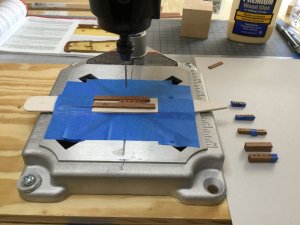
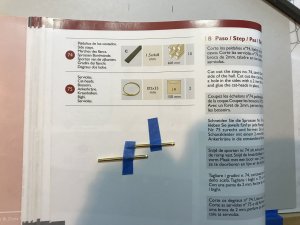
A small jig. Two left over pieces of planking glued to a plant marking label. The planking bits are spaced apart as the same width as the pin rail material, with left side a tad bit tighter to hold the material while drilling and allow the material to be moved to drill the next hole in line. The jig was then squared up with the drill bit and taped in place.
Not very complex but workable.
Pinrails:
I’ve enjoyed looking at all the great work on the Forum. A lot of it is complex and done with remarkable skill. That having been said, I find it comical that it took me the better part of a day to figure out how to drill a series of holes in a straight line given the tools I have available.

A small jig. Two left over pieces of planking glued to a plant marking label. The planking bits are spaced apart as the same width as the pin rail material, with left side a tad bit tighter to hold the material while drilling and allow the material to be moved to drill the next hole in line. The jig was then squared up with the drill bit and taped in place.
Not very complex but workable.
Proxxon kt70
Very helpful and not that expensive.
JL
Very helpful and not that expensive.
JL
Proxxon kt70
Very helpful and not that expensive.
JL
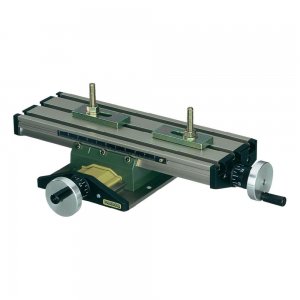
That looks like a great tool. But a little bit more than I need. This is my first wooden ship build. My main hobby is large scale railroading (1.22.5 Scale).
The ship was a Birthday present and I thought I’d give it a go not realizing the amount of time and effort required to complete a build. It’s been and still is a great learning experience. The Forum members have been a great help and many of them amaze me with their accomplishments.
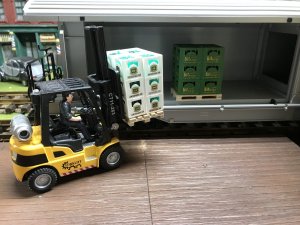
My other hobby.
Last edited:
Intermission:
The shipyard is temporarily closed. Good Summer weather, lots of company and good times by the pool. We have company for the next several weeks so the shipyard staff has taken time off.
We did have a show and tell of our progress to date.
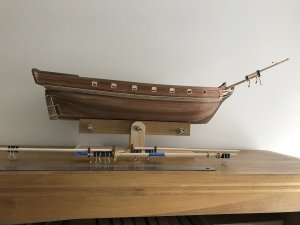
The visitors have been impressed by the amount of small details stored carefully next to the hull.
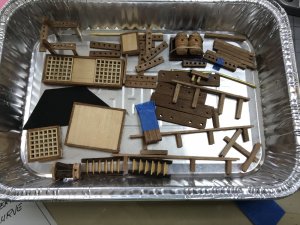
We shall return..
The shipyard is temporarily closed. Good Summer weather, lots of company and good times by the pool. We have company for the next several weeks so the shipyard staff has taken time off.
We did have a show and tell of our progress to date.

The visitors have been impressed by the amount of small details stored carefully next to the hull.

We shall return..
Hello Pathfinder,enjoy your summer and company,we are waiting for you here.
Hello Pathfinder,enjoy your summer and company,we are waiting for you here.
Thank you Zoltan.
With family living on the West coast those of us on the East coast look forward to their yearly Summer visit. Lots of fun, food and spoiling of the Grandchildren.
Intermission is over, shipyard is open once again.
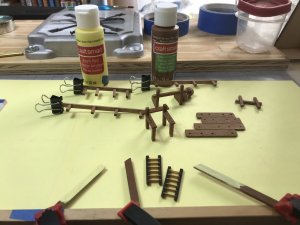
I’ve been to the local hobby store to buy paint, but I’ve not been able to find the colors I’m visualizing.
The yellows I’ve found are to “yellow “ and the “brown” is to dark.
I like the looks of the Lady Washington.

I’ve found that colors of internet paint sources aren’t always as pictured.
Hopefully the experts here can point me in the right direction.

I’ve been to the local hobby store to buy paint, but I’ve not been able to find the colors I’m visualizing.
The yellows I’ve found are to “yellow “ and the “brown” is to dark.
I like the looks of the Lady Washington.

I’ve found that colors of internet paint sources aren’t always as pictured.
Hopefully the experts here can point me in the right direction.
I built the Enterprise 2 years ago and I started the second planking after I had the Hull from the first planking sanded filled nice and smooth you will find also that some sunk in sections of the first planking job can make the hull look bad even though they are only shallow depressions of 1/64 - 1/32 deep they can look really bad on the finished hull, so what I do is when I'm sanding the first planking I do so over a full sheet of news paper. I then collect that sanding dust and mix it with glue to make a putty I fill any gaps and depressions with that mix to make the hull as perfect as possible before starting the second Planking.
I built the Enterprise 2 years ago and I started the second planking after I had the Hull from the first planking sanded filled nice and smooth you will find also that some sunk in sections of the first planking job can make the hull look bad even though they are only shallow depressions of 1/64 - 1/32 deep they can look really bad on the finished hull, so what I do is when I'm sanding the first planking I do so over a full sheet of news paper. I then collect that sanding dust and mix it with glue to make a putty I fill any gaps and depressions with that mix to make the hull as perfect as possible before starting the second Planking.
Thank you for the advice. This being my first build Ive needed all the advice and building help offered. I’ve been able to fiddle, diddle and muddle my way through. It’s been a great learning experience and I’ve noted many things I would do differently next time around.
My first ships planking job was so bad I ended up painting the Hull with thick Brown Paint lol I learned how not to do planking on that ship. My next one was better and every one after got better then the last. Don't give up Brother, first ships are rarely ever perfect. You sound like your on the right path learning from mistakes that's what all of life is about Brother.Thank you for the advice. This being my first build Ive needed all the advice and building help offered. I’ve been able to fiddle, diddle and muddle my way through. It’s been a great learning experience and I’ve noted many things I would do differently next time around.
I thought for me it would be a snap building wood ships because I was a carpenter prior to going into the Marine Corp and I had built some 50 Plastic car models in my youth many modified models with opening doors and engine wiring some with electric motors that made the car move. I built plastic war ship models and lots of plane models when I came home from the Corp. Then about 10 years ago I saw a bunch of tall ships come into the Baltimore harbor where the USS Constellation is Docked. Though I had been on the Vessel many times seeing all the other ships gave me the model ship bug something terrible, I cant turn back now and I don't want to its to much fun. I have built 17 Wood ships in the past 10 years and I don't have a single one in possession someone always sees the one I just finished and wants it so I send them home with it. It keeps the wife happy since they aren't taking up space and its always a good excuse to start a new one. It also keeps me out of the Bar and home where I belong lol
I don't now why, but I like that blue deck also lol. I love seeing what other folks are doing with these ships so I'm gonna follow this one.
I don't now why, but I like that blue deck also lol. I love seeing what other folks are doing with these ships so I'm gonna follow this one.
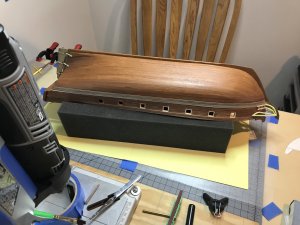
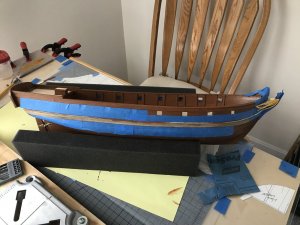
I think I have as much invested in 3M masking tape as I do in the small tools acquired to build this model.
I have three different widths of tape. The masking takes time to do but also eases the anxiety while painting.
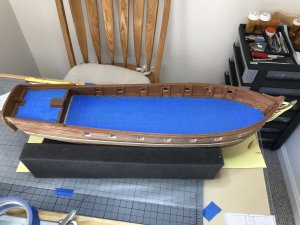
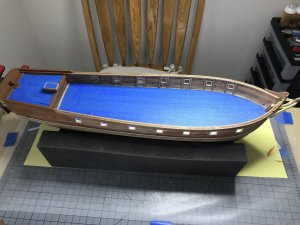
1st coat of paint inside hull. I apply a coat of paint wait for a day, lightly sand and apply the next coat of paint.
Last edited:
Fortunately I get the painters tape free from work, but mine is green 3M I will have to give this method a go as I usually pain without it and its a pain in the rump trying to keep my old hands steady.
The build is looking nice Brother cant wait to see more pics as it progresses.
The build is looking nice Brother cant wait to see more pics as it progresses.
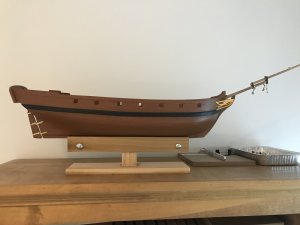
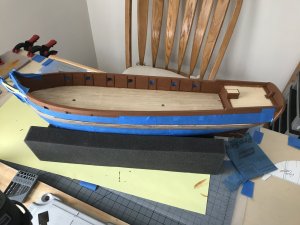
First coat of trim paint done.
.
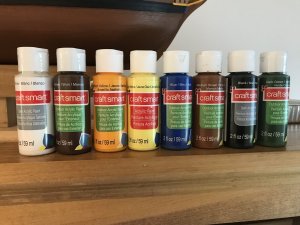
I did quite a bit of research on finding and buying paint. The nearest Hobby Store is about 30 miles north of my home and they specialize in RC cars and airplanes. None of their paint selection looked promising since it was all geared to fiberglass or plastic. I ordered a couple of sample paints from an online Hobby Store and the colors weren't close to what showed on their website. Last week I followed my wife into one of the local Craft Shops and wound up in the artists section. The variety and type and colors of paint amazed me. I settled on the above colors because of the easy water cleanup and colors that I could work with. I combined some of the deep yellow with the dark brown to get the color I was looking for at the bow. The lower Wales were painted with a mixture of two parts black and one part dark green. I was pleased with how easily the acrylic paint flowed on the hull parts. Clean up was a snap, a little soapy water and a damp rag was all that was needed.
Last edited:
looking Good Brother
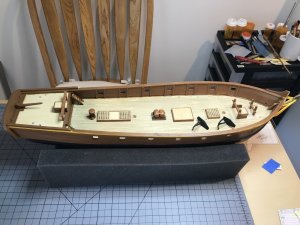
Some time spent today adding and gluing the "furniture" to the deck. I ran a piece of string from the bow to the stern to approximate the center line of the deck. I scaled the location of the "furniture from the plans, made a light pencil mark to fix the corners and then centered the pieces under the string center line.The Poop stanchions need be adjusted to allow for the slight curve of the Poop deck, to help align the stanchions and head rail I drilled holes in the bottoms of the two outer stations and glued in a 12mm nail. The nails helped in the alignment and setting of the stantions while the glue dried.
I had to fiddle with the two anchors. Both anchors had to be "adjusted" the holes for the hawser rings were broken. I filed off the broken parts and glued the anchors into the stocks. Once the glue had set I glued the rings supplied with the anchors to the other side of the stocks. With the stocks painted its hard to tell that there was a "problem".
More painting later on. I'm waiting for the Ochre paint I ordered last week. I tried mixing Yellow and Orange paints but could not get the Ochre color I was looking for. The Tamika website displayed a shade of Ochre that I thought would work so.. now we wait.


