Constructo 1799 Enterprise help

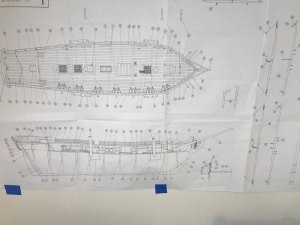
Constructo instructions leave a lot to be desired. Ignore them and follow the plans..
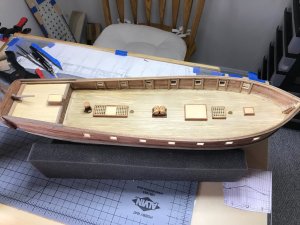
You didn't align that strake with the strake below. Are you going to sand it flush when finishing the hull?

JL
 
Constructo instructions leave a lot to be desired. Ignore them and follow the plans..
You didn't align that strake with the strake below. Are you going to sand it flush when finishing the hull?

JL

I just pinned the rails temporarily with 12mm nails. I need to sand and shape the stern area more to get a good transom fit. I'll permanently mount those rails after the transom is installed.

I plan to finish the hull to match the paint scheme of the Lady Washington when I get to that point.
 
Really nice and clean work.
 
Yet another kit foible:

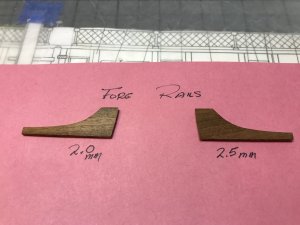
1AA21525-510A-4390-8CBE-DAA885C5B50B.jpeg

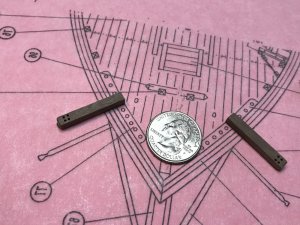
The Fore rails supplied in the kit are two different thicknesses. One is around 2.0mm the other is about 2.5mm. The Gallent rails are 2 X 2mm. So I would think that the 2.0mm Fore rail is correct and the 2.5 mm belongs to another kit.
 
Sometimes it is surprising and we often can not understand how and what kit manufacturer are thinking. Or sometimes they do not care.....
Good, that the requested thickness is the smaller on with 2mm, so some small sanding work will solve the problem
 
Welcome to Constructo kits, although I think that most of the kit manufacturers work the same way.

Well, it everything fits and things were perfect it would't be half the fun, would it? :):)

JL

Absolutely correct. I’m having a great time figuring out how to do some of the build steps. My ship building “training” is a work in progress.
 
More build steps completed:

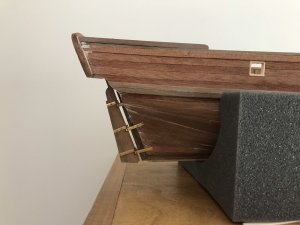
Mounting the rudder was a small problem. The hinge parts that attach to hull would not stay fastened to the rudder. The solution was a dab of glue on the hinge pin. Fastening the hinges to the hull with the 12mm nails also proved interesting. I used a small bit to drill a starting hole for the nails on the thicker part of the hull, placed a dab of CA on the nail and tapped it in place. The other two hinge holes were closer to the narrow part of the stern. The nails tapped into those holes extended beyond the hinge. The ends of nails were cut almost flush with the hinge and lightly “peened” to form a “head”. (I hope this all makes sense)

F64D0B8B-EC68-4CFB-A071-79E06FE6F181.jpeg

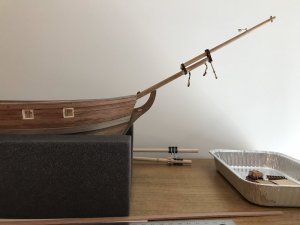
The next part of the build was worrisome. “Cut a hole for the bowsprit opening”. After having survived the “cut the holes and frame the gun ports event”, I wasn’t sure that this would have a good outcome. First the hole had to be cut at an angle, second the Gallant rails that I had so carefully cut and sanded to meet at the bow had to be cut, and third the opening had to be filed to accommodate the diameter of the bowsprit.


302C7DD4-8401-464A-9564-556E5FCC75D8.jpeg

Just a little more sanding of the stem top and all is well.
 
Good progress. Fine work.
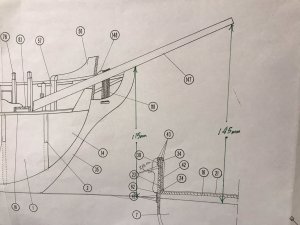
The angle of the bowsprit looks in the first moment a little steep, but comparing with your photos of the drawings, seems to be correct according the drawing. Before you finally install and fix the bowsprit I would try to adjust the top of the stem-post with a round file or rasp, so that the bowsprit will sit smooth on top, with no gap...... great work my friend

Good advice Uwe. I though the angle looked a little steep also. I have time today to measure and check the physical versus the plan.

D0FFBC7F-09DC-442B-B503-89BF1AEAE1B6.jpeg

I think a line drawn from the keel forward to under the bowsprit should give one several good reference points.
 
Bowsprit:

Uwe noted the the bowsprit did not look right. I trimmed the top of the stem to get the bowsprit angle within the dimensions shown on the plans.


1146B69F-991C-454D-84A2-C913A1B777DD.jpeg

I used the above two reference points to get the proper alignment.
 
The angle seems correct.

Agree with Uwek, the bowsprit must sit correctly on top of the stem-post withou any gap.

JL

Thank you for the help. I will do that fix when the bowsprit is permanently installed. I need to mount the Fore rails first. I’ve sanded down the Fore rail piece that was oversize and now need to give both Fore rails a slight bend so they fit the curve of the Gallent rails at the bow.
 
Build Quandary:

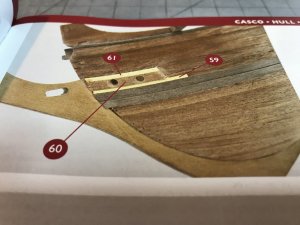
I’m at the step to install the Haweshole reinforcements. Instructions state to glue and drill two 3mm holes in the reinforcements. Do the holes go all the way through the hull?

?1C199F18-33ED-481F-B30E-05C71A67EE86.jpeg
 
  • Like
Reactions: ADC
Boat David’s:

C489DA2B-6588-4164-BA1E-AD9E8864BA99.jpeg

I find I’m using the instructions to see the next part of the build less and less and tracings of the plans more and more. For this step I found that the plans gave me a better idea of what to do than the pictorial instructions.
 
Boat David’s:

I find I’m using the instructions to see the next part of the build less and less and tracings of the plans more and more. For this step I found that the plans gave me a better idea of what to do than the pictorial instructions.

Exactly what I'm doing, too... :)

JL
 
Back
Top