HMS Snake

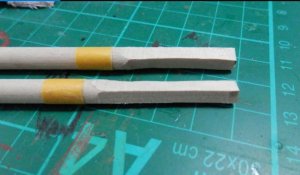
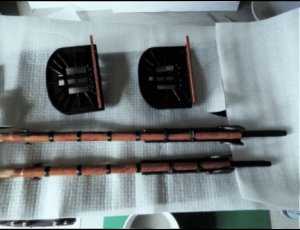
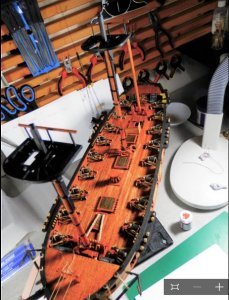
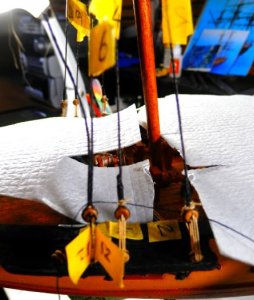
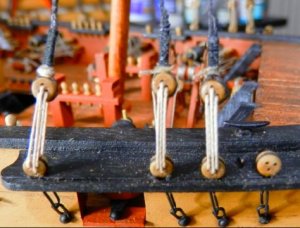
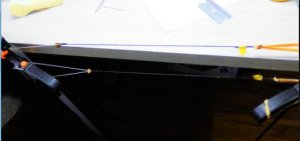
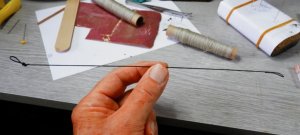
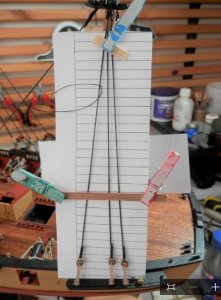
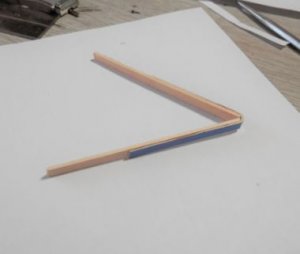
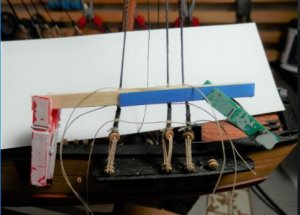
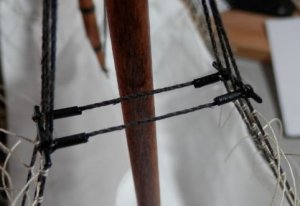
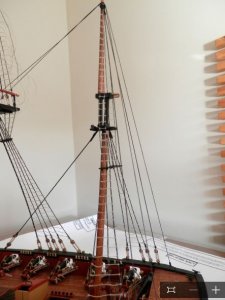
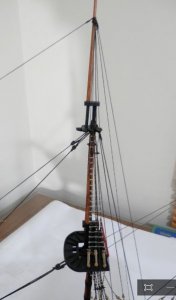
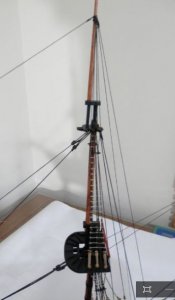
Masts. The photos show the sequence. Some points –
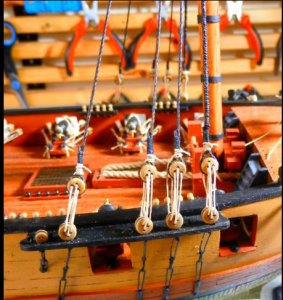
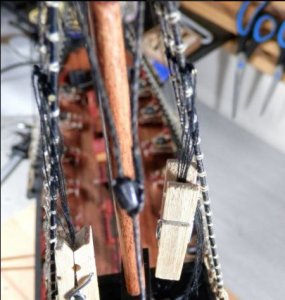
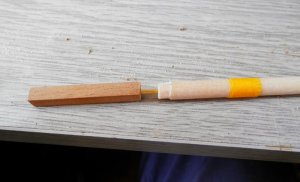
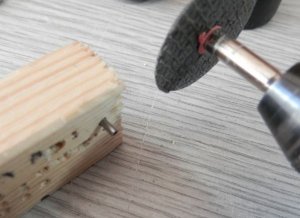
a. The top of the masts are squared off where they go through the crosstrees. I ran them across the bench grinder to take off the bulk of the material and then finished them off with a sanding stick; it worked well.
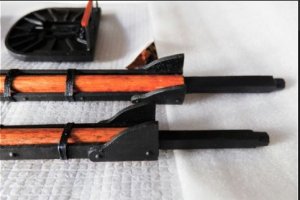
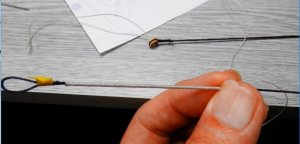
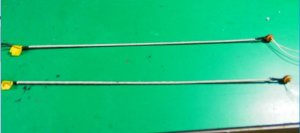
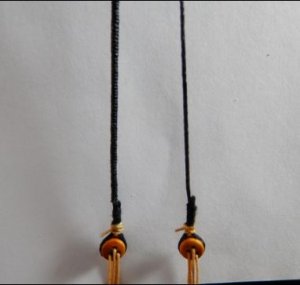
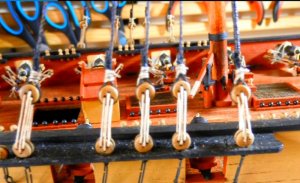
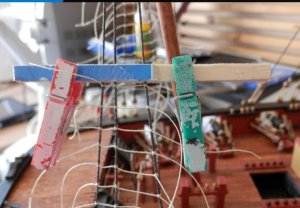
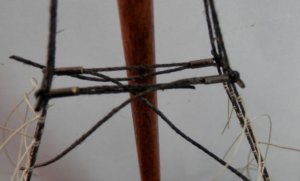
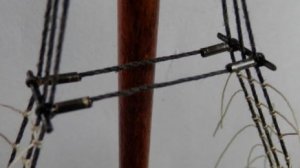
b. The banding on the masts is supposed to be achieved using black cartridge paper. I gave it my best shot but it did not look too good, so I whipped some cord around them instead.
c. The masts are suppose to be painted the ocre colour of the hull but I stained & lacquered them.
 

Attachments

  • Squaring Off.JPG
    Squaring Off.JPG
    52.1 KB · Views: 115
  • Finished Masts 1.JPG
    Finished Masts 1.JPG
    31.4 KB · Views: 115
  • Finished Masts 2.JPG
    Finished Masts 2.JPG
    47.4 KB · Views: 116
.
 

Attachments

  • Fighting Platform 1.JPG
    Fighting Platform 1.JPG
    26.2 KB · Views: 113
  • Fighting Platform 2.JPG
    Fighting Platform 2.JPG
    37.3 KB · Views: 114
  • Fighting Platform 3 and Cheeks.JPG
    Fighting Platform 3 and Cheeks.JPG
    35.1 KB · Views: 114
  • Dry Fit.JPG
    Dry Fit.JPG
    72.6 KB · Views: 113
Thanks, Gary.
I will fit the masts one at a time as I work forward on the ship. The lower mizzen mast is now glued in place and the rake set; time to fit some shrouds and deadeyes. There are two sizes of deadeye, the smaller ones being spaced at 12mm, the larger at 15mm, so I made some wire spacers to fit in the holes and keep them apart as the shroud is fixed –


I put a peg on the back of the wires because it kept slipping out and pinging the deadeye across the room. Shroud passed around the deadeye and held with a second peg –


Loose end of the shroud cut to length after tying a knot (thin cotton) above the deadeye. Thin cotton then used to whip the shroud. Tip – use thin CA to stiffen the short end of the shroud before you remove the uppermost peg and do the whipping; it makes life much easier. Deadeye rope then completed –


I did the shrouds as a batch before placing them over the mast top, which is why they are numbered -
 

Attachments

  • Spacers 1.JPG
    Spacers 1.JPG
    30.7 KB · Views: 149
  • Spacers 2.JPG
    Spacers 2.JPG
    30.6 KB · Views: 150
  • Spacers 3.JPG
    Spacers 3.JPG
    49.3 KB · Views: 150
  • Spacers 4.JPG
    Spacers 4.JPG
    45.8 KB · Views: 150
Finished article. This is the mizzen shrouds finished as the rearmost deadeye (currently unrigged) takes a rope from the top of the mizzen mast.
On to the main and foremast next and I’ll post some pictures as I go.
 

Attachments

  • Finished MS 1.JPG
    Finished MS 1.JPG
    42.7 KB · Views: 154
Since deadeyes are supposed to be only the size of the radius of the mast, those masts must be really big at 30 and 24 mm. They must be really strong.
 
Hi Gary. No, It is a 12mm spacing between the 3.5mm deadeyes and a 15mm spacing between the 5.0mm deadeyes. Regards.
 
Oh. I get it but the deadeye space between each should be 5 times the diameter of the deadeyes. Only occasionally, it might get reduced to 4 on smaller vessels. The rigging on all kits is usually very wrong to grossly incorrect. Even on the $1,400.00 kit of the Titanic, there are only 10 lines that are rigged. 4 of them are incorrect. This is how much research the manufactures put into the rigging. Rigging is a complex subject that changed over time but had specific rules that can be found published in several book. The information is there but kit manufactures don't have the staff or are not willing to ask knowledgeable to help design the rigging. They believe if the hull and deck furniture approach somewhat the correct ship, they can sell it and stop there.
 
I see from reading that the forward shrouds on the main and foremast had ‘serving’ on them. I also saw this when I went aboard the Victory and the Trincomalee. Basically it is a thinner rope wrapped around the two forward shrouds of the main and foremast in order to protect the shroud from the sail as it rubbed against them. I had a look on the internet for a method and saw some wonderful lathe-like devices which were excellent – but I don’t have the parts or probably the skills to build one of those. I was keen to get the look, but something else was needed and after a couple of trial runs this is what I did.
1 Rig the shroud in the usual way – loop at the top, deadeye at the bottom. Stretch it in between a couple of clamps and use an elastic band to keep the tension on it –


2 Carefully put some thin CA along the length of the shroud. Leave 10 minutes and do it again. Gently drag a rag along the underside of the shroud to remove any blobs. Tip – keep your face away from the fumes.

3 After 30 minutes remove the shroud and it will be quite stiff –


If there are any blobs you missed they can easily be sanded flat.

4 Tie the serving thread onto the deadeye. Then twirl the deadeye with a rolling motion with your right fingers whilst feeding the thinner cord with your left until you cover the desired length – photo 3. Apply CA to the knots and trim off the knot ends –


Tip – apply a dab of CA occasionally on the serving as you work along the shroud then, If you drop it (as I did), the whole lot does not unravel.

5 Paint with matt black, then matt lacquer, then rub with wax to colour it just a touch (I am using dark brown wax). Tip – use thin paint and lacquer, otherwise you will lose the definition of the serving.


6 Rig the shroud as usual – photo 5.


Hope this helps, it worked for me.
 

Attachments

  • Serving 1.JPG
    Serving 1.JPG
    19 KB · Views: 171
  • Serving 2.JPG
    Serving 2.JPG
    46.1 KB · Views: 172
  • Serving 3.JPG
    Serving 3.JPG
    45.6 KB · Views: 173
  • Serving 4.JPG
    Serving 4.JPG
    28.7 KB · Views: 174
  • Serving 5.JPG
    Serving 5.JPG
    20.4 KB · Views: 174
Main and foremast shrouds now complete. As you know this is my first model, so any comments or tips are welcome.
 

Attachments

  • Foreshrouds 1.JPG
    Foreshrouds 1.JPG
    60.1 KB · Views: 179
  • Foreshrouds 2.JPG
    Foreshrouds 2.JPG
    38.8 KB · Views: 179
  • Mainshrouds 1.JPG
    Mainshrouds 1.JPG
    80.7 KB · Views: 178
Forestays. From my visit to HMS Trincomalee (see photos in 'Real Ships for Reference') there is a feature I want to try and replicate.

What we’re looking at here is a Stay Mouse. From Wiki:-
The nautical term "stay mouse" refers to an antiquated part of a sailing vessel's standing rigging. On all sailing ships built before about the 19th century, the stayswere of natural cords. These lines were looped around the top of each section of the wooden masts using a spliced loop or seized loop in their ends. During the 16th century some riggers began to attach stays by splicing or seizing only a small loop into the end of the stay then passing the rope's tail around the mast and back through the small loop, like a slip-knot. To prevent this from slipping tightly around the mast when in use, a strong bulge was built into the standing part of the rope that could not fit through the small loop. This bulge was called a mouse or stay mouse.

I added a serving to the four stays in question (2 from the main mast, 2 from the fore mast) and then had a root around for something suitable to make the ‘bulge’. I ended up in the fishing tackle box and cut the centre section out of some swivels –


Necessity, mother of invention & all that.
This is the sequence of making them -


The stays were then painted and rigged to the closed heart blocks on the bowsprit.
Learning point – I should not have fitted and rigged the spar on the bowsprit this early as it got in the way a bit when adding the closed heart blocks onto the bowsprit. And it’s been getting in the way ever since! Rule: Complete the standing rigging first.
 

Attachments

  • Shroud Mice 1.JPG
    Shroud Mice 1.JPG
    35.4 KB · Views: 121
  • Shroud Mice 2.JPG
    Shroud Mice 2.JPG
    18.2 KB · Views: 120
  • Shroud Mice 3.JPG
    Shroud Mice 3.JPG
    12.2 KB · Views: 120
  • Shroud Mice 4.JPG
    Shroud Mice 4.JPG
    27.2 KB · Views: 121
  • Shroud Mice 5.JPG
    Shroud Mice 5.JPG
    43.5 KB · Views: 121
Topmasts. Both ends need to be squared off to fit in the crosstrees but this was tedious in order to get them in the same plane. I took a shortcut and glued and pinned some square stock for the base of the masts. It’s to be painted anyway so being a different colour does not matter.
 

Attachments

  • Topmast 1.JPG
    Topmast 1.JPG
    60.8 KB · Views: 117
Shaping the topmasts You will note that there is a flare at the top below the square section – this is called a hound. No, I don’t know why either. So, '.... the crosstrees rest on the hound and then the topgallant mast passes through the mast top and is secured with a fid resting on the crosstrees'. I can’t for the life of me see why I didn’t understand that the first time I read it, it’s so self-explanatory – not!
If you are on your first build (as I am) then take heart - it does get clearer as you work through the build and my box of ‘I have no idea what this is or where it goes’ bits is now almost empty.
 

Attachments

  • Topmast 2.JPG
    Topmast 2.JPG
    57.9 KB · Views: 118
Ratlines. These are tied at 5mm intervals so I made a template on Excel with 5mm lines across it and clamped it behind the shrouds. This did not work for me because you can’t then get your fingers behind when tying the knots, plus the paper moves even though it is clamped. I need a plan B....................
 

Attachments

  • Ratlines 1.JPG
    Ratlines 1.JPG
    49.8 KB · Views: 119
Plan B – use two 5mm planks pegged on the shrouds. These were a bit fiddly to align separately, so I made a ‘hinge’ at one end from some card and this made life easier -


Pegging the spacer in place from the underside keeps the pegs out of the way. It worked well.
 

Attachments

  • Ratlines 2.JPG
    Ratlines 2.JPG
    15.7 KB · Views: 116
  • Ratlines 3.JPG
    Ratlines 3.JPG
    33 KB · Views: 117
  • Ratlines 4.JPG
    Ratlines 4.JPG
    56.2 KB · Views: 116
Slow but steady progress up to the catharpins.
Learning points so far:
1.However you break the job up you are in for the long haul tying the ratlines. Get the model at the right height and distance away from you or you end up with a sore neck and shoulders through crouching over it.
2.Do not tighten the clove hitch knots massively, you may need to unpick one or two and re-tension them as you work your way up the shrouds.
 

Attachments

  • 1.JPG
    74.7 KB · Views: 660
  • 2.JPG
    111.5 KB · Views: 660
Catharpins. This is a piece of wire tied across the shrouds and then braced between them. I had trouble lining everything up whilst tying numerous knots so here’s what I did:-
a.Get some tubular line crimps from the fishing tackle box. Put in a hole in a wooden block and cut to the desired length –


b.Thread on the line, loop around the shroud, then back through the tube -


c.Do this for all the braces which run across between the shrouds, pass the pin through the loops on the outside of the shrouds and pull on the loose ends to tighten up –


d.When happy with the tension cut off the loose ends. Dab on CA glue as necessary and paint matt black –
 

Attachments

  • Cath Pins 1.JPG
    Cath Pins 1.JPG
    43.3 KB · Views: 117
  • Cath Pins 2.JPG
    Cath Pins 2.JPG
    28.9 KB · Views: 118
  • Cath Pins 3.JPG
    Cath Pins 3.JPG
    21.7 KB · Views: 119
  • Cath Pins 4.JPG
    Cath Pins 4.JPG
    26.8 KB · Views: 118
The excel sheet is what I use. I tie the end and weave the ratline across. Then check the alignment with the sheet. I start the next and do the same. After you do a few, you will find that the eye gets good at spacing. By having several lines like on the excel sheet, you will get even spacing all the way up. Just using a stick did not make them all spaced consistently for the full height of the ratlines for me. But having the speed sheet guarantees that each row will all be exactly 5 mm all the way to the futtock shroud.
 
Hi Graham,
Very nice and clean work on the ratlines and shrouds. I like your step by step procedure. I have to refer back to this when I get my Montanes going.

Donnie

ps. If the lines become a little fuzzy, you can use beeswax and it helps to run the rigging line through the blocks.
 
On with the ratlines, all lower masts now complete up to the futtock shrouds. Futtocks; what a wonderful word, but opportunities to use it in everyday conversation are very limited.
 

Attachments

  • Mizzen Top Rats.JPG
    Mizzen Top Rats.JPG
    45.9 KB · Views: 127
  • Fore Top Rats.JPG
    Fore Top Rats.JPG
    28.5 KB · Views: 129
  • Main Top Rats.JPG
    Main Top Rats.JPG
    26.9 KB · Views: 127
Back
Top