
Ah, the trials and tribulations of ship building. This is a great example of a method you tried and the fix you came up with and to me that is what this forum is all about, so thanks for the detailed explanation which will be of great benefit to someone who also builds this ship or has a similar task to do. I, too, have had many experiences where I sit back and think 'Why the heck didn't I see that that would happen?', so I beat myself up and learn from it. I like the look of the decorations, I think it really sets it off.

You are using an out of date browser. It may not display this or other websites correctly.
You should upgrade or use an alternative browser.
You should upgrade or use an alternative browser.
Bireme - Greek Warship, Amati, scale 1/35 [COMPLETED BUILD]
- Thread starter moreplovac
- Start date
- Watchers 7
-
- Tags
- amati bireme completed build

Thanks Graham, i have some afterthoughts i will share with the group once the ship is done. I like to follow ship treads that actually showing how things are done so i am trying to make this one useful for all members.

Just spent an enjoyable 20 minutes or so catching up on your log.
A very nice job on what is really a pretty basic kit.
A very nice job on what is really a pretty basic kit.
Thanks aew. Yeah, it is very basic kit; tried to make it a bit more interesting similar what you have done with moving oars..Just spent an enjoyable 20 minutes or so catching up on your log.
A very nice job on what is really a pretty basic kit.
It may be a basic kit, but it's certainly not a simple one to build. If you can plank the stern of this one, you can plank anything! ")
Nothing interesting to report today; spent time gluing and clamping bubbly ornaments, cutting pins to 4 mm in length so i can put them back in pre-drilled holes, without damaging the hull again.


And bubbly ornaments completed..

Happy modeling..
And bubbly ornaments completed..
Happy modeling..
I had some extra free time today so i completed all decorations.

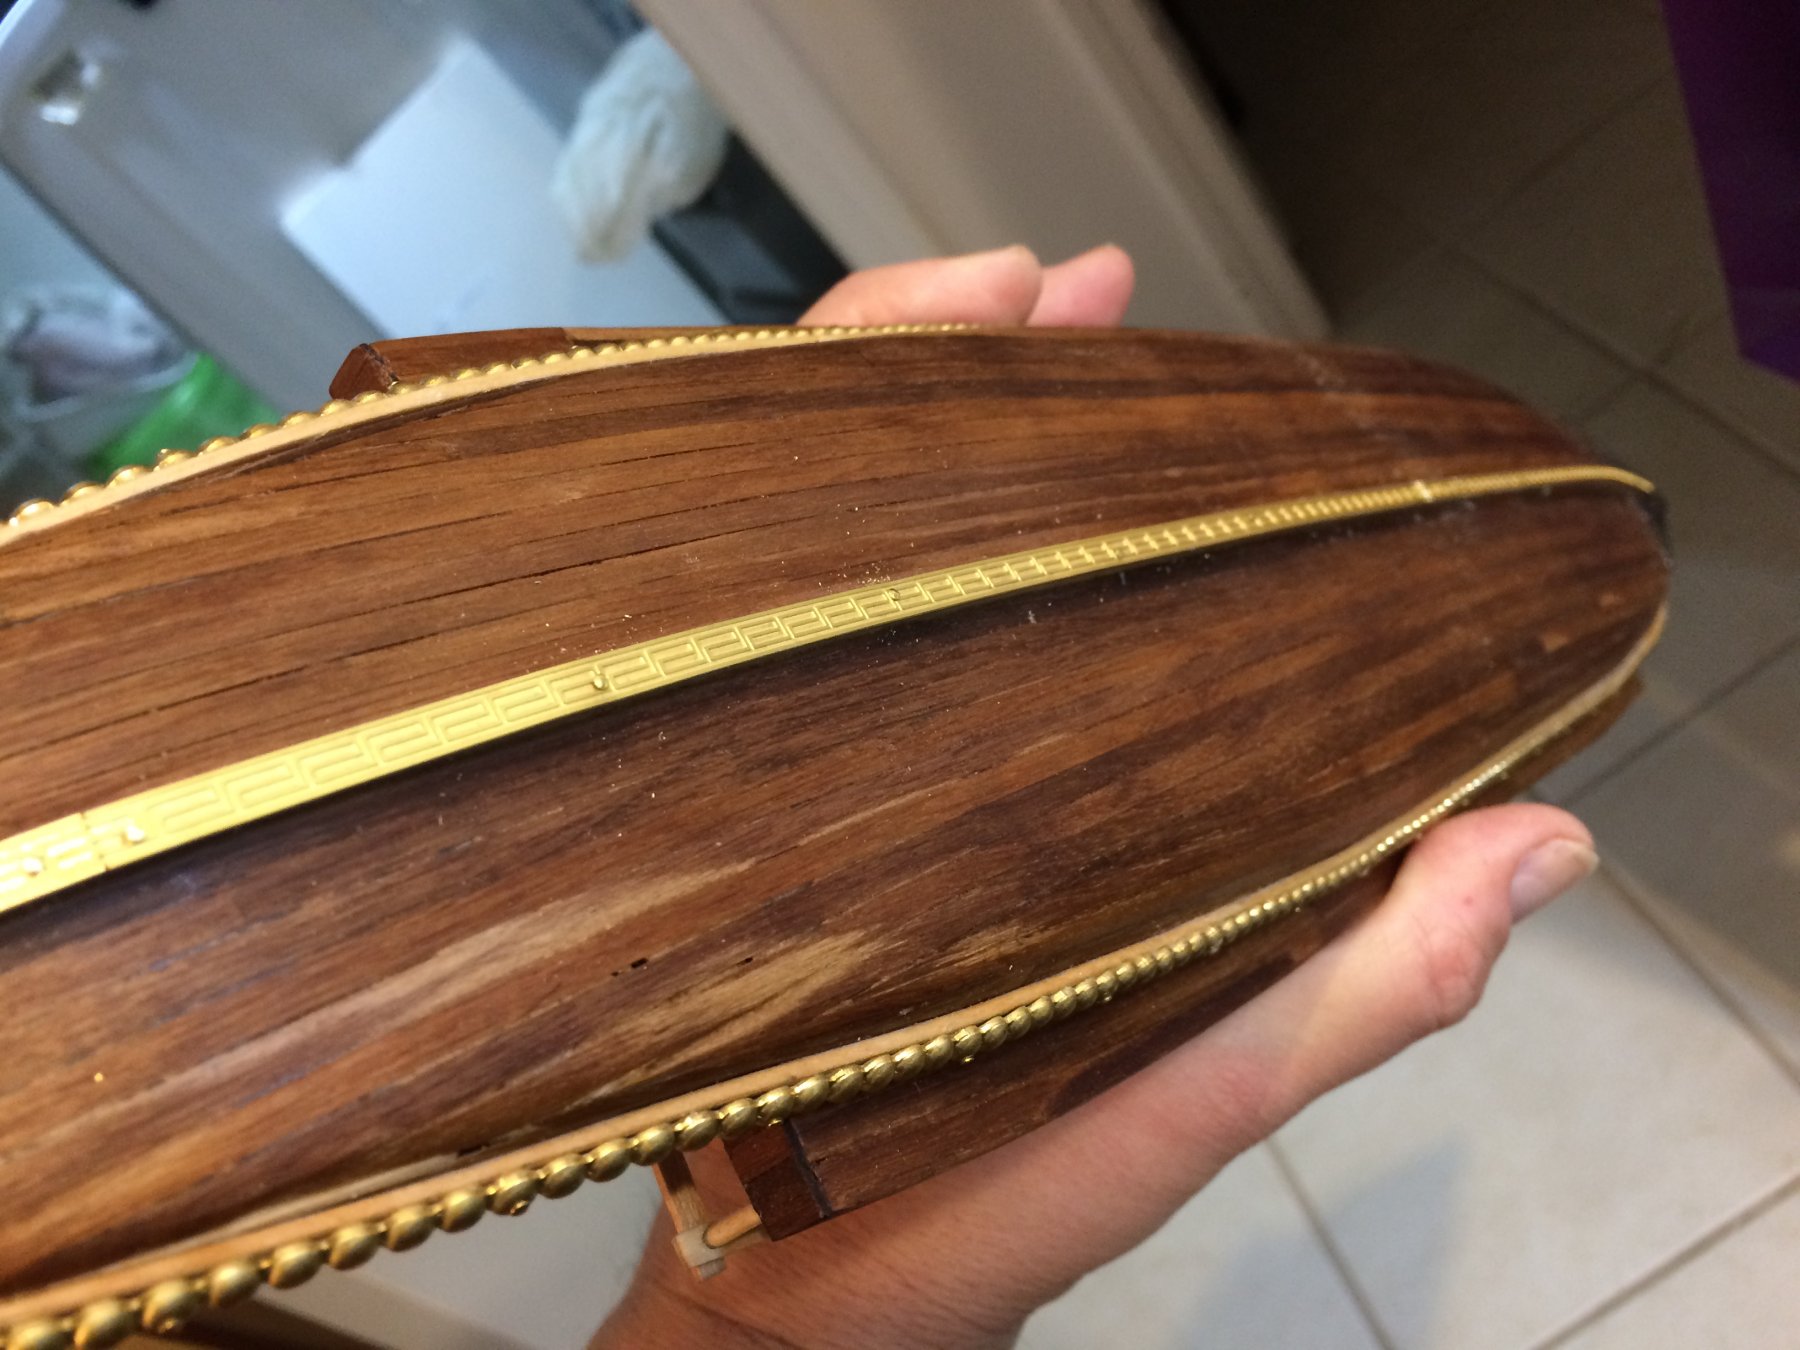
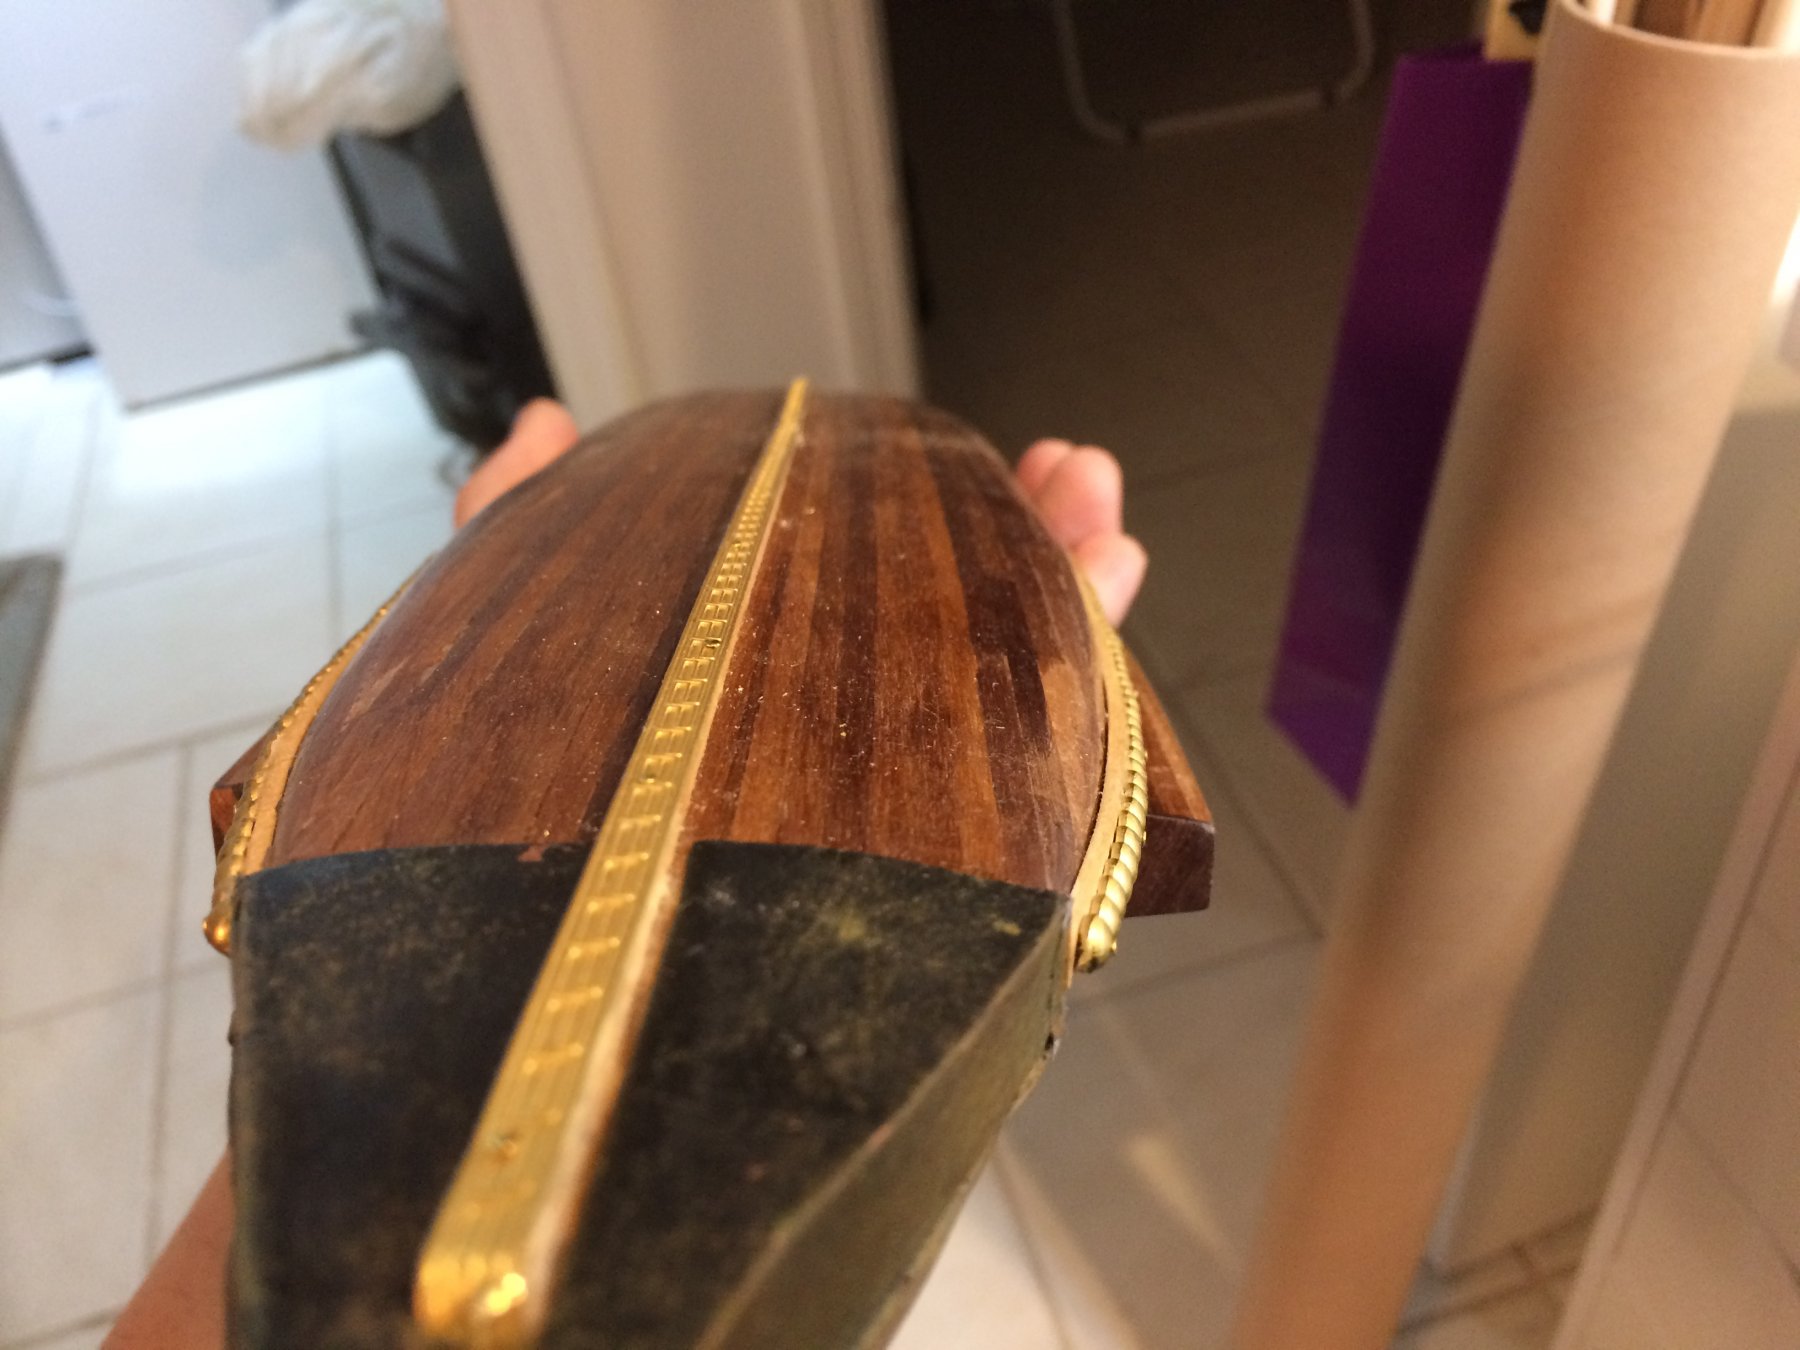
I made executive decision to use pins in addition to glue to fix the flat strip decoration that goes on the keel. Reason is just to make sure it will stay put. Cut few pins to the size of 4-5mm, drilled a pilot hole in decoration, a bit smaller in diameter than pins and start with glue first. Than drive those small pins into the flat strip and to the keel. Did not want to be extremely precise but tried to make the distance between pins as even as possible.
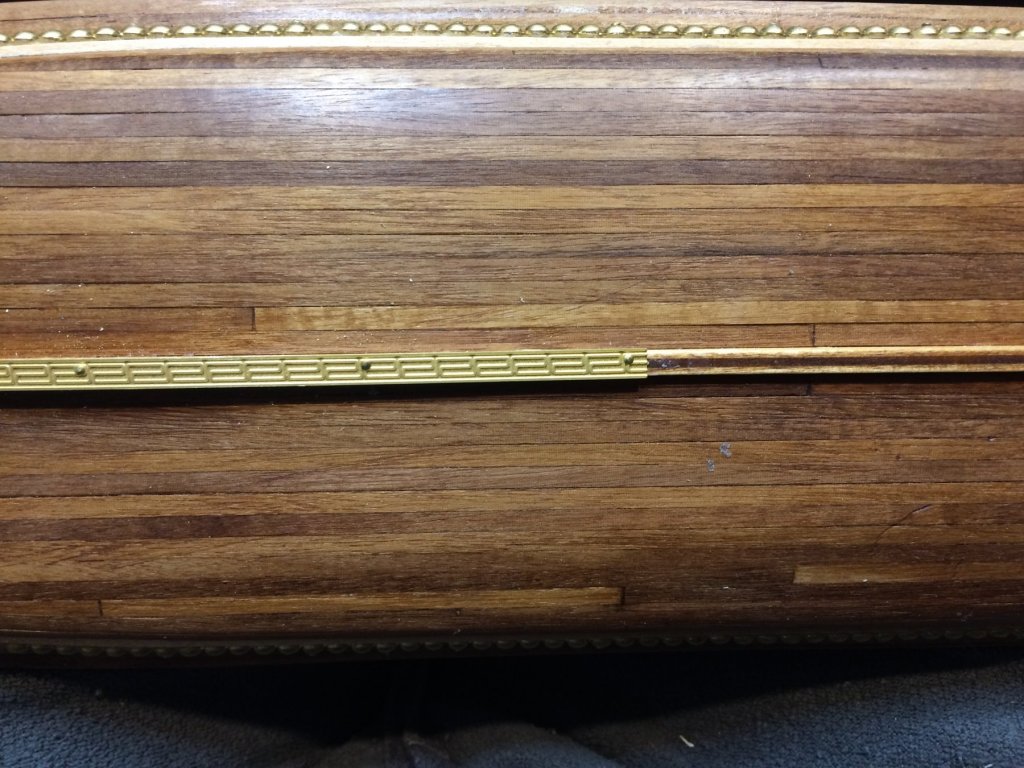
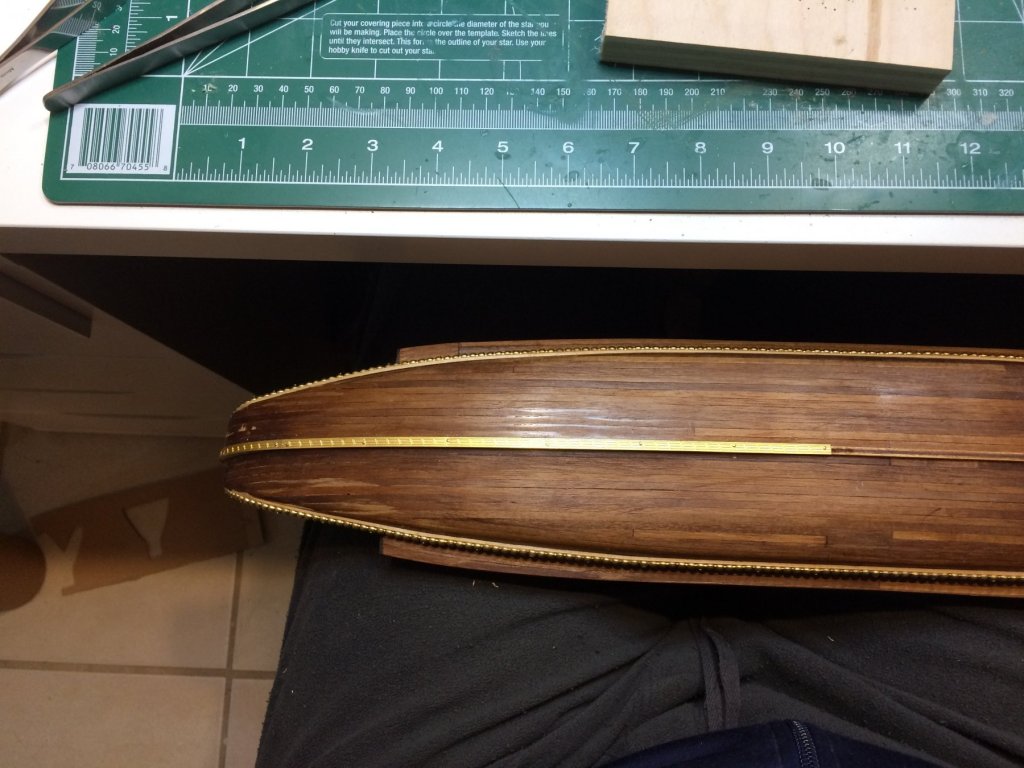
These flat strips comes in 4 strips, so at the end there will be a small gap that has to be filled with 2cm long flat strip. Wondering should this small piece be at the ram area or in the middle of the ship. Middle of the ship it is...

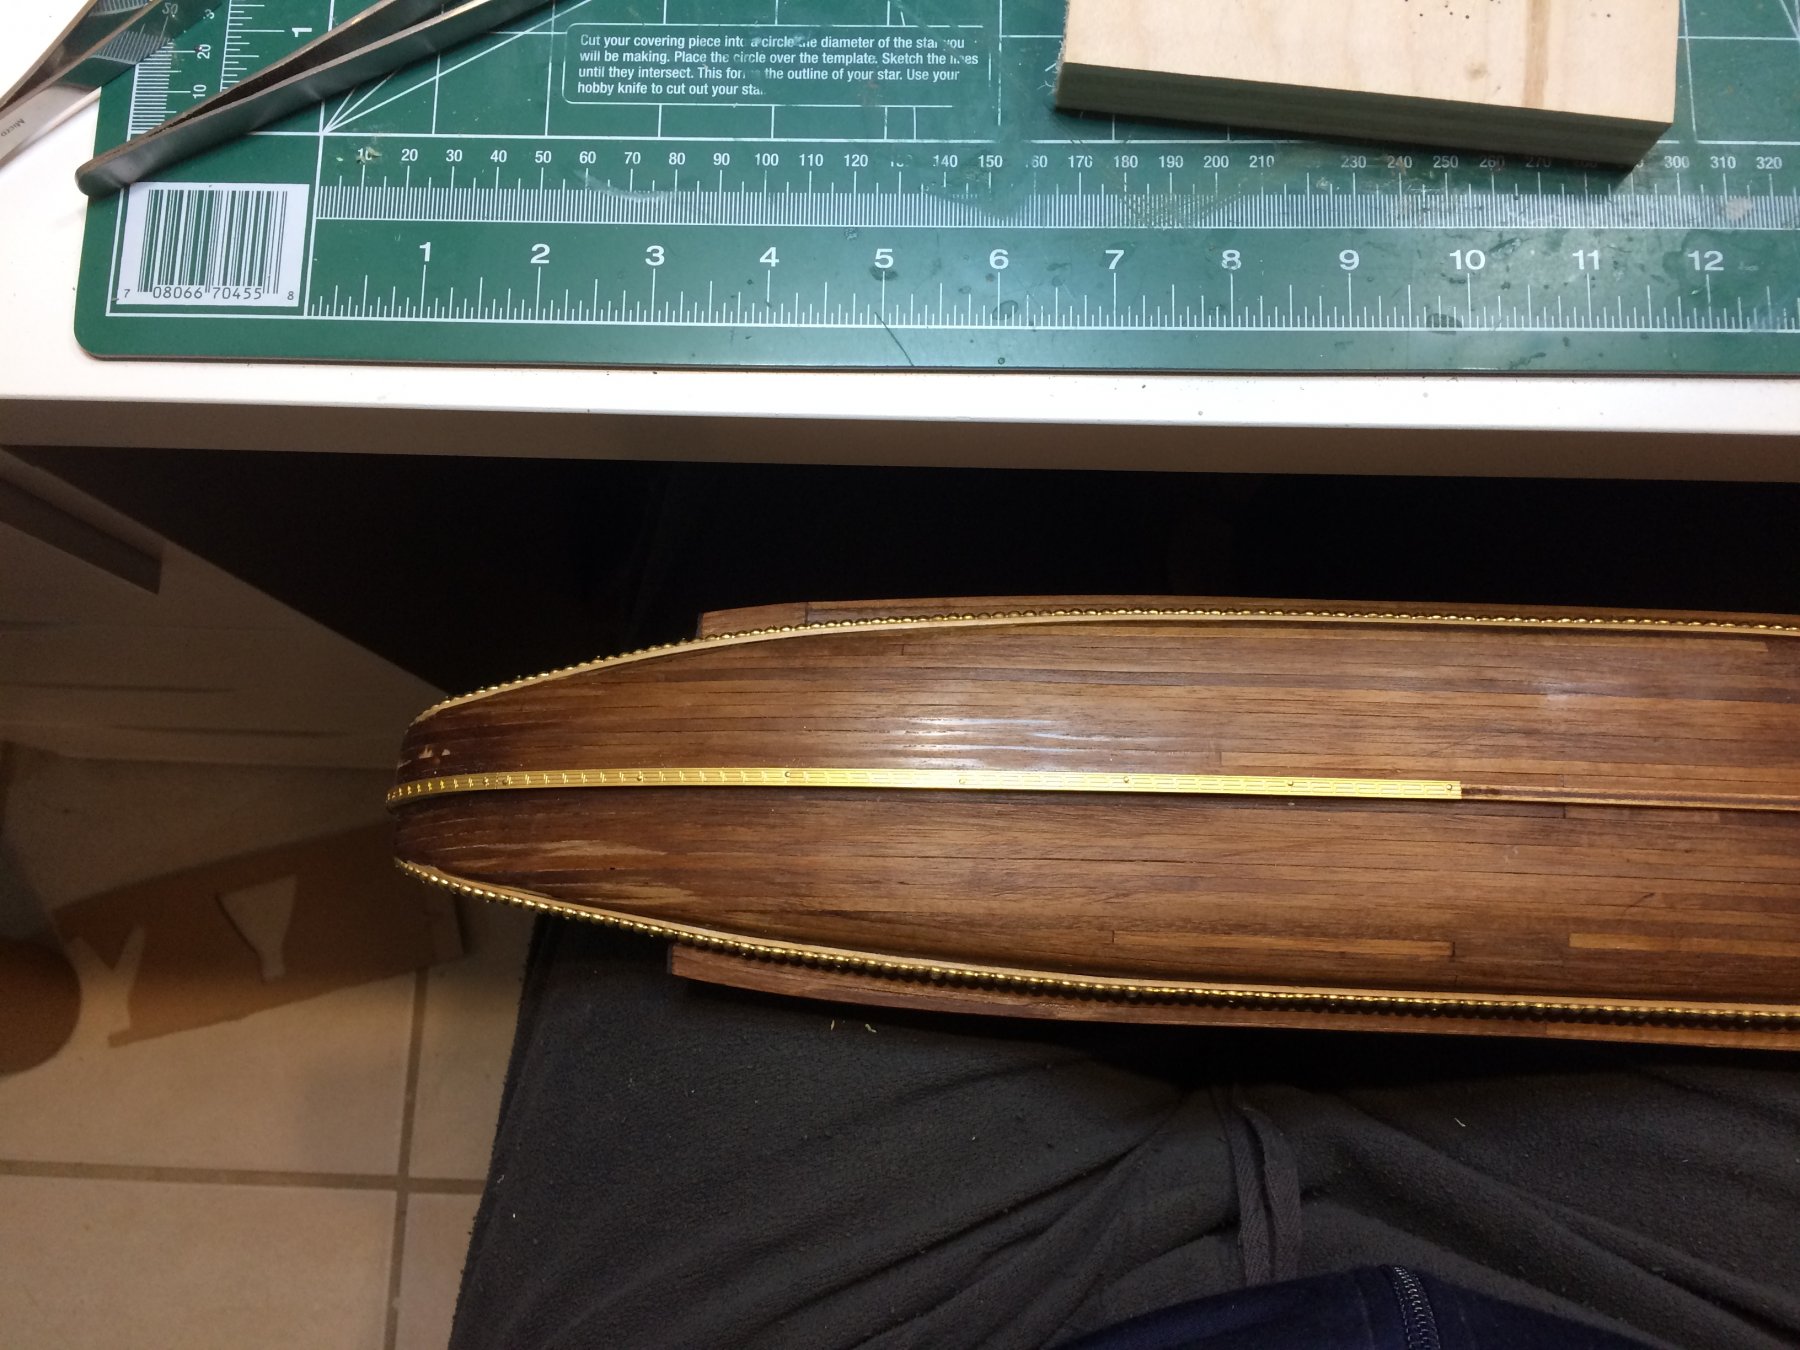
The whole length of keel decoration.
I was not quite sure what was the point of this decoration on real ships as you might not be able to see it anyway, unless you have some ancient Greek made scuba gear.

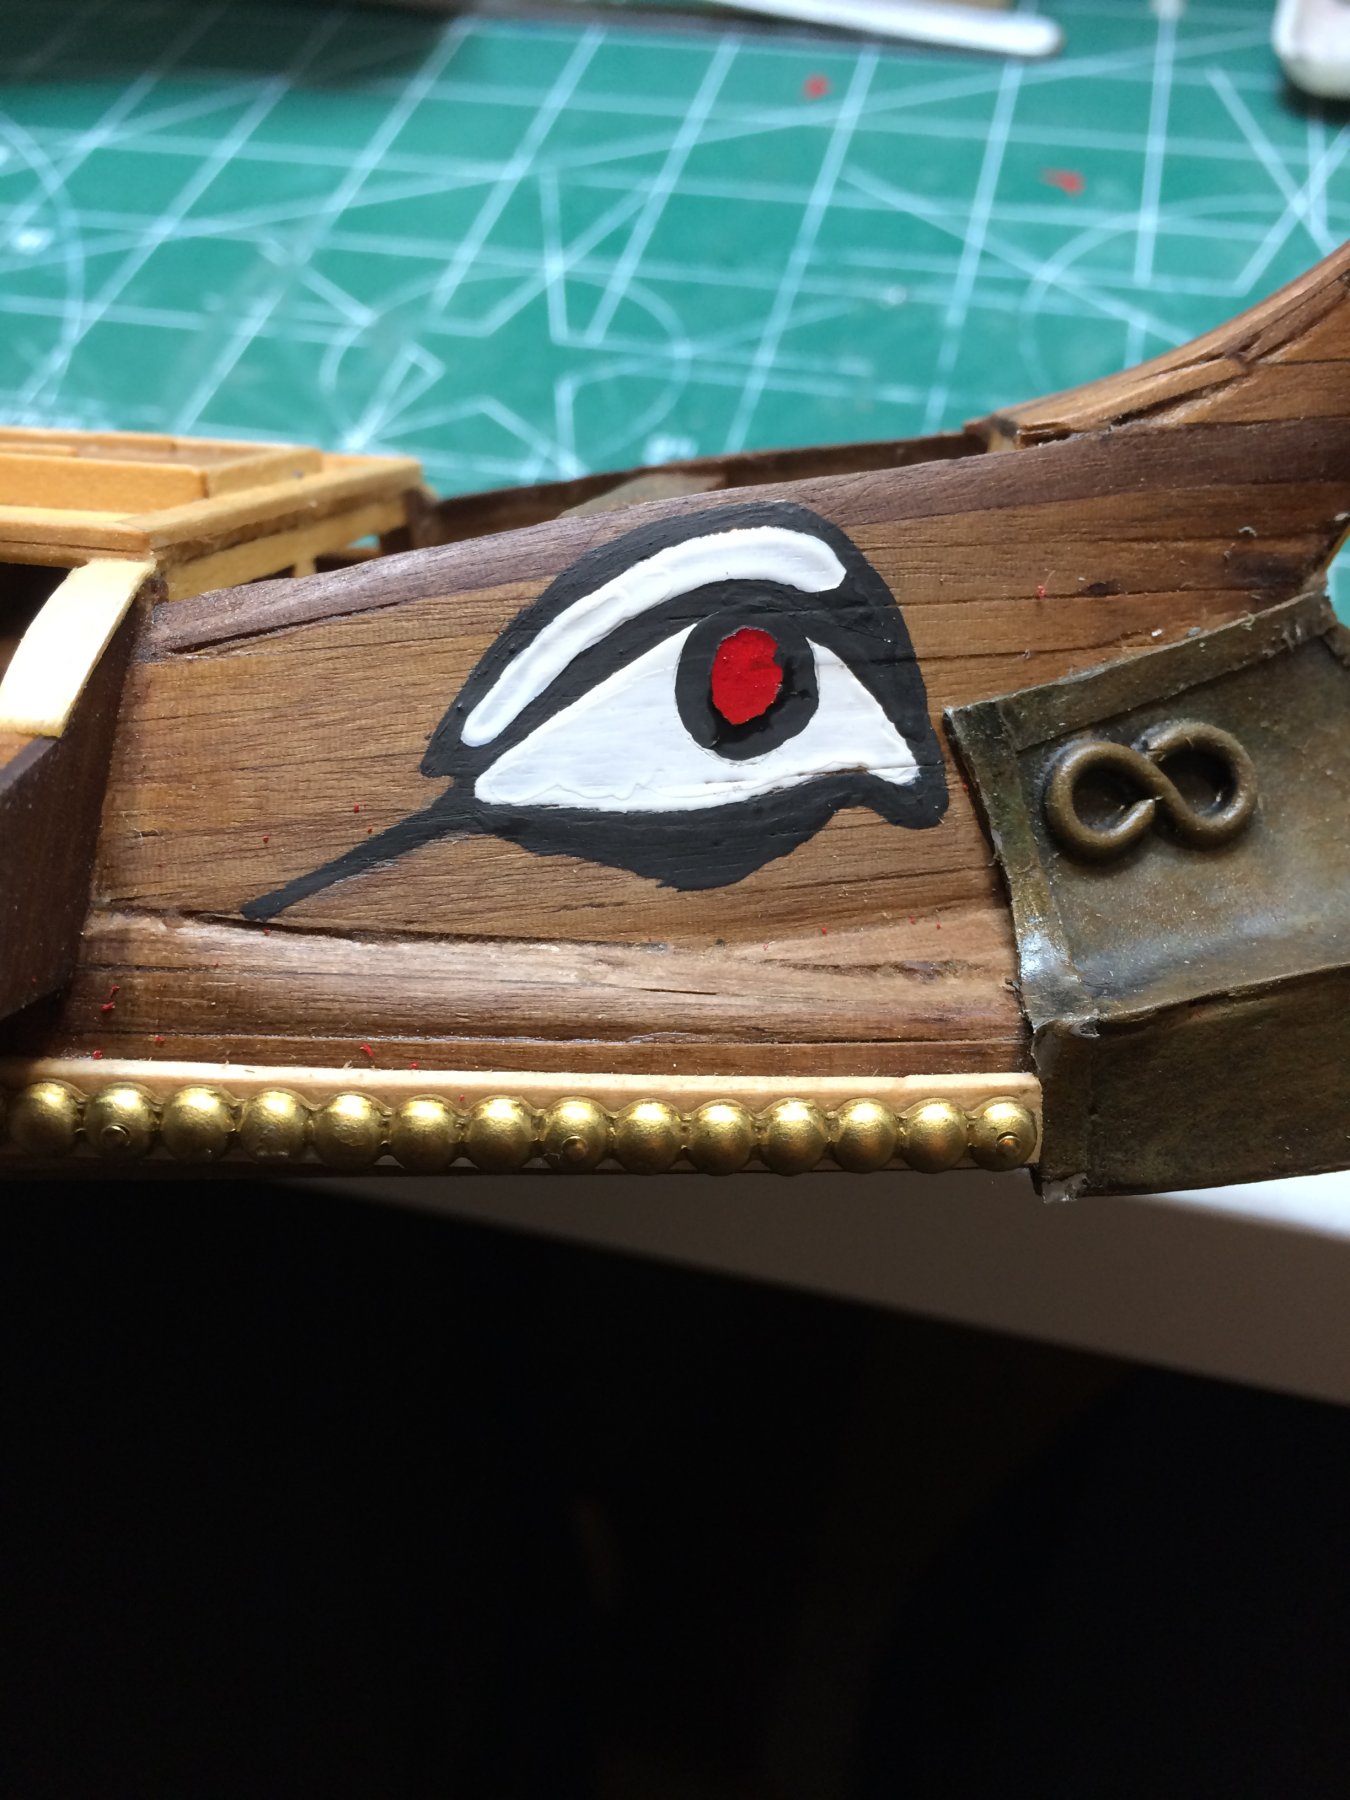
Next will be to paint two eyes; will do it free hand, and as precise as possible. Do not want to use printer and print them out; i think it will be to thick and sticking out much more that doing it by hand..
I am getting fairly close to complete this interesting model. After eyes there will be several coats of varnish for protection, captain seat, flag, mast, sail and oars...
Happy modeling..
I made executive decision to use pins in addition to glue to fix the flat strip decoration that goes on the keel. Reason is just to make sure it will stay put. Cut few pins to the size of 4-5mm, drilled a pilot hole in decoration, a bit smaller in diameter than pins and start with glue first. Than drive those small pins into the flat strip and to the keel. Did not want to be extremely precise but tried to make the distance between pins as even as possible.

These flat strips comes in 4 strips, so at the end there will be a small gap that has to be filled with 2cm long flat strip. Wondering should this small piece be at the ram area or in the middle of the ship. Middle of the ship it is...
The whole length of keel decoration.
I was not quite sure what was the point of this decoration on real ships as you might not be able to see it anyway, unless you have some ancient Greek made scuba gear.
Next will be to paint two eyes; will do it free hand, and as precise as possible. Do not want to use printer and print them out; i think it will be to thick and sticking out much more that doing it by hand..
I am getting fairly close to complete this interesting model. After eyes there will be several coats of varnish for protection, captain seat, flag, mast, sail and oars...
Happy modeling..

Realy good progress with the decoration work. Your ram especially is realy looking good
Thanks Uwe. I also like how ram ended up.
Getting there, getting there.
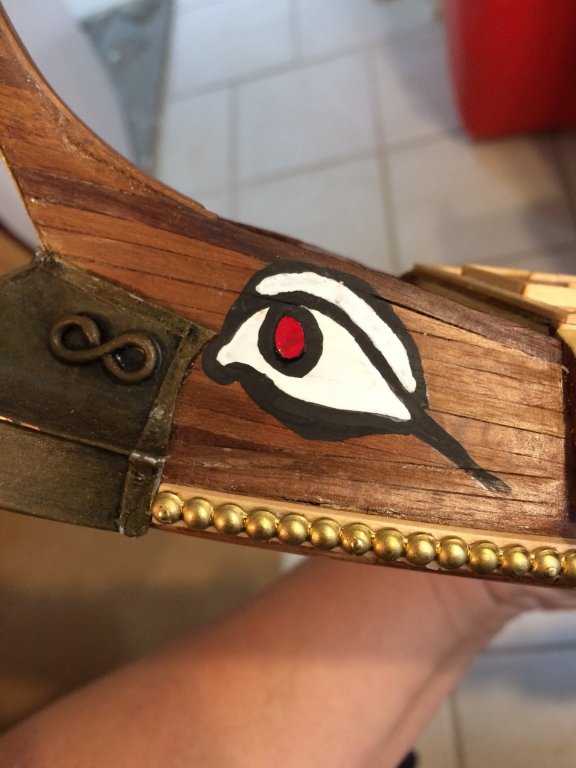
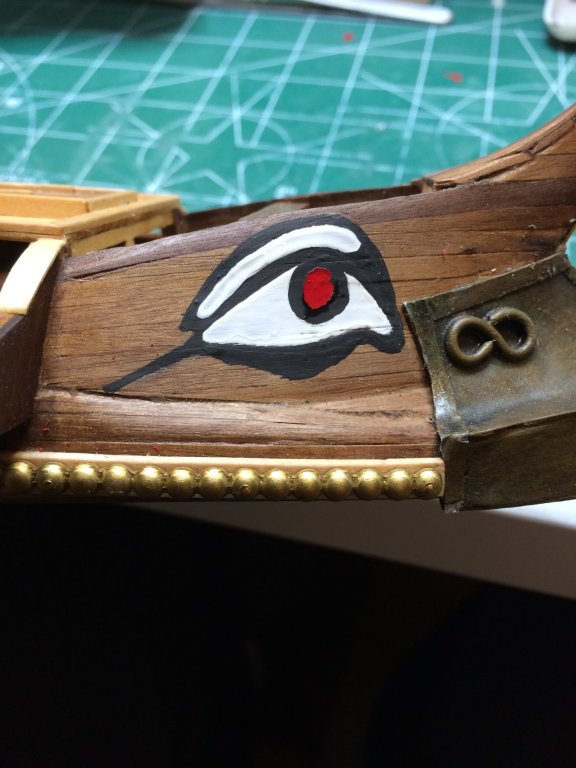
Started to work on eyes, painted them on both ends. Need to work on pupils today and some touch up since i painted it all by hand, directly on the ship. Very good brush is all what is required and some acrylic paint..

Need to fix that top of the ram, accidentally damaged it with flat strip decoration.
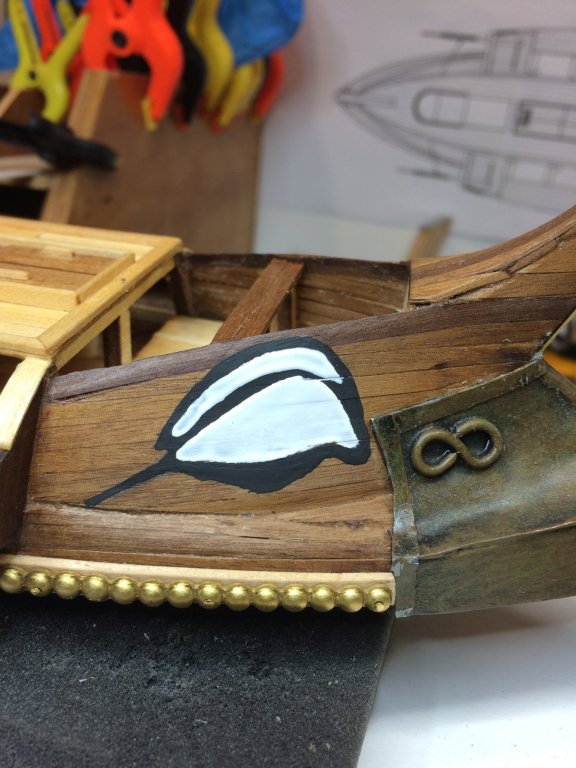
More to come..
Started to work on eyes, painted them on both ends. Need to work on pupils today and some touch up since i painted it all by hand, directly on the ship. Very good brush is all what is required and some acrylic paint..
Need to fix that top of the ram, accidentally damaged it with flat strip decoration.


More to come..

You've done a good job on the Ram, I'll borrow your weathering techniques for future projects, it's something I can never get to look right. The entire ship is looking really good,
Cheers Andy
Cheers Andy
You've done a good job on the Ram, I'll borrow your weathering techniques for future projects, it's something I can never get to look right. The entire ship is looking really good,
Cheers Andy
Thanks Andy.
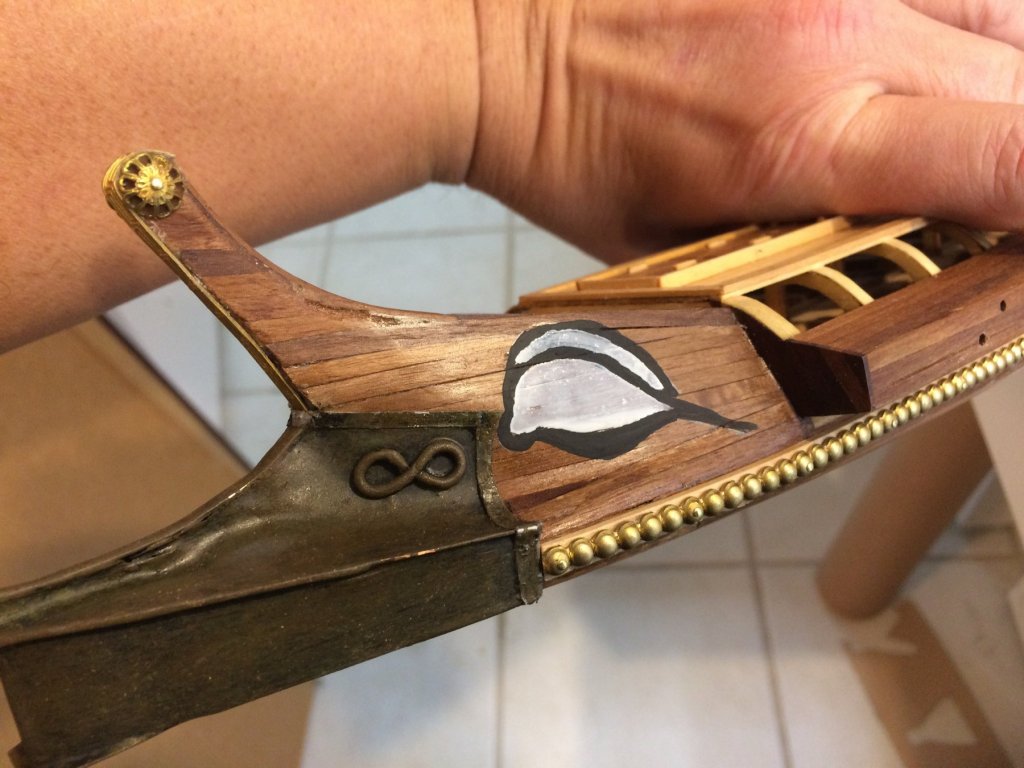
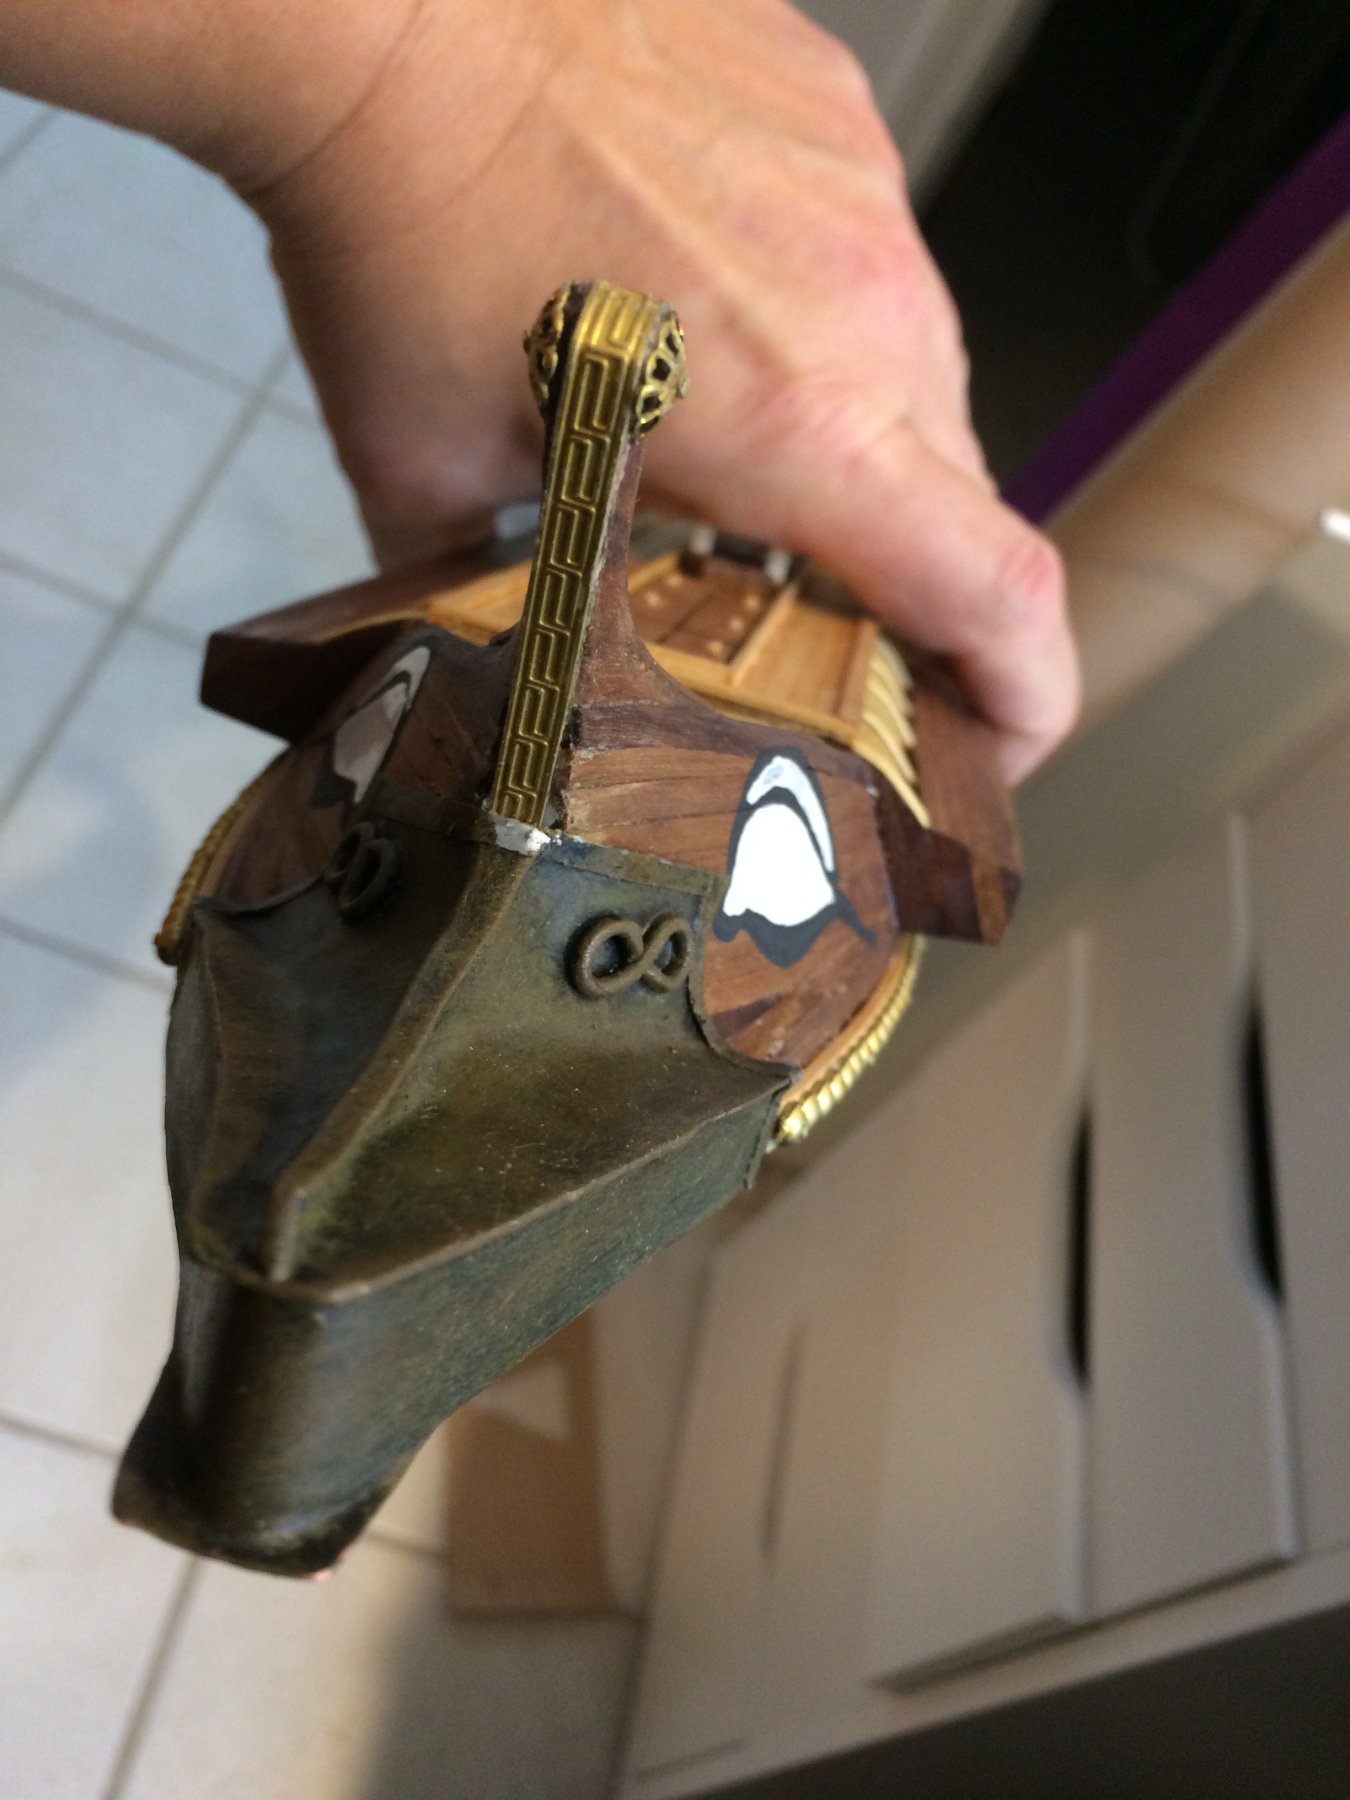
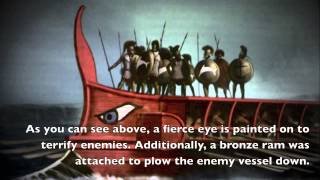
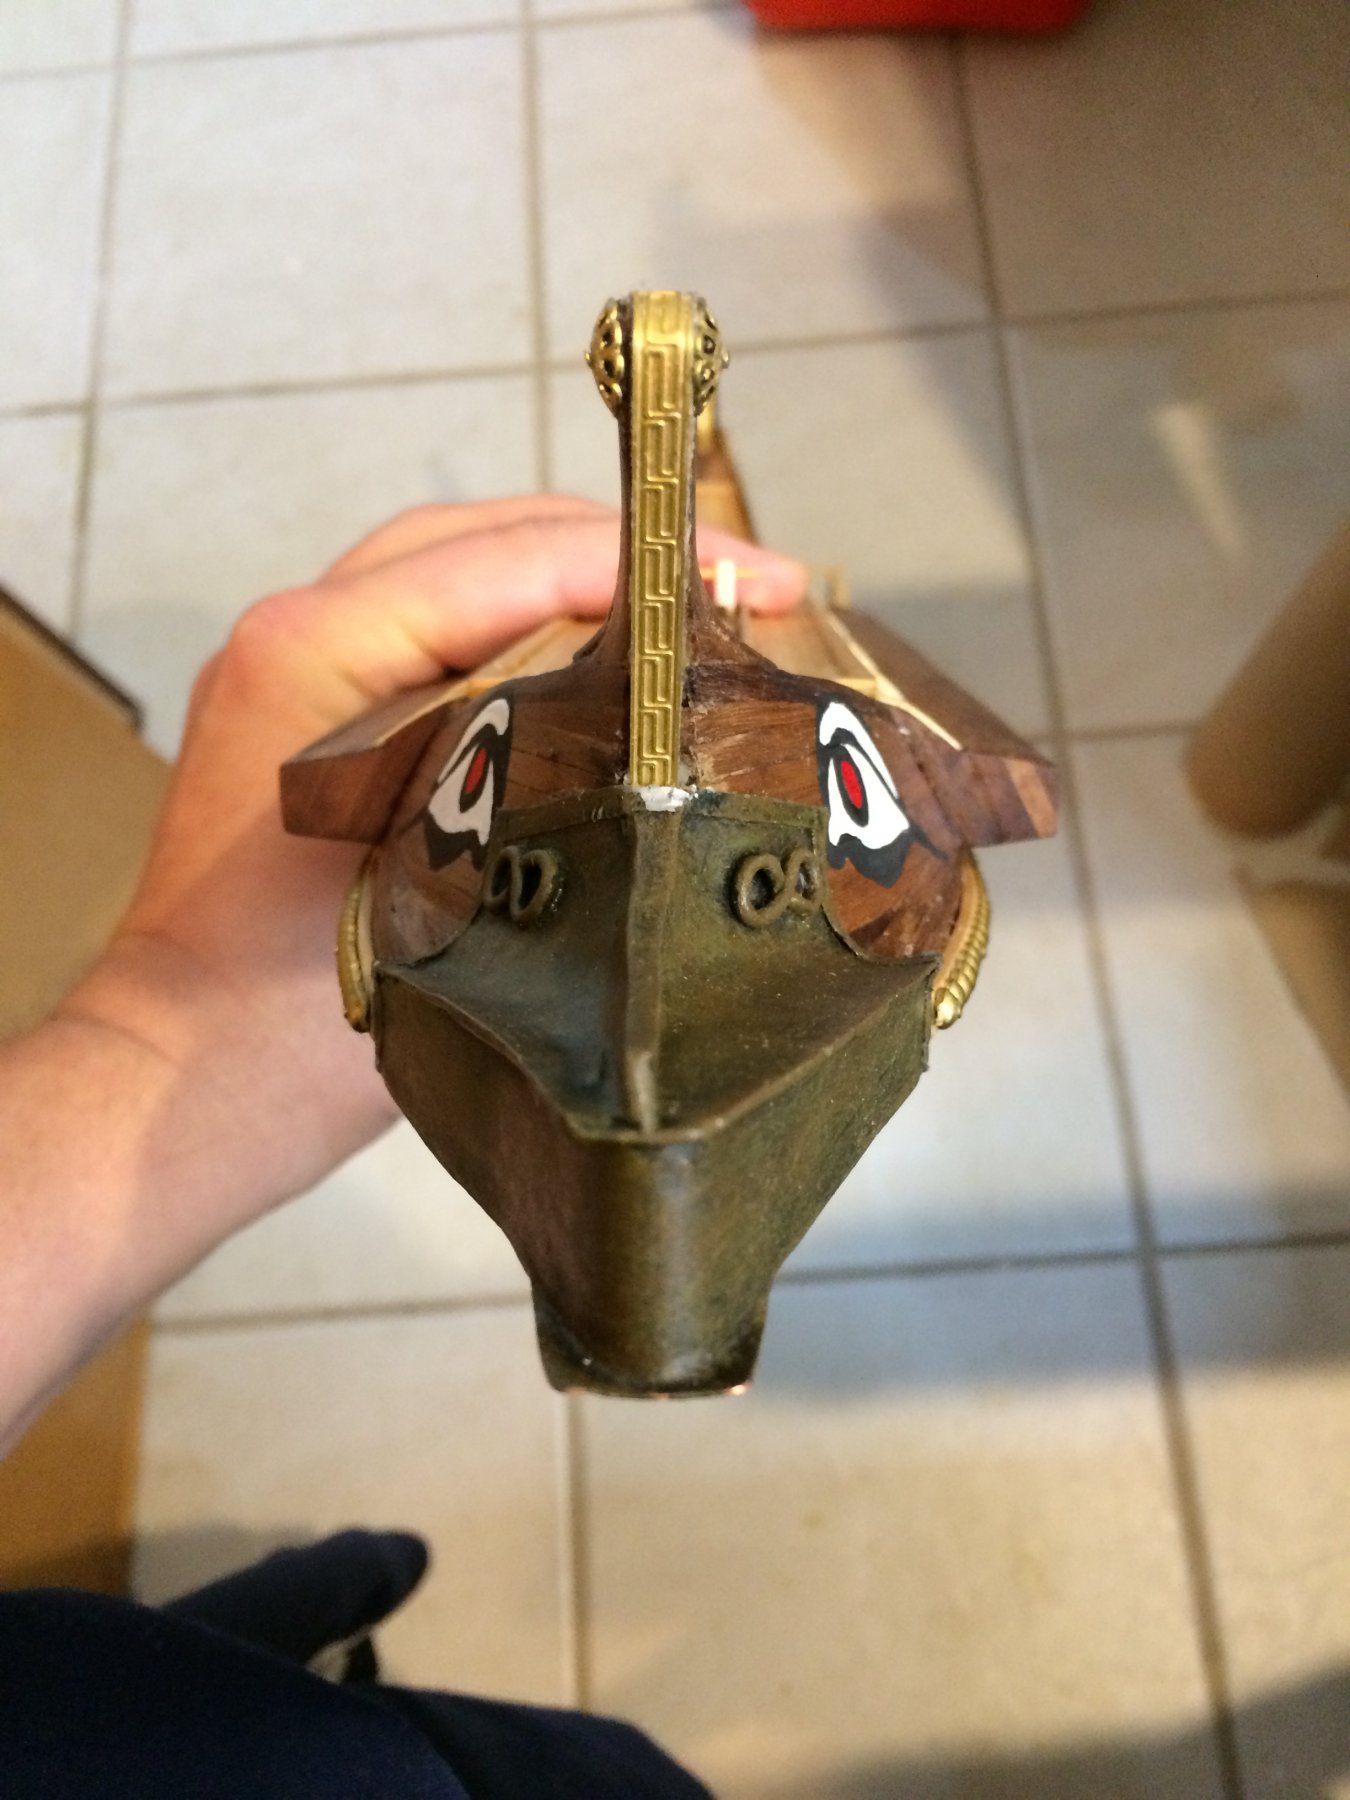
I finally finish painting ship eyes. They took me a while and two attempts as my hand was not steady enough and slightly stronger push on the brush resulted in wider line that expected. So remove all and start from scratch. I wanted to have a more mighty look particularly when you look from the enemy' perspective to the approaching ram. Later in painting process i came across one picture that really shows how mighty eyes should be looking but it was to late to start painting all over again. So it is what it is..
And from enemy's point of view:

So, this activity completes this stage of the building process.
Next is few layers of protective coating, mast, sail, captain's chair, oars and stand.
More to come soon.

And from enemy's point of view:
So, this activity completes this stage of the building process.
Next is few layers of protective coating, mast, sail, captain's chair, oars and stand.
More to come soon.
Your Mighty eyes are looking realy good....... Imagine dozens of eye-pairs like yours are coming closer and sailing an attack against your fleet.
Especially your last photo .... great model
Especially your last photo .... great model
Thanks Uwe.
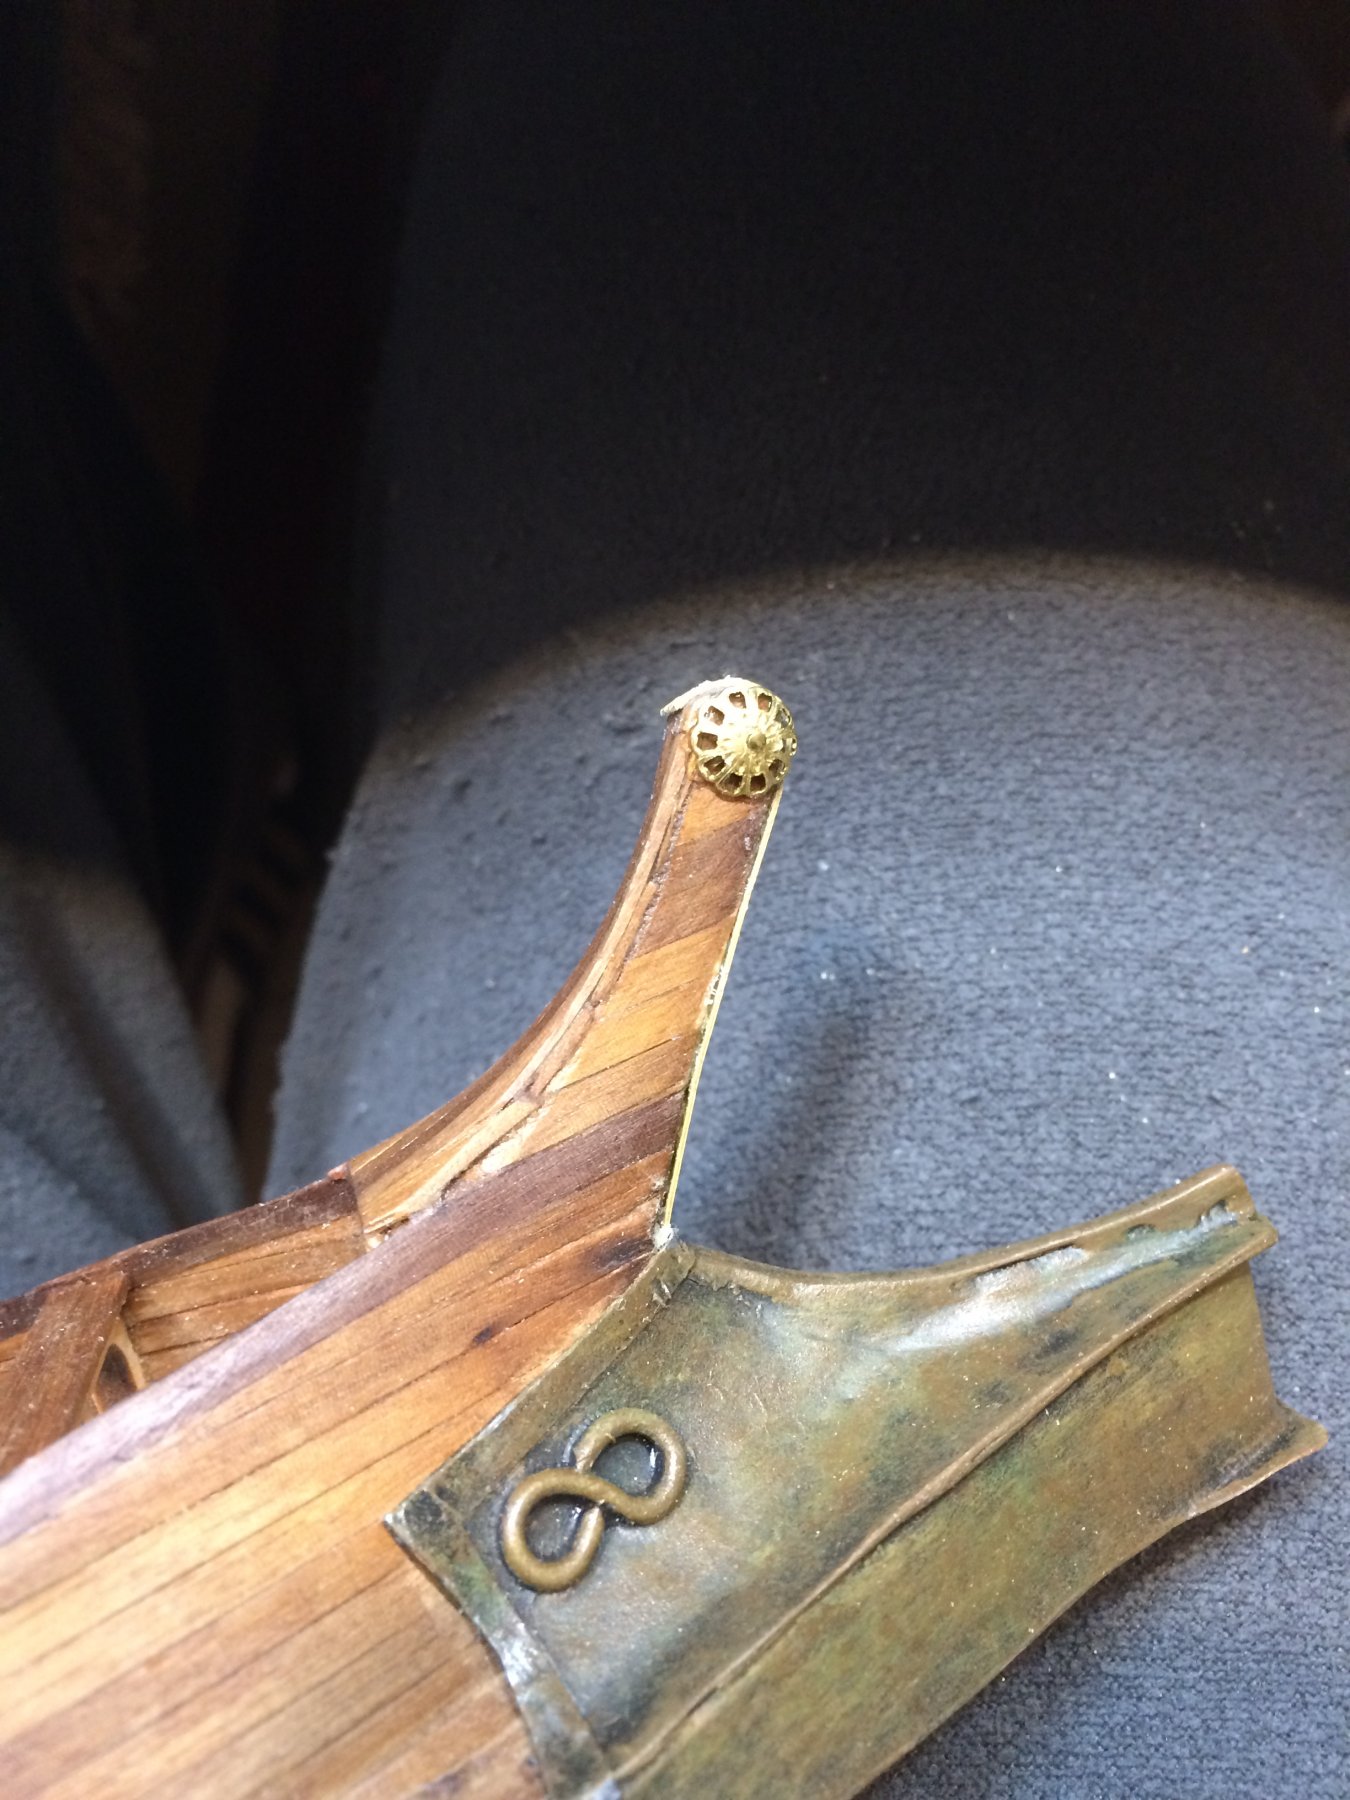
Today i finished up the ram by adding few pins to simulate a way to fix ram to the ship. Not sure what techniques was used back in days but i think they had some sort of iron pins for this purpose.

I painted the pin head black but during installation process some of the paint was removed. Not a big deal..
I also drilled a pilot hole for pins. Had to make particular attention to the top corner of ram since the pin will be visible after installation so i ended up cutting most of the pin and leaving only head with few extra mm in length.

And installed.

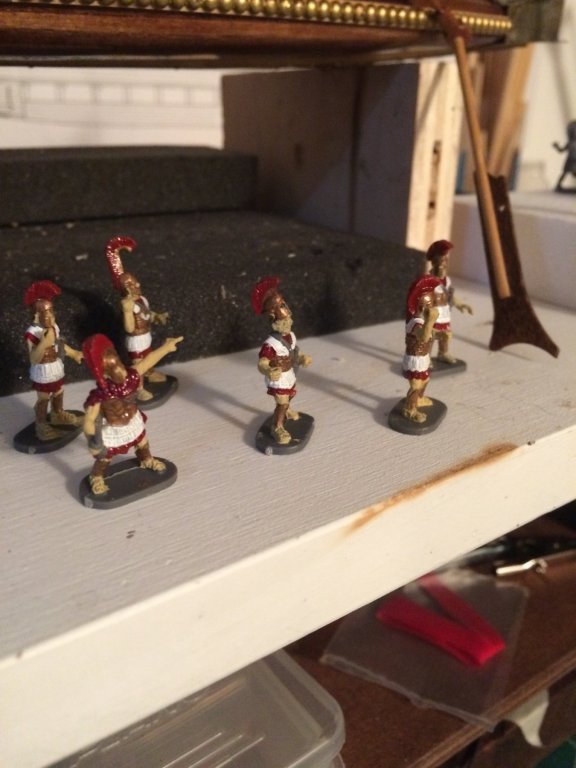
Then the Hoplite arrived.... Finally i received a box of Greek warriors (Hoplite) figures i planned to put on the ship. The reason for having them is to give a bit of a scale vision of ship size. The scale of warriors is not quite matching the scale of the ship but it is fairly close...

They have made in China, sold by company in Austria via Amazon and shipped to North America. I was actually surprised with the level of details these small dudes have. It will be interesting process to paint them in the colour of ancient world.
This friendly dude will definitely have a place on the ship; he is the leader and must be there..

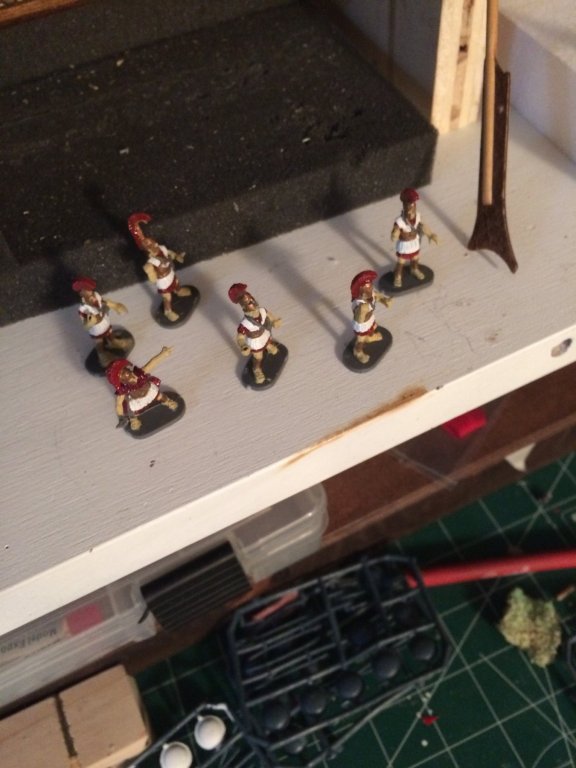
Not sure how many warriors will be enjoying the mighty bireme but i am planning to have them 4 or 5. Will see..

They also need to have shields and spears so here they are. This part is not quite good but it is workable..

Then i decided to run a first layer of protective satin varnish on the hull. I used this product in the past with satisfactory results. Will need several layers of it.


This complete the work for today. Will continue with varnish and painting warriors.
Happy modelling.
I painted the pin head black but during installation process some of the paint was removed. Not a big deal..
I also drilled a pilot hole for pins. Had to make particular attention to the top corner of ram since the pin will be visible after installation so i ended up cutting most of the pin and leaving only head with few extra mm in length.
And installed.
Then the Hoplite arrived.... Finally i received a box of Greek warriors (Hoplite) figures i planned to put on the ship. The reason for having them is to give a bit of a scale vision of ship size. The scale of warriors is not quite matching the scale of the ship but it is fairly close...
They have made in China, sold by company in Austria via Amazon and shipped to North America. I was actually surprised with the level of details these small dudes have. It will be interesting process to paint them in the colour of ancient world.
This friendly dude will definitely have a place on the ship; he is the leader and must be there..
Not sure how many warriors will be enjoying the mighty bireme but i am planning to have them 4 or 5. Will see..
They also need to have shields and spears so here they are. This part is not quite good but it is workable..
Then i decided to run a first layer of protective satin varnish on the hull. I used this product in the past with satisfactory results. Will need several layers of it.
This complete the work for today. Will continue with varnish and painting warriors.
Happy modelling.
Warriors are getting some paint...

They are very tinny for colouring, using lamp with magnifying glass to assist. I can also do some manicure in the same time..


Need to do few more layers of paint as the toys colour is dark grey and very hard to cover with either white or yellowish..
Was thinking to test different approach on few of them: to cover them all in white or skin colour, then to continue with other (red, gold, solver) or to cover them in flat black and then the same process. Will try it for sure.
Happy modelling.
They are very tinny for colouring, using lamp with magnifying glass to assist. I can also do some manicure in the same time..
Need to do few more layers of paint as the toys colour is dark grey and very hard to cover with either white or yellowish..
Was thinking to test different approach on few of them: to cover them all in white or skin colour, then to continue with other (red, gold, solver) or to cover them in flat black and then the same process. Will try it for sure.
Happy modelling.
Hi. Whenever I did figures in the past I used to spray everything in undercoat first, the kind you get in a small spray can and use on car body repairs. I found it helped get a better colour coat, but make sure you don't go too thick with the undercoat or you will start to lose detail.
Hi Graham, you are absolutely right. I will keep this advice in my tool box for next project.Hi. Whenever I did figures in the past I used to spray everything in undercoat first, the kind you get in a small spray can and use on car body repairs. I found it helped get a better colour coat, but make sure you don't go too thick with the undercoat or you will start to lose detail.
Today i painted second coat on mighty warriors. Some touch ups and another layer of varnish on the ship.
This painting/varnishing process is not very exiting. You can run another coat of varnish which takes about 5 min and spend 10 minutes cleaning a brush...
Oh well, more to come soon.
Happy modelling...
This painting/varnishing process is not very exiting. You can run another coat of varnish which takes about 5 min and spend 10 minutes cleaning a brush...


Oh well, more to come soon.
Happy modelling...