USS BONHOMME RICHARD - POF - Cross Section in Pear - 1:48 - by Uwe

Very nice and clean! A real pleasure to look at!
Many thanks for your kind words - I am trying (based on my limited possibilities) to build the models as accurate as possible - The good quality material and timber is here helping a lot.
Hope to be able to work during the weekend some hours on this model - so I guess an update of this log will come soon
 
If the modeler has also the add-on set / upgrade for the interieur and Inside structure, it is now more or less time to start with these works.

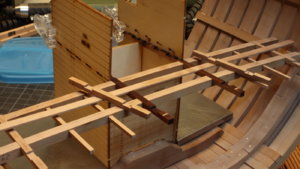
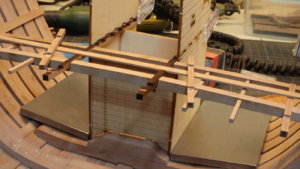
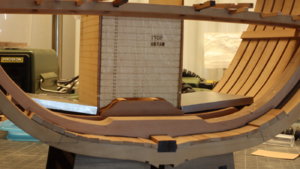
In this upgrade set additional beams are included, which have to be exchanged to the short one´s which are included in the main section kit. Here visible due to the fact, that the char of the laser cut is not removed. The plates in the back ground forming the magazin are part of the upgrade kit, they are included, only to be a pattern for the planking of the magazins.
IMG_5129.JPG

IMG_5130.JPG

view from the other side
IMG_5131.JPG

IMG_5132.JPG

IMG_5135.JPG

IMG_5136.JPG
 
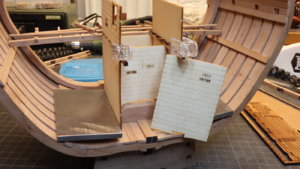
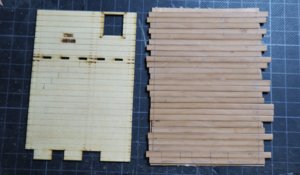
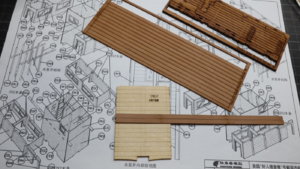
Here you can see a typical sketch / drawing
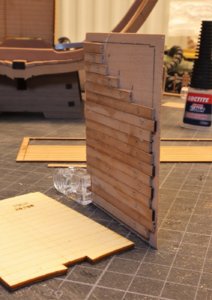
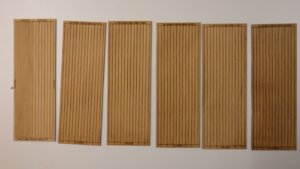
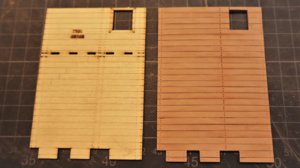
and the pattern sheet element 19C2 which is one front element of the magazin in the hold. They are included not as a basis for gluing the planking (laser cut strips also in photo) - really only as a pattern. If you plan not to show the back size of the wall, you can easily use these pattern also as a base and directly glue the planks on top. But I want to partly open the magazins (you will see this later in a photo) it is necessary, that these pattern sheets are not visible.
IMG_5134.JPG

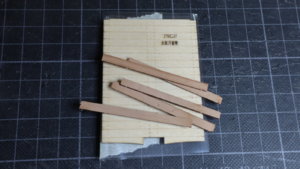
It is maybe not possible to see very well - it is my first attempt with a folio over the pattern sheet, so that the planks will be not glued against the pattern sheet - But it was not working (for me) - so a failed try
IMG_5137.JPG

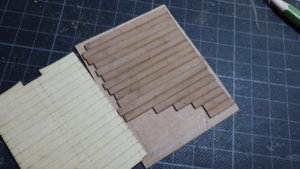
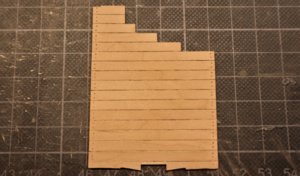
My other and next attempt was using a thin 0,5 mm veneer of pear - here you can see also the steps in the top, so my idea to be able to somehow look inside the magazin
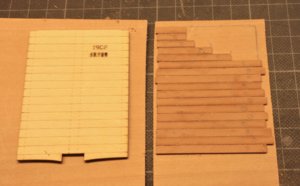
IMG_5138.JPG

IMG_5139.JPG

I used the pattern sheet to mark the outside size (BTW it is fitting extremely good into the section - so the measures of these elements is extremely good)
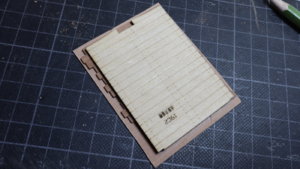
IMG_5140.JPG

IMG_5141.JPG

The outside form were sanded with the circular sander / sanding disk and not cut by the scroll saw - I think this way is safer in order not to destroy the structure of the sheet
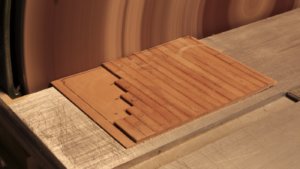
IMG_5142.JPG

after the sanding
IMG_5143.JPG

Not finished yet (also on top of the planks are still rests of glue etc. ) but you get an impression how it is looking like
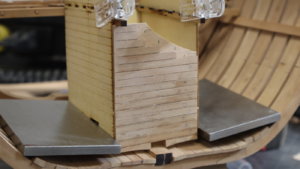
IMG_5144.JPG

I think I found my way to make these sheets, but I am open for any suggestions and help to make it better (or faster) - now a bigger number of sheets are to be prepared ...... step by step .....

to be continued .....
 
Uwe, thanks for a nice and informative build log, I have some questions about different types of glue for different materials.
1. Brass on wood, (hinges).
2. Wood, - tissue paper - wood, (between sections in bow).
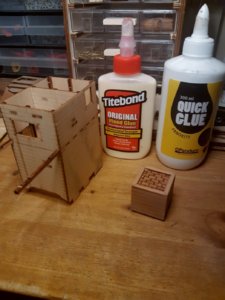
Here in Norway I can get titbond, locktite, these brands also have different types / variants.
Do you have any good advice on this topic?
I think I can take advantage of some good advice before starting Alert and Rattlesnake.
.
 
Hi!
Interesting,i am just there to begin whid that step,had no problems gluingView attachment 129481
But be careful - these elements you glued together are only a help for the pattern as templates and have not the final finish...... for this the laser cut planks (I think something like 7 or 8 sheets have to be used -> see the photo
IMG_48551.JPG
 
Uwe, thanks for a nice and informative build log, I have some questions about different types of glue for different materials.
1. Brass on wood, (hinges).
2. Wood, - tissue paper - wood, (between sections in bow).
Here in Norway I can get titbond, locktite, these brands also have different types / variants.
Do you have any good advice on this topic?
I think I can take advantage of some good advice before starting Alert and Rattlesnake.
.
For brass to wood I use a superglue gel and
wood - paper - wood I use normal waterbased wood glue (paper is made out of wood, so I think the best for this problem
Sorry I have no experience until now with tidebond etc., so maybe here somebody else can give a better suggestion
But I am maybe not the best to give suggestions - I am more or less trying to use most of the time my standard wooden glue
 
Thanks for your reply Uwe, I will buy super glue and try, regular super glue tends to flow uncontrolled beyond.
Wonder if you wet black paper before gluing with wood glue.
I did a test with cascol wood glue, paper under pressure with poor result, the parts would not stick together properly.
Regards-
 
G'day Uwe, I honestly cannot find anything wrong with using the templates and just gluing the planks to them, they make a very strong base, and if you want to show the inside of the Magazine just plank the inside as well, just my thoughts,
Best regards John,
 
G'day Uwe, I honestly cannot find anything wrong with using the templates and just gluing the planks to them, they make a very strong base, and if you want to show the inside of the Magazine just plank the inside as well, just my thoughts,
Best regards John,
Thats my thougt
 
G'day Uwe, I honestly cannot find anything wrong with using the templates and just gluing the planks to them, they make a very strong base, and if you want to show the inside of the Magazine just plank the inside as well, just my thoughts,
Best regards John,

Hi
This is how I have done it in my model. Plank front and back using the templates.
The only thing is that the interior plank is with a very fine wood.


Regards
 
G'day Uwe, I honestly cannot find anything wrong with using the templates and just gluing the planks to them, they make a very strong base, and if you want to show the inside of the Magazine just plank the inside as well, just my thoughts,
Best regards John,
I can fully understand your point and agree also in principle. It would be some working steps less with using the templates.
For the magazins which I will not open for a look inside I will maybe do so.
For the other ones, f.e. like this one which I started my thought was, that the tickness of the wall would be too thick, so you have the pillars etc. not at the correct place and you can see the lighter template wood also in the shortened planks.
I have to think once more about the different solutions........ I will think about ...... and many thanks for all your comments ..... good to have friends to discuss these things.....
 
No worries Uwe, I'm sure which ever way you build it will be great, and that's one of the best things with our Hobby, Variation, we all build in different ways, but as long as the enjoyment is there it is all great,

best regards John,
 
I did not change the technique until now - it is working well and I get slim elements, so I think the final result will be good enough.

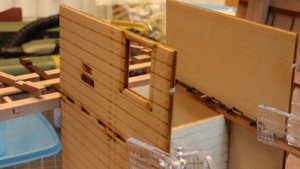
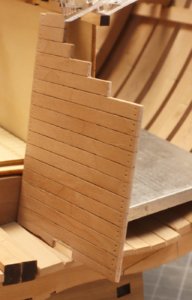
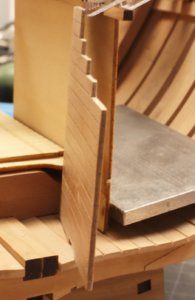
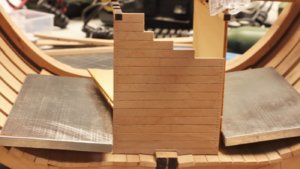
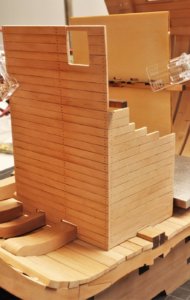
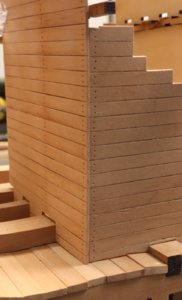
The first wall element in his final shape
IMG_51451.jpg

IMG_51461.jpg

IMG_51471.jpg

IMG_51481.jpg

I made only one smaller mistake, which I will avoid with the next element - The grain of the veneer is following the small planks - with this the final sanding was not easy and I had to be very carefully - with the next element I will put the veneer grain in a right angle to the planks, so the package will be more stabile.

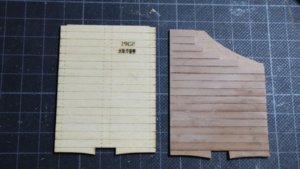
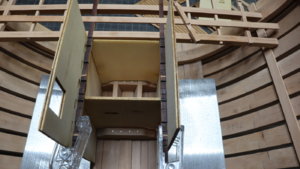
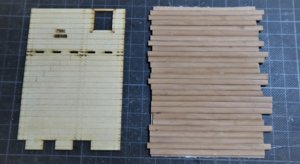
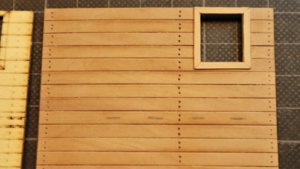
The second element: on the left the pattern - on the right are the planks already glued onto the veneer
IMG_51921.jpg

The outside lines of the elements are marked with pencil, so ready for sanding and cutting
IMG_51931.jpg

the element after the sanding and cutting out
IMG_51961.jpg

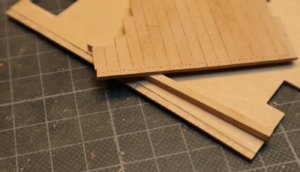
because of the half mm of the veneer, I have to remove in the edges the veneer from the planks, so the elements can sit smooth in a right angle, and the veneer base will be not visible.
IMG_51981.jpg

Dryfit check
IMG_51941.jpg

IMG_51951.jpg

finally I installed also the frame of the small window
IMG_51971.jpg

Many Thanks for the interest ..... to be continued .......
 
Back
Top