YQ Bluenose Ted R

Assuming the inscribed bevel lines are on the visible, exposed sides of the frames, there should be no char residue on the interfacing surface of the frame parts, unless you started sanding while the adhesive wasn't completely set. To avoid just that I let the freshly bonded frames set and dry for 24 hours.
Do you observe this phenomenon on all your frames?
 
No not all of them. I'll adhere to the 24 hour guideline. Should I assume that I shouldn't presa d the frames prior to glueing
 
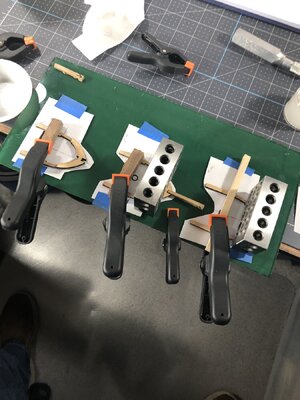
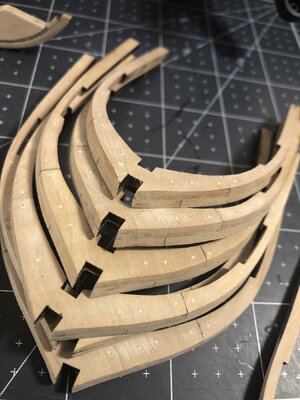
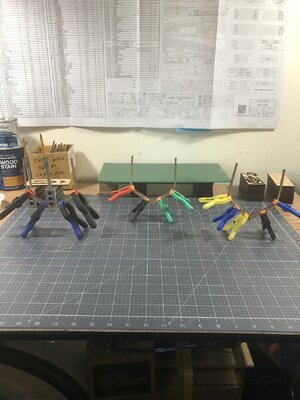
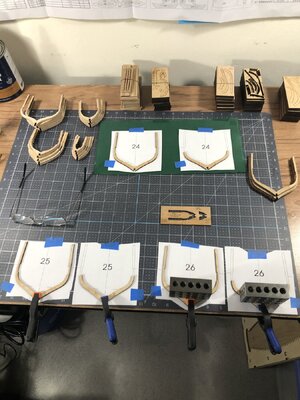
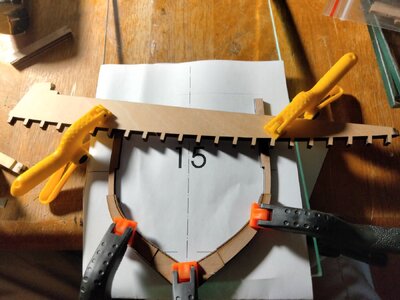
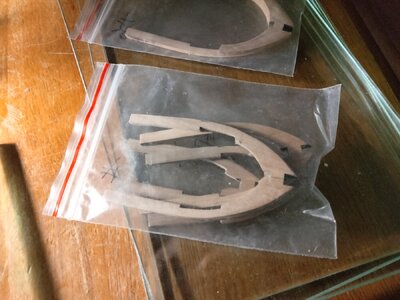
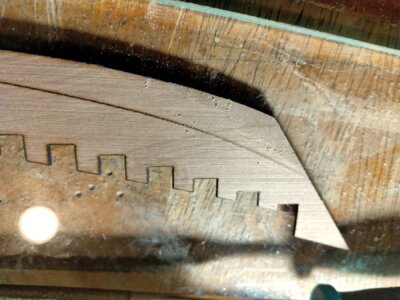
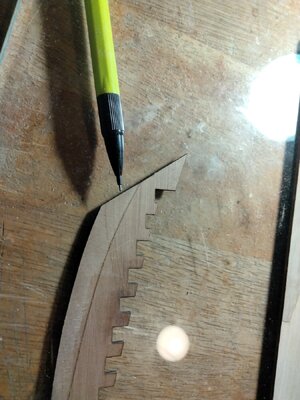
Here is an example of my assembly line.

IMG_2390.jpgIMG_2406.jpgIMG_2409.jpgIMG_2412.jpg

I made copies of the frames then cut the copies down and began the glue up right on the paper. They would stick to the paper some so I just carefully sliced the paper off and any residual paper would sand off. As you can see if you are matching them correctly you will not have any char running longitudinal.

Click on any picture and it will enlarge for you.
 
Here is an example of my assembly line.

View attachment 431733View attachment 431734View attachment 431735View attachment 431736

I made copies of the frames then cut the copies down and began the glue up right on the paper. They would stick to the paper some so I just carefully sliced the paper off and any residual paper would sand off. As you can see if you are matching them correctly you will not have any char running longitudinal.

Click on any picture and it will enlarge for you.
Ok, so you are glueing both front parts or the frame together and the same for both parts of the back half. Then glueing the halves together.
Also I am interested in the treenails. What do you use for a guide in placement? Are they installed on both sides of the frame?
 
Here is an example of my assembly line.

View attachment 431733View attachment 431734View attachment 431735View attachment 431736

I made copies of the frames then cut the copies down and began the glue up right on the paper. They would stick to the paper some so I just carefully sliced the paper off and any residual paper would sand off. As you can see if you are matching them correctly you will not have any char running longitudinal.

Click on any picture and it will enlarge for you.
Ok, so you are glueing both front parts or the frame together and the same for both parts of the back half. Then glueing the halves together.
Also I am interested in the treenails. What do you use for a guide in placement? Are they installed on both sides of the frame
Sometimes I feel like an idiot l, lol
 
I made sure there was a tree nail on each side of a splice. your splices are staggard so you will have at least 8 nails per frame then if there was significant distance between splices, I would add one or big gap to the keel would add one. Each treenail goes all the way through both halves. I just eyeballed this. The larger frames will have more nails. You can do some research on this subject, it's very interesting. You need a nail at the ends as well unless the end is close to a splice. One other thing, every where you see one of my treenails , on a real ship there would be a pair side by side.
 
Last edited:
Ok, so you are glueing both front parts or the frame together and the same for both parts of the back half. Then glueing the halves together.
Also I am interested in the treenails. What do you use for a guide in placement? Are they installed on both sides of the frame
Sometimes I feel like an idiot l, lol
I first bonded the frame's centerpieces together, than the two frame halves on the protruding ends of the bonded center pieces and finally the two upper most frame parts. In all three bonding steps, with clamping and curing throughout the entire process.
Some of the smaller frames are slightly different, but you should always look for the largest possible bond area.

Treenails is an interesting topic and a lot has been written about these little buggers, also here on SOS.
I think there's as many methods as there are modelers.
It's not very likely you'll be able to exactly copy what went into her 1:1 example, so what does look right to you is probably okay and I think Daniel gave you some pointers on how you could do your treenails. You have to bear in mind that the visibility of the treenails or lack thereof is highly determined by the material of the treenails and the applied finish. Best is to run some tests, prior to deep diving into installing those treenails.
 
I made sure there was a tree nail on each side of a splice. your splices are staggard so you will have at least 8 nails per frame then if there was significant distance between splices, I would add one or big gap to the keel would add one. Each treenail goes all the way through both halves. I just eyeballed this. The larger frames will have more nails. You can do some research on this subject, it's very interesting. You need a nail at the ends as well unless the end is close to a splice. One other thing, every where you see one of my treenails , on a real ship there would be a pair side by side.
Thanks, for your patience
 
I first bonded the frame's centerpieces together, than the two frame halves on the protruding ends of the bonded center pieces and finally the two upper most frame parts. In all three bonding steps, with clamping and curing throughout the entire process.
Some of the smaller frames are slightly different, but you should always look for the largest possible bond area.

Treenails is an interesting topic and a lot has been written about these little buggers, also here on SOS.
I think there's as many methods as there are modelers.
It's not very likely you'll be able to exactly copy what went into her 1:1 example, so what does look right to you is probably okay and I think Daniel gave you some pointers on how you could do your treenails. You have to bear in mind that the visibility of the treenails or lack thereof is highly determined by the material of the treenails and the applied finish. Best is to run some tests, prior to deep diving into installing those treenails.
Thank you the photos helped a lot.
 
I will have a proper look at this over the weekend when I have more time. Those parts do NOT look right.
Good morning Heinrich,
Have you been able to determine the availability of replacement parts. Should I be going to the manufacturer directly.
I don't want to be a bother.
Thank you for your assistance.
 
I'm following Peter Voogt's lead on glueing the frames. On number 15. I have 6 frames sanded and awaiting preliminary fitting. I can't do anything on fitting to the keel until I learn if I can get replacement parts for the stained deadwood area.

17095919996617246815859389571287.jpg

17095920217661315370536660543248.jpg
 
I sat down and had a good talk with myself this morning and came to the conclusion that I'm expecting to much from this kit and my abilities at this stage of ship model building.
I have spent much of my life pursuing careers and hobbies that require perfection. This started with being an air traffic controller in the USAF. I restored old and abandoned light aircraft to flying status and was a general contractor doing additions and remodeling in one of the most demanding markets here in Los Angeles and Malibu. Every board has to be grain and end matched.
None of these allowed for even the smallest imperfection or error.
So it is with my sincerest apologies that I don't need any additional parts. I'm sorry to have brought you along my path of awareness and any problems or efforts I have caused.
With dearest regards,
Ted Robinson
 
No worries, Ted, your aim for perfection is understandable, but, as I found out during my BN build, for me that's unattainable.
After some 22 months I now have a completed model which is quite honestly an accumulation of discrepancies and re-do's. Regardless, this model holds high value, despite the misgivings I might carry.
In your professional career, apart from the remodeling work, you had to make sure no people were killed. That's a different ballgame altogether. Now this is for fun, having a good time building a model and filling up swear jars.
You will know of details being far from perfect, heck, I know the aft part of the of my BN is not correct, but when I found out, there was nothing I could do anymore, other than accept it and soldier on.
I wish you fun building your BN, she is challenging, but what a charming lady she is.

During my time in the US, I met quite a few (former) USAF guys. Especially my CFI made an impression, being a retired AF colonel and a Vietnam veteran. What a colorful character he was, especially his language... Fond memories.
 
Hello Ted. I fully endorse Johan's post.
In my previous work as a CSI I couldn't afford to make any mistakes either. And in my pursuit of perfection I sometimes hit a wall. During the build of my models I also had my pro’s and con’s.
My Bluenose also has lesser points, but you can only see most of them yourself. We have chosen model building as a hobby and are also active on this great forum. Partly to support each other. Pleasure must predominate.
Regards, Peter
 
No worries, Ted, your aim for perfection is understandable, but, as I found out during my BN build, for me that's unattainable.
After some 22 months I now have a completed model which is quite honestly an accumulation of discrepancies and re-do's. Regardless, this model holds high value, despite the misgivings I might carry.
In your professional career, apart from the remodeling work, you had to make sure no people were killed. That's a different ballgame altogether. Now this is for fun, having a good time building a model and filling up swear jars.
You will know of details being far from perfect, heck, I know the aft part of the of my BN is not correct, but when I found out, there was nothing I could do anymore, other than accept it and soldier on.
I wish you fun building your BN, she is challenging, but what a charming lady she is.

During my time in the US, I met quite a few (former) USAF guys. Especially my CFI made an impression, being a retired AF colonel and a Vietnam veteran. What a colorful character he was, especially his language... Fond memories.
My primary CFI, that gave me the gift of flight will always hold a special part of my heart.
Thank you for your thoughts..
Ted
 
Hello Ted. I fully endorse Johan's post.
In my previous work as a CSI I couldn't afford to make any mistakes either. And in my pursuit of perfection I sometimes hit a wall. During the build of my models I also had my pro’s and con’s.
My Bluenose also has lesser points, but you can only see most of them yourself. We have chosen model building as a hobby and are also active on this great forum. Partly to support each other. Pleasure must predominate.
Regards, Peter
The standards on this site are incredibly high.
I'm in this for the fun.
You guys are great
 
Hello Ted. I fully endorse Johan's post.
In my previous work as a CSI I couldn't afford to make any mistakes either. And in my pursuit of perfection I sometimes hit a wall. During the build of my models I also had my pro’s and con’s.
My Bluenose also has lesser points, but you can only see most of them yourself. We have chosen model building as a hobby and are also active on this great forum. Partly to support each other. Pleasure must predominate.
Regards, Peter
Thank you Peter.
Interesting work; you can't afford to make a mistake while looking for someone else's mistakes.
I'm back at it. Started filing the keel pieces. This is fun again.
Tes
 
I'm in this for the fun.
Thats fantastic Ted, that's what modeling should be all about. I suspect we all try at one point or another to translate our professional carriers into our modeling aspirations. The types of mistakes I have made in modeling with all the do overs would never have been tolerated in my professional carrier. As s a senior survey manager I was responsible for all our precast concrete bridge beams (very expensive) fitting correctly on top of the bridge bents that I laid out. Never had a situation in 40 years where they did not fit. Stay with it we are here to support you.
 
Back
Top