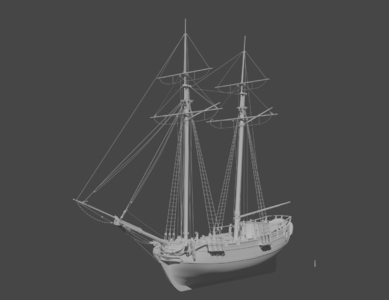
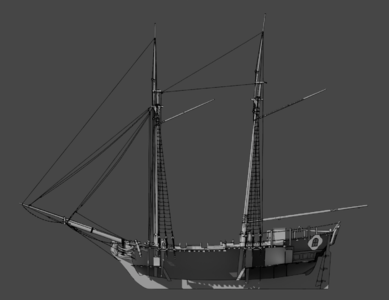
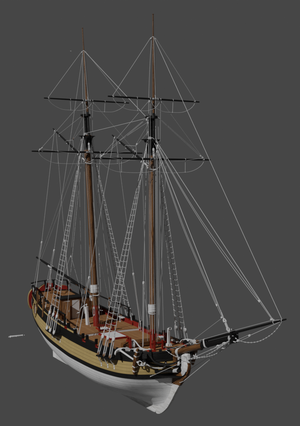
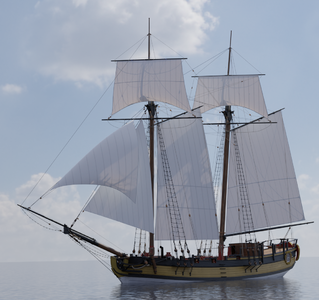
HMS Halifax (1768) 3D Blender model

Joined
May 26, 2023
Messages
23
Points
48

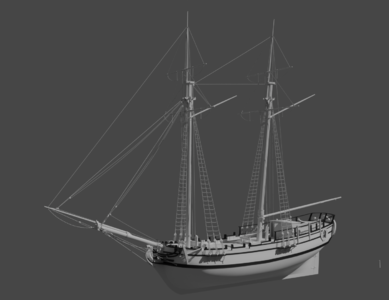
For my next D&D campaign I'm giving my players a schooner, and I wanted to build a rough 3D model of it to help us all visualise it. I've chosen HMS Halifax (1768) as the template, and have already added way more detail than necessary, so I guess I'm building the whole ship now just for fun.

Here's the current progress. There's still a lot to do, and feedback would be most welcome!
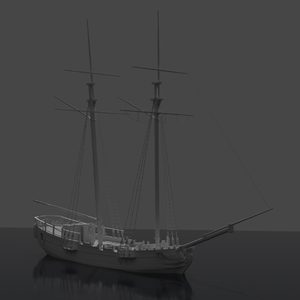
HalifaxWIP1.png

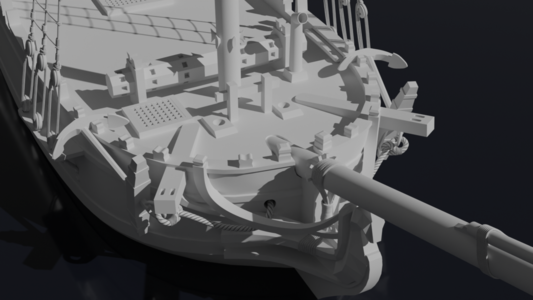
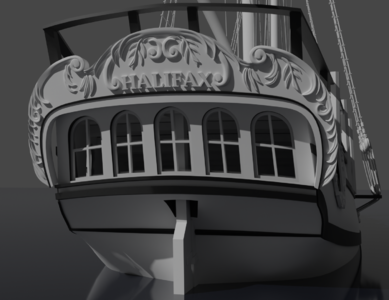
The figurehead is a placeholder. For the game I'm going to sculpt a Darter for the figurehead (a type of bird), but I hope also to do Halifax's mermaids with hippocampus for the sake of completion.HalifaxWIP1b.png
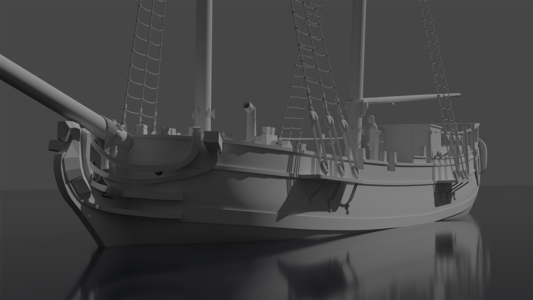
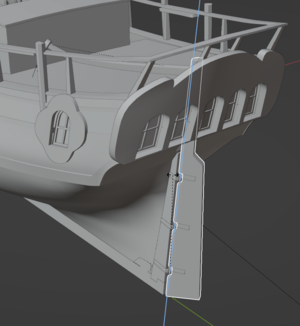
I'm undecided whether the stern window facades for the game version will match the Halifax's or not. Either way, I haven't figured out how I'm going to do them yet. Note that I also have yet to hinge the rudder properly.
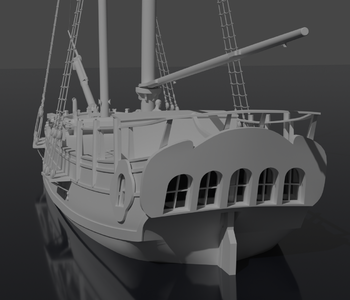
HalifaxWIP1c.png

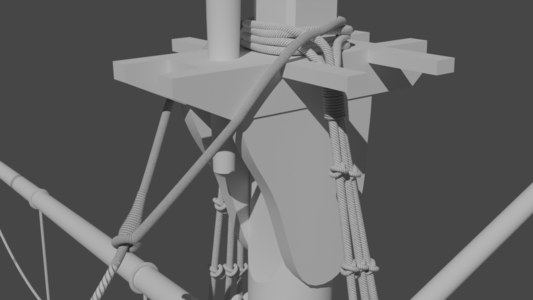
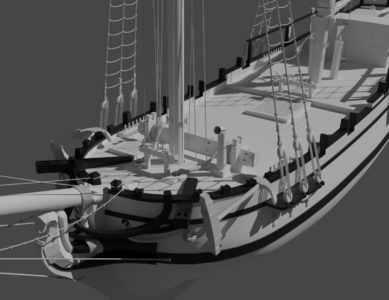
The ropes are made with splines and geometry nodes, with textures giving the illusion of detail. I'm cheating on most of the knots by using crossed toruses or spirals, because tying real knots in 3D is hard.
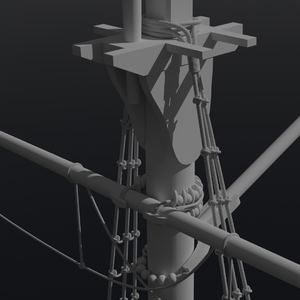
HalifaxWIP1d.png

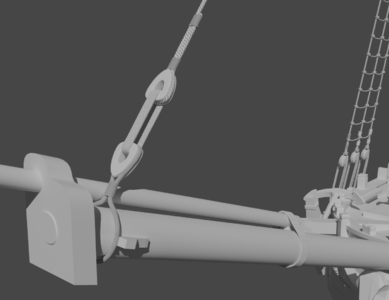
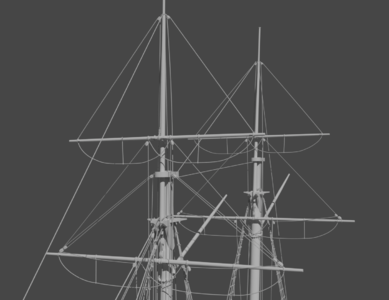
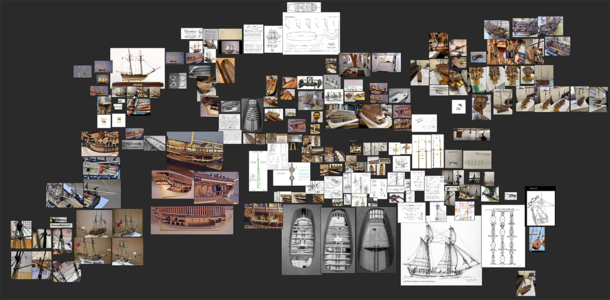
I want to have all of the standing rigging modeled for the game, but it's doing my head in because the plans I'm working from (H. Hahn's and Admiralty) are quite vague about the details, and seem to assume I know much more about rigging a ship than I actually do. Any advice on additional resources for this stuff would be greatly appreciated. I've bought a few digital books that are helping, and I'm building a massive PureRef file of photo references, many drawn from these very forums:
Screenshot 2023-07-22 005041.png

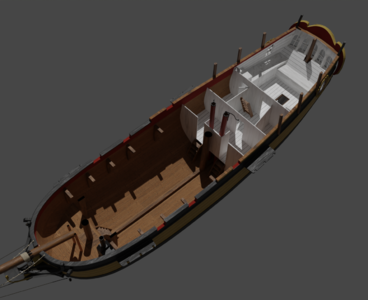
And finally, one of my main reasons for doing this: I know my players, and they'll want to decorate and rearrange the furniture in the stern cabin. By modeling the whole thing (including the glass in the windows), I can give them a reasonable idea of how much space they'll have and what the lighting conditions will be. I had to set the digital camera's lens to a super-wide 16mm, and up the film exposure by 5 stops for this render:HalifaxWIP1e.png
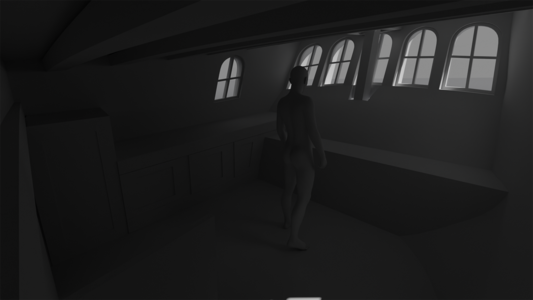
 
I've been doing lots of little fiddly bits. The anchors are in place, along with their main cables (I'll rig the rest once I figure out how the hell these things attach to the Catheads and Windlass)HalifaxWIP3a.png

The rudder is now hinged properly, rotates on the correct axis, and works with the tiller:HalifaxWIP3b.png

...and the forestay is rigged:
HalifaxWIP3c.png

HalifaxWIP3d.png

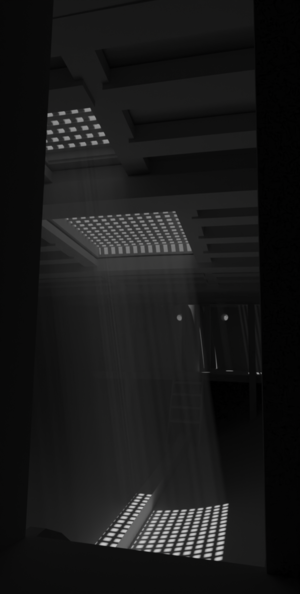
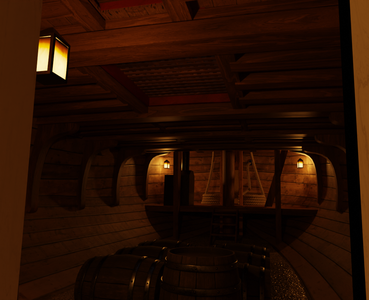
Also, after modelling the gratings for the hatches, I decided it was time for a moody below-decks render (with bonus scatter volume for light rays). This is the view looking towards the bow (I hadn't added the anchor cables yet when I rendered this).

HalifaxWIP2.png
 
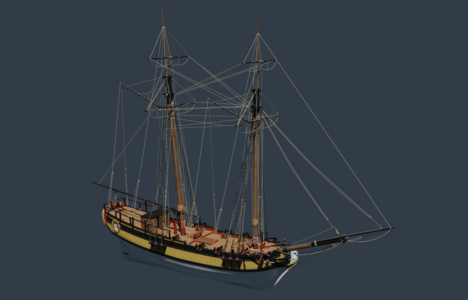
Latest update: Lots of minor details, many tweaks, and I'm getting serious about the rigging. Still lots to do though:
HalifaxWIP5.png

The rigging's giving me a headache, but the beauty of doing it digitally is that It doesn't really matter what order I do it in because it's relatively easy to fix later. I can't imagine the patience (and dexterity!) required to do this stuff by hand!

HalifaxWIP5a.png

And here's a quick Proof of Concept cutaway render showing the lower decks. The ultimate goal is to have multiple views/angles to show my players depending on whether they're fighting on the weather deck, climbing the rigging, or faffing about in the hold.

HalifaxWIP5b.png
 
I'm taking a break from rigging to work on other details, such as the stern facade and decorations. Harold Hahn's illustrations aren't crystal clear on the carvings around the stern windows, and his drawings differ from his model, so I'm using a blend of his designs plus a touch of my own flair. Next, I'll move on to the decorative columns around the windows.

HalifaxWIP8.png
 
great project, I will keep following with great curiosity
 
I've gone and added some black paint to the model. I'm not about to texture map the whole thing, but I really like how the black wales and railings accentuate its form.

HalifaxWIP8b.png
HalifaxWIP8c.png

Do you plan on producing a model of this ship.
Commercially you mean? No. One of my D&D players wants to 3D print it for herself, but I'm not sure how practical that will be as I'm not building it to be printable and it would take a lot of extra work to ready it. The main purposes for this build are 1) to create a highly detailed model for rendering (exterior and interior) and 2) to keep me busy.
 
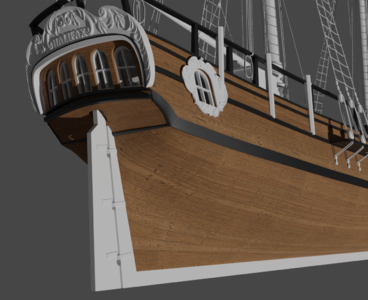
Proof of concept for the hull planking. There's no way I'm going to model each individual plank, but neither do I want to hand-paint each plank seam onto the model. My solution is to use a repeating texture and UV Map each island on the mesh by hand so the planks run in the appropriate directions. I'm pretty happy with how it's going. There's a bit of distortion but that's mainly because I still have a subdivision modifier on the hull - once I apply the modifier I'll be able to clean it up further.

The texture itself is a placeholder, as I intend to have painted planks instead of this raw, unfinished look.

HalifaxWIP9.png
 
I had fun playing with colours today before I get back into the rigging. I'm drawing from what historical sources I can find for colour schemes and patterns, but I gather there was a lot of leeway about this sort of thing, and colours were frequently changed.

Still much to do, but I'm happy with how it's coming together so far.

HalifaxWIP10a.png
 
I'm reorganising the project so I can easily hide the weatherdock to reveal the hold and cabins - basically a map view of below deck. This will make it easier to work on these areas, and allow me to render them out as encounter maps to use in the game. I've even started slicing up some objects (such as the masts, fore bits, and stove exhaust) so they don't obscure the maps.

HalifaxWIP13.png
 
Lots of progress since my last update:

HalifaxWIP17f.png

As you can see, the rigging is mostly done, and every finished object has a material now.

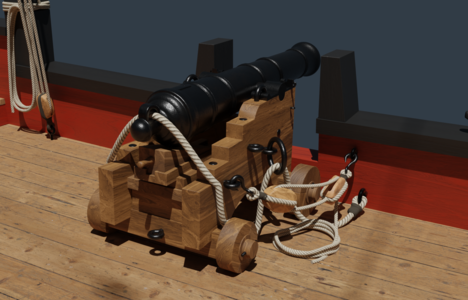
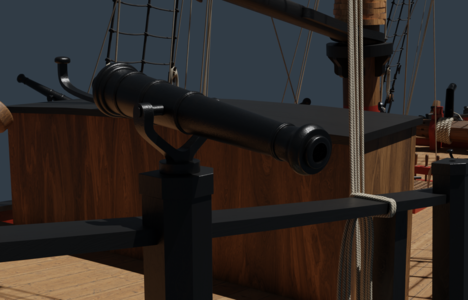
This weekend I made the armaments, consisting of 3-pounder cannons and 1/2-pounder swivel guns:
HalifaxWIP17b.png
HalifaxWIP17d.png
 
Looking very good - your deck planking is looking extremely realistic
I have only two small remarks
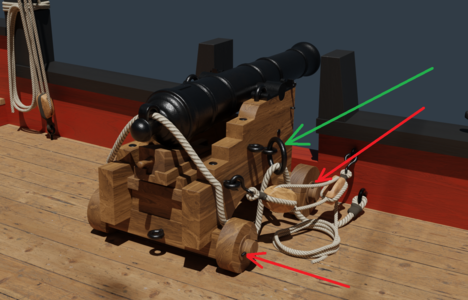
HalifaxWIP17b.png

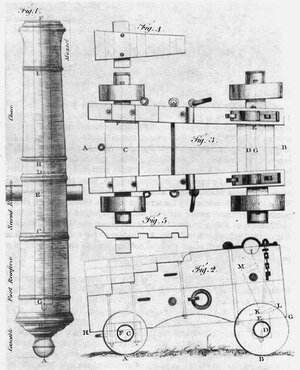
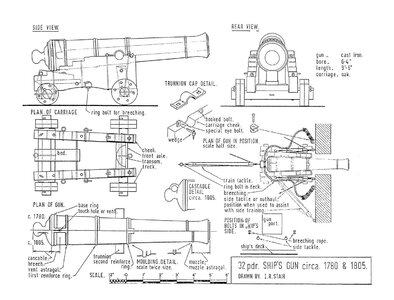
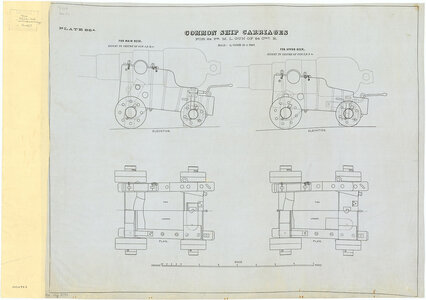
1) Green - this ring looks a little bit to big in diameter
cannon plans.jpg
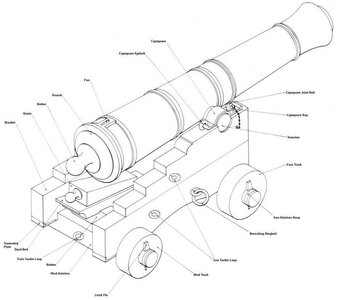
2) red - these splints / linch pins are installed more or less vertical - on the front wheel you have , but at the rear axis they are horizontal
4.jpg 50578029_2191158431201273_921381604385882112_o.jpg
 
Looking very good - your deck planking is looking extremely realistic
I have only two small remarks
View attachment 391769
Good catches, thanks! I based the proportions on Hahn's drawings and assumed the rings only looked large because the carriage is relatively small, but after looking at some replica 3-pounder carriages I realised you're right and have scaled them down a bit.

There's no excusing the linch pins though. That's just me being a noob and not understanding how the axles work XD

Tweaked model:

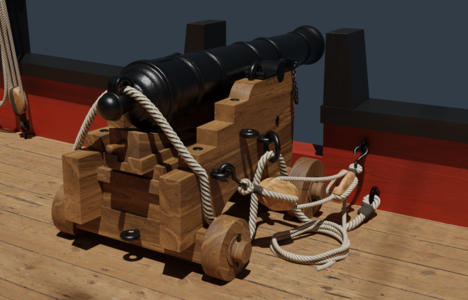
HalifaxWIP18.png
 
Very good that I am able to help.
Looking at the rendering, maybe you would like to add one more detail - the trucks or wheels

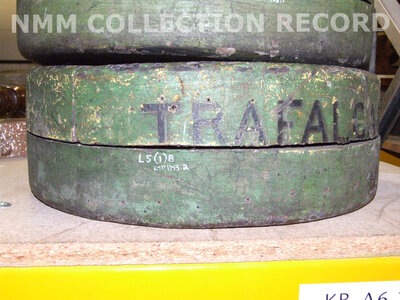
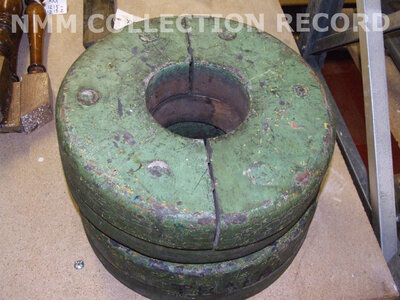
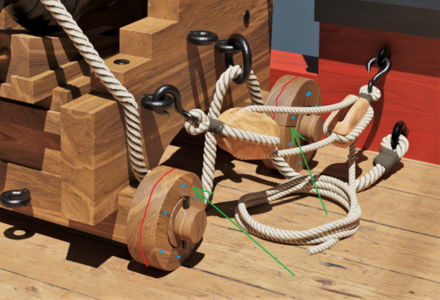
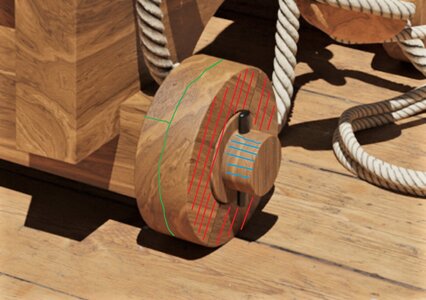
These wheel are made in principle out of four pieces of half discs - you are showing already the joint (green arrow), but the wheel was built out of four segments, 2 times 2 which were twisted by 90° - this was to produce more strength into the wheel because of the grain of the wood

Original trucks - here two wheels are laying on each other, so on the first photo you see one complete wheel and the second (on top) you can see only half

rs4042.jpg rs4043.jpg


Here a contemporary drawing (of a heavier carriage, but showing the principle of the wheel)

j2219.jpg

The red line is showing appr. the joint between the two discs

The four elements were fixed together with usually six (or even more) wooden bolts (blue dotts)- these wooden bolts / nails are oftne no visible, when the wheels are painted, but you show the natural wood with grain

HalifaxWIP18.png

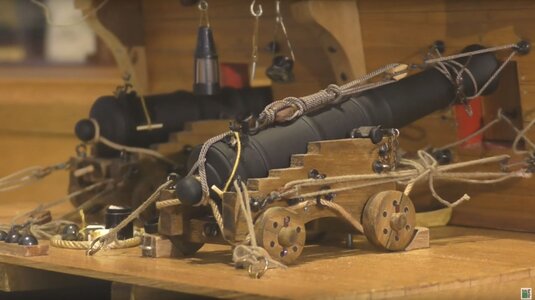
A nice model of a gun showing this detail

BattleStation_4.JPG

BTW: the grain direction of the wood should be like this
HalifaxWIP18ab.jpg
 
Lots of work done these past few weeks. I've converted most of the running rigging to be dynamic - so if I rotate the yards/gaffs/boom, the lines will follow. Here's a Proof of concept video from early in this process:

This was tricky to achieve to blender. Not only was I hooking the end of lines to spars, but I also had to find a way to make tackle blocks move and rotate based on multiple anchor points that were moving independently of each other. I ended up using multiple Copy Location constraints, followed by a Track To constraint, and then hooking the various lines to the blocks.

With the rigging mostly done, I can set sail after all! Here she is at full sail with the topsails angled 45 degrees to port:

HalifaxWIP20_Crop.png

I'm using subsurface scattering on the sail materials to let the sun pass through, and I've painted SS maps for each sail to simulate how the bolt and reefing lines would block the light. I think they look quite nice when backlit now.

Speaking of lighting, I've also started putting lanterns below deck:

HalifaxWIP19b.png
Getting close to being done (for my purposes at least).
 
This dynamic feature is looking very good - you also can control the lines and their location Thumbsup
 
Back
Top