A very nice 3D puzzle you have put together. Not so easy!
You are using an out of date browser. It may not display this or other websites correctly.
You should upgrade or use an alternative browser.
You should upgrade or use an alternative browser.
"Flying Cloud " by Mamoli - kit bash
- Thread starter Peter Gutterman
- Start date
- Watchers 15
- Joined
- Jun 17, 2021
- Messages
- 1,698
- Points
- 488

Thanks, Paul. I believe you replied before I was even done editing! Yes, 3D puzzle is exactly right. I assemble and disassembled it in my head countless times before doing anything irreversible, which dogs every step! 
I like your nibling planks, the deck nicely looking!
- Joined
- Jun 17, 2021
- Messages
- 1,698
- Points
- 488

Thanks, Jim and thanks for following! 
DittoI like your nibling planks, the deck nicely looking!
- Joined
- Jun 17, 2021
- Messages
- 1,698
- Points
- 488

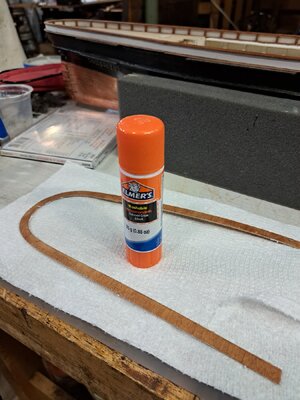
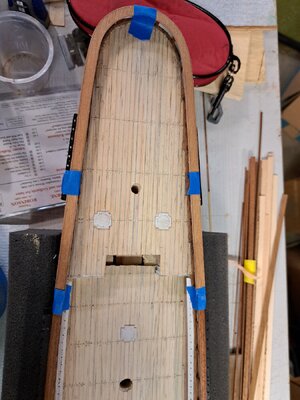
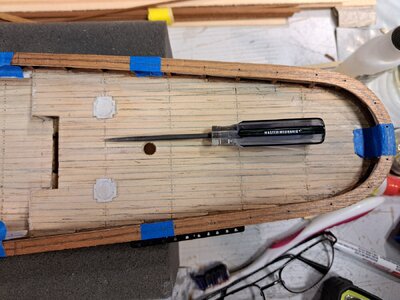
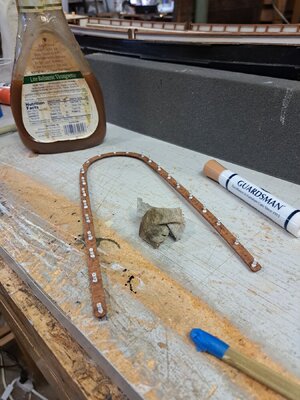
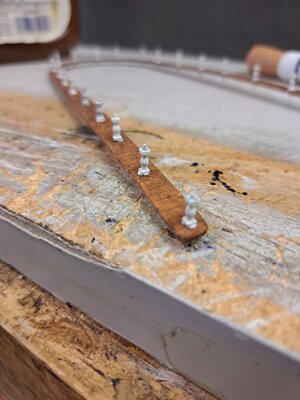
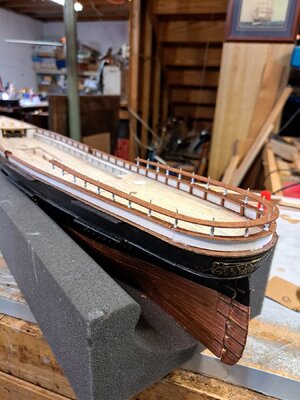
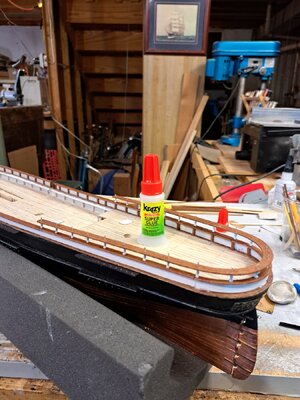
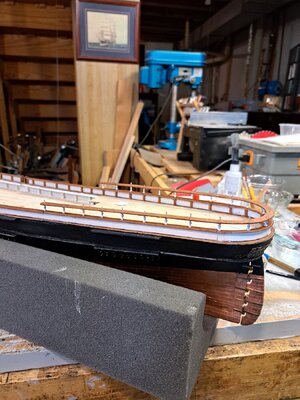
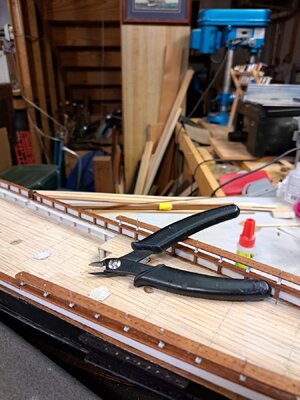
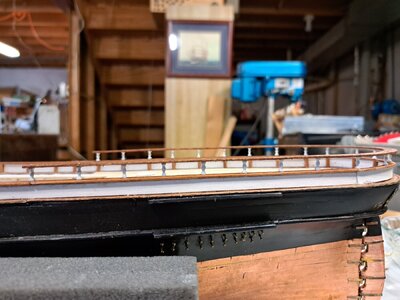
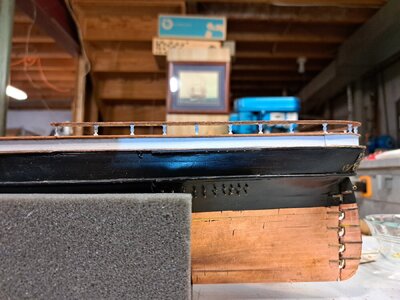
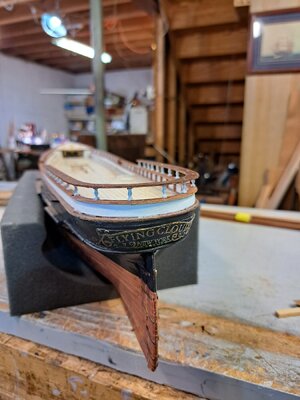
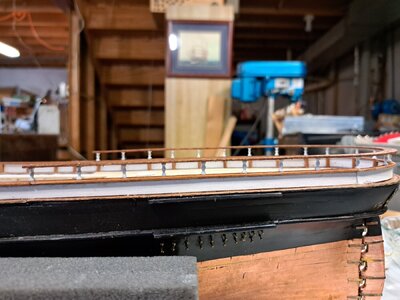
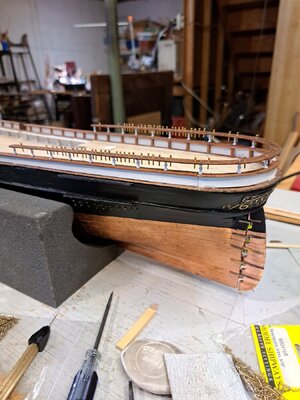
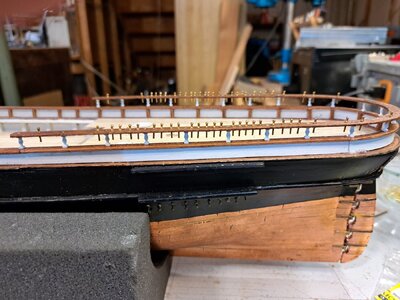
On to the taffrail which doubles for the pin rail for the mizzen mast. I cut the rail out of the same left-over piece of mahogany plywood veneer I had used for the monkey rails, which facilitated cutting the rail from a single piece. I marked the centerline for the taffrail with a compass set to the proper width from the edge of the rail to the center and marked the drill points for the stanchion pins. I tack glued it onto the matching railing below it with stick school glue (very light tack, easy to release) and a bit of low tack masking tape. I transferred the drilling points for the holes for the stanchion post pins with an awl, then drilled them through, being careful to mark the drilling depth on the drill with a bit of tape. I lightly sanded the taffrail, both sides, stained it with a stain marker and finished with amber shellac, padded on. I painted the stanchions (1/4" or 2 scale feet, white metal from BlueJacket Ship Crafters) white. I first glued the stanchions to the underside of the taffrail using Aileen's fast grab tacky glue. When dry I glued the stanchions to the monkey rail. Starting at the back, I worked my way forward and right and left simultaneously. Each time I fit a pin into its hole I fixed it with a drop of thin superglue. The stanchion castings come with a short pin on one end and a long pin on the other. The long pins I fit through the taff, or upper, rail so that the short pins would easily fit into the shallow holes in the monkey rail. This also made it easy to adjust them as I fit each in place. I nipped off the excess length of pins topside with a flat cut side-cutter and lightly sanded the surface, then touched up the finish. I show the belaying pins dry fitted into place. I am using the belaying and sail plans for the Model Shipways "Flying Fish" which was very nearly a sister ship to the "Flying Cloud", built only a couple of years apart by Donald McKay. The only major difference in the sail plans being that the " Flying Fish" had Spencer sails on the fore and main while the " Flying Cloud" did not. The other "Flying Cloud" plans I have show a more simplified sail and belaying arrangement. Yes, there are a LOT of belaying pins! I am using brass aftermarket pins. The wood pins supplied in the kit are too thick and too short. I will just let the brass patinate naturally to a dull dark brown over time. I probably left some things out, but You can fill in the blanks or ask me. 


Last edited:
- Joined
- May 25, 2020
- Messages
- 372
- Points
- 228

Awesome! She's really coming together, Pete! When you say you've got momentum you really mean it!On to the taffrail which doubles for the pin rail for the mizzen mast. I cut the rail out of the same left-over piece of mahogany plywood veneer I had used for the monkey rails, which facilitated cutting the rail from a single piece. I marked the centerline for the taffrail with a compass set to the proper width from the edge of the rail to the center and marked the drill points for the stanchion pins. I tack glued it onto the matching railing below it with stick school glue (very light tack, easy to release) and a bit of low tack masking tape. I transferred the drilling points for the holes for the stanchion post pins with an awl, then drilled them through, being careful to mark the drilling depth on the drill with a bit of tape. I lightly sanded the taffrail, both sides, stained it with a stain marker and finished with amber shellac, padded on. I painted the stanchions (1/4" or 2 scale feet, white metal from BlueJacket Ship Crafters) white. I first glued the stanchions to the underside of the taffrail using Aileen's fast grab tacky glue. When dry I glued the stanchions to the monkey rail. Starting at the back, I worked my way forward and right and left simultaneously. Each time I fit a pin into its hole I fixed it with a drop of thin superglue. The stanchion castings come with a short pin on one end and a long pin on the other. The long pins I fit through the taff, or upper, rail so that the short pins would easily fit into the shallow holes in the monkey rail. This also made it easy to adjust them as I fit each in place. I nipped off the excess length of pins topside with a flat cut side-cutter and lightly sanded the surface, then touched up the finish. I show the belaying pins dry fitted into place. I am using the belaying and sail plans for the Model Shipways "Flying Fish" which was very nearly a sister ship to the "Flying Cloud", built only a couple of years apart by Donald McKay. The only major difference in the sail plans being that the " Flying Fish" had Spencer sails on the fore and main while the " Flying Cloud" did not. The other "Flying Cloud" plans I have show a more simplified sail and belaying arrangement. Yes, there are a LOT of belaying pins! I am using brass aftermarket pins. The wood pins supplied in the kit are too thick and too short. I will just let the brass patinate naturally to a dull dark brown over time. I probably left some things out, but You can fill in the blanks or ask me.View attachment 446121View attachment 446122View attachment 446123View attachment 446124View attachment 446125View attachment 446126View attachment 446127View attachment 446128View attachment 446129View attachment 446130View attachment 446131View attachment 446132View attachment 446133View attachment 446134View attachment 446135
- Joined
- Jun 17, 2021
- Messages
- 1,698
- Points
- 488

Thanks, Chuck. 
I'll have a whole new series of progressions by the end of the week!

I'll have a whole new series of progressions by the end of the week!
- Joined
- Jun 17, 2021
- Messages
- 1,698
- Points
- 488

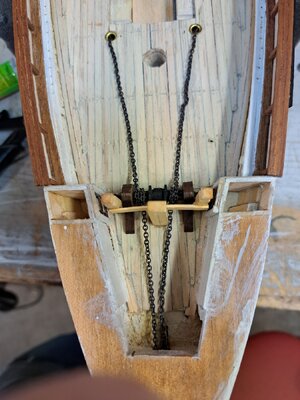
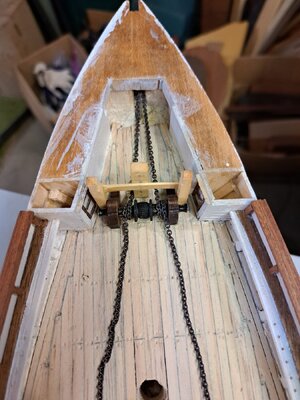
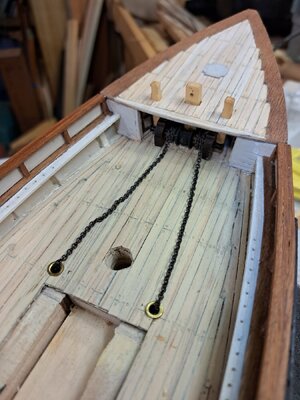
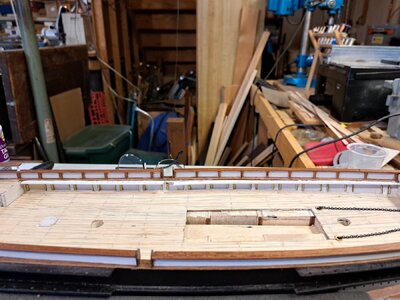
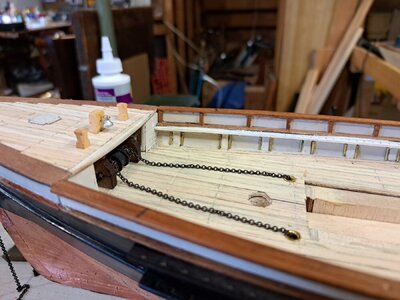
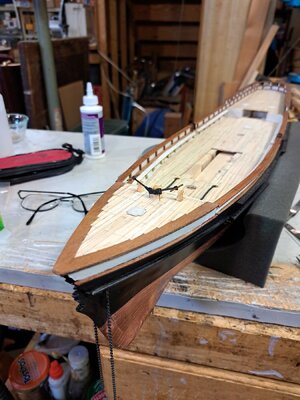
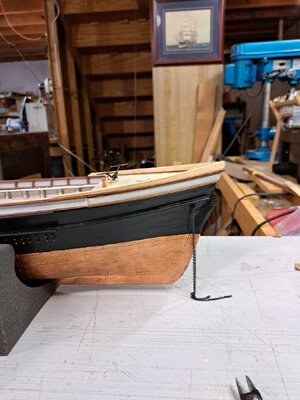
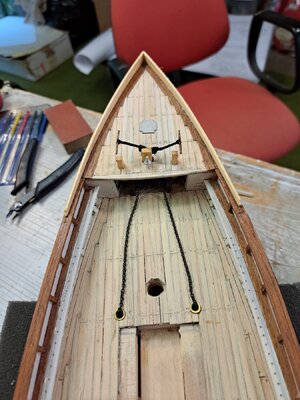
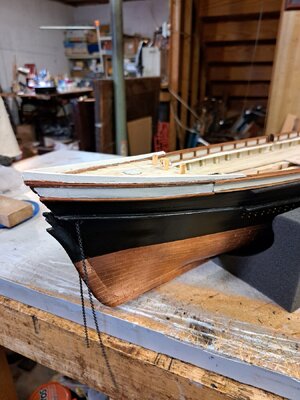
Progress this week, not including all the fits and starts, fussing, fuming and cursing at things that broke or didn't fit and required hours of fussy retro work (opening up the holes in the hull for the anchor chain) breaking the cast metal windlass heavers three times before deciding to scrap it altogether and scratch build a new one. So, if it appears in the pics and then disappears, you'll know at what point I had decided I'd repaired it for the last time. Now I'm preparing to use steel "T" pins to stand in for the anchor heaver handles. A word to the wise, if you are building a ship that requires anchor heavers, they should be the LAST item you put onto the forecastle deck!
The toilet bowl cleaner is used to soak parts to be blackened by blackening solution. It is an organic acid and cleans and etches the metal to be blackened if left to soak for a few hours, a trick I learned at the USNA museum workshop. The anchor chain supplied in the kit was a bright shiny steel. A brass chain was also supplied but the links were too large and out of scale for the ship. Pictured are the shiny steel "T" pins I am going to use for the anchor heavers soaking in the toilet bowl cleaner. I was also told to dilute the blackening solution with water to slow down the blackening process so that the black doesn't rub or flake off.
The American clippers had brass ventilator tubes between the fames exiting on deck between the bulwark stanchions, in this case venting just below the pin rail.
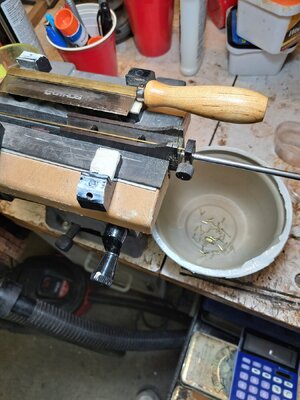
I used 1/32" dia. brass tubing, cut to size and glued them in place against the bulwark wall and edge of the stanchion. there are 62 of them. An ET type Tubing cutter from Micro Mark helps to move this otherwise odious process along efficiently and easily. A little candle wax occasionally applied to the razor saw teeth prevents the teeth from binding and jamming in the saw kerf.
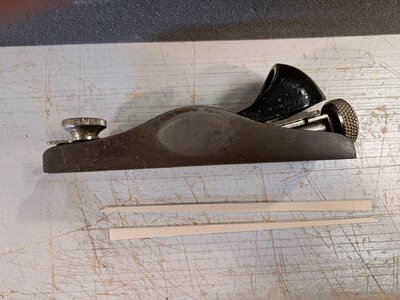
I used 1/16" thick bass wood to make the spray rails. I used the old Stanley block plane to trim them, and the Model Shipways heat bender to shape them. This process went very quickly and easily. Just keeping the wood wetted is sufficient. No prolonged soaking necessary. If faced with the need to apply them to your model, paint them first before gluing them in place. I went the masking and painting in place route. In such tight and tiny spaces masking is difficult at best and next to useless, requiring a lot of clean up and touch up. I used water-based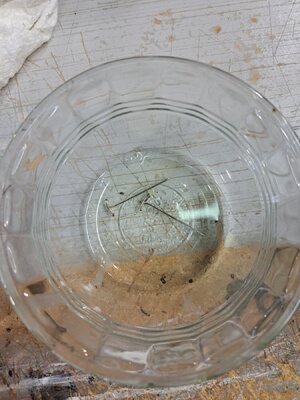
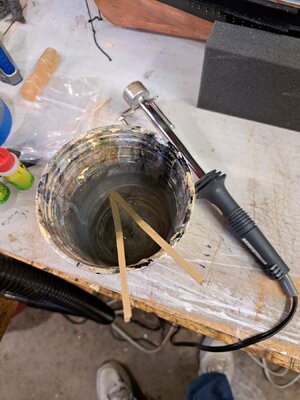
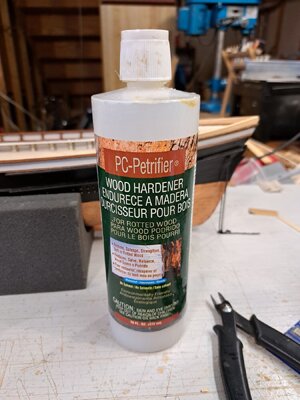
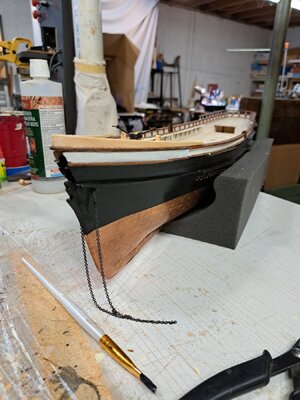
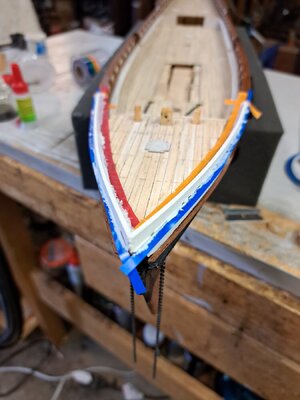
 wood hardener to prepare the basswood for sanding and painting.
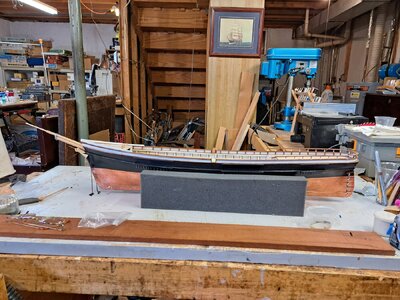
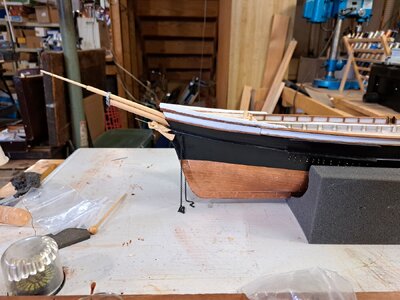
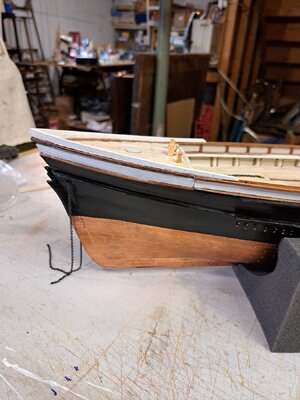
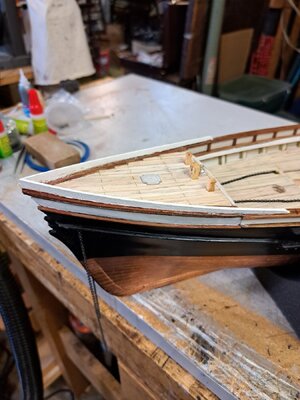
I dry fitted the figurehead, bowsprit and jibboom in place just to get a sense of what I'm working toward and keep motivated. (A little like peeking at the last chapter of a looooong novel!)
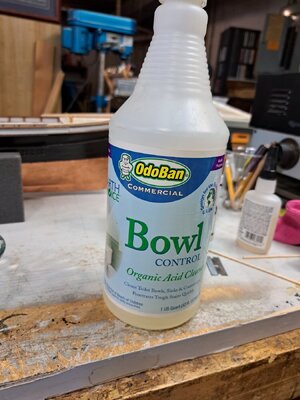
The toilet bowl cleaner is used to soak parts to be blackened by blackening solution. It is an organic acid and cleans and etches the metal to be blackened if left to soak for a few hours, a trick I learned at the USNA museum workshop. The anchor chain supplied in the kit was a bright shiny steel. A brass chain was also supplied but the links were too large and out of scale for the ship. Pictured are the shiny steel "T" pins I am going to use for the anchor heavers soaking in the toilet bowl cleaner. I was also told to dilute the blackening solution with water to slow down the blackening process so that the black doesn't rub or flake off.
The American clippers had brass ventilator tubes between the fames exiting on deck between the bulwark stanchions, in this case venting just below the pin rail.
I used 1/32" dia. brass tubing, cut to size and glued them in place against the bulwark wall and edge of the stanchion. there are 62 of them.
I used 1/16" thick bass wood to make the spray rails. I used the old Stanley block plane to trim them, and the Model Shipways heat bender to shape them. This process went very quickly and easily. Just keeping the wood wetted is sufficient. No prolonged soaking necessary. If faced with the need to apply them to your model, paint them first before gluing them in place. I went the masking and painting in place route. In such tight and tiny spaces masking is difficult at best and next to useless, requiring a lot of clean up and touch up. I used water-based


 wood hardener to prepare the basswood for sanding and painting.
I dry fitted the figurehead, bowsprit and jibboom in place just to get a sense of what I'm working toward and keep motivated. (A little like peeking at the last chapter of a looooong novel!)


Last edited:
- Joined
- Jun 17, 2021
- Messages
- 1,698
- Points
- 488

Somehow, as if by magic, My pictures end up out of sequence, re-arranged during the editing process.
The wonders of modern digital science,... or gremlins. I'm going with gremlins.
The wonders of modern digital science,... or gremlins. I'm going with gremlins.
Very nice Peter! Lots of progress. Well fought!
- Joined
- Jun 17, 2021
- Messages
- 1,698
- Points
- 488

Thanks, Paul. I barely finish posting when your, always much appreciated, comments appear 

- Joined
- Jun 17, 2021
- Messages
- 1,698
- Points
- 488

Thanks Jim. That brightens my day! 
Often, I also put together all the parts to enjoy what will be the outcome of a long journey. Not only will it give hope that the finish is coming, but it will also reveal some discrepancies. What I find, is that small imperfections are almost invisible against the background of the overall picture of the assembly....Thanks Jim. That brightens my day!
- Joined
- Jun 17, 2021
- Messages
- 1,698
- Points
- 488

You've cracked my M.O.Often, I also put together all the parts to enjoy what will be the outcome of a long journey. Not only will it give hope that the finish is coming, but it will also reveal some discrepancies. What I find, is that small imperfections are almost invisible against the background of the overall picture of the assembly....
- Joined
- Jun 17, 2021
- Messages
- 1,698
- Points
- 488

Thanks for the thumb's up, Jerry. The cannon models are great, both virtual and real! I know they will really enhance Chuck Henson's beautiful model. BTW, how the heck are ya? 
- Joined
- Jun 17, 2021
- Messages
- 1,698
- Points
- 488

Thanks, Grant, et al.

